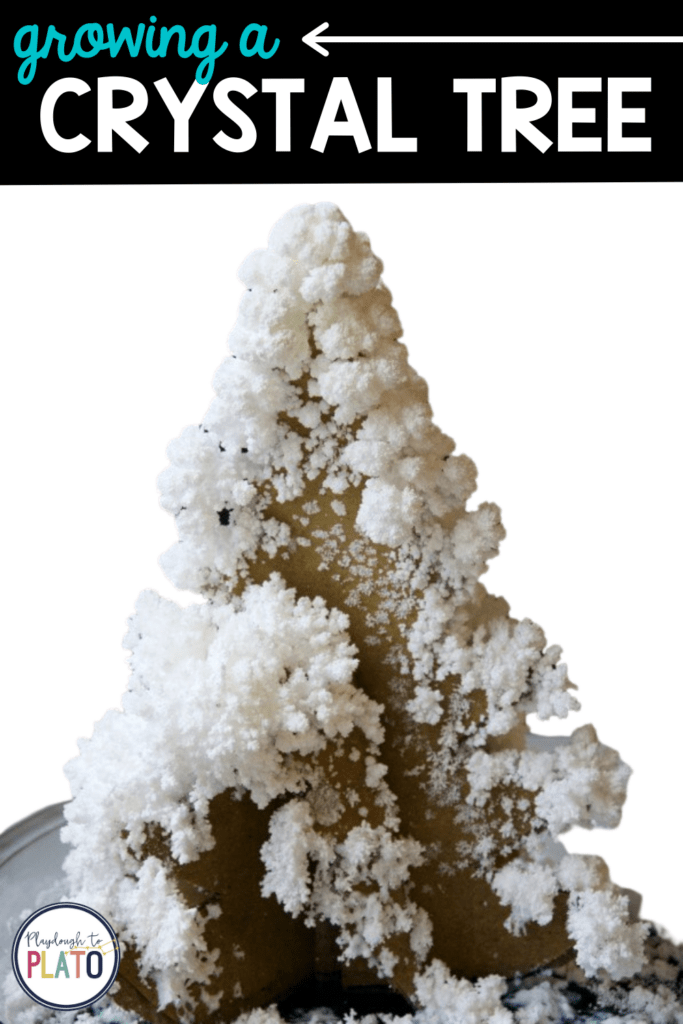
There’s something magical about growing crystals – whether you’re growing crystal names or growing crystal trees. No matter how many times we’ve waited for the stunning structures to appear, the surprise at what has grown never disappoints. This crystal tree demonstration is no exception.
The surprisingly simple experiment is the perfect addition to our top-selling Super Cool Science Kit!
This post contains Amazon affiliate links.
Getting Ready to Grow Crystals
The hardest part of growing crystals, besides waiting, is finding the key ingredient, Mrs. Stewart’s Bluing. (Other brands won’t work for this demo.)
Bluing is a laundry additive used to brighten whites and sometimes can be found in the laundry section of the grocery store. I avoided the frustration of hunting it down and simply ordered it from Amazon here.
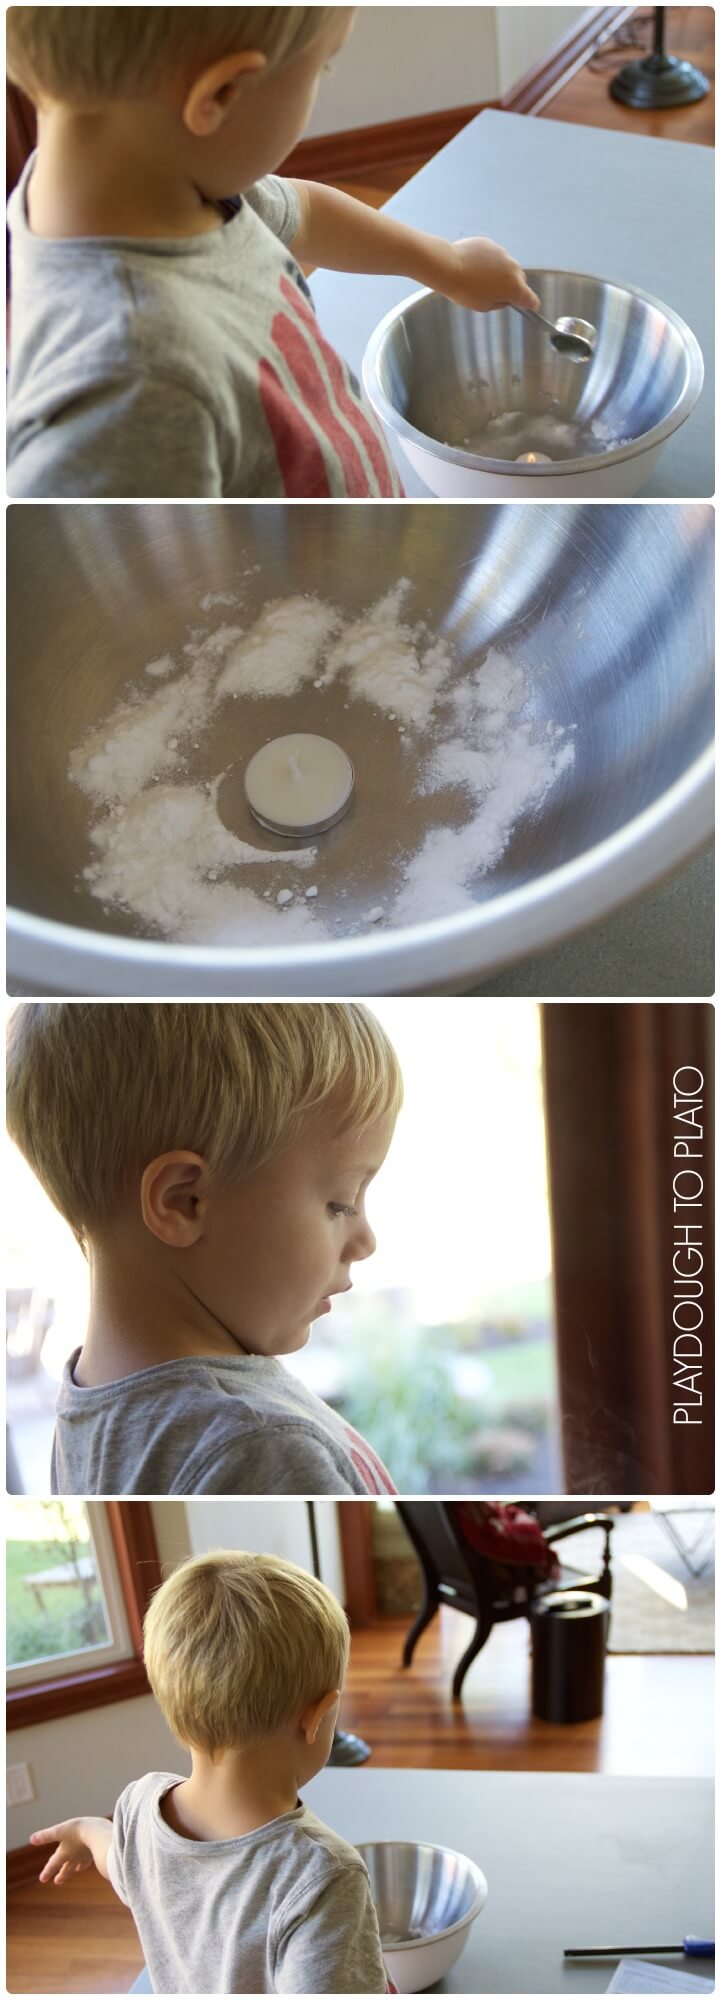
Once my bluing arrived, I gathered my materials:
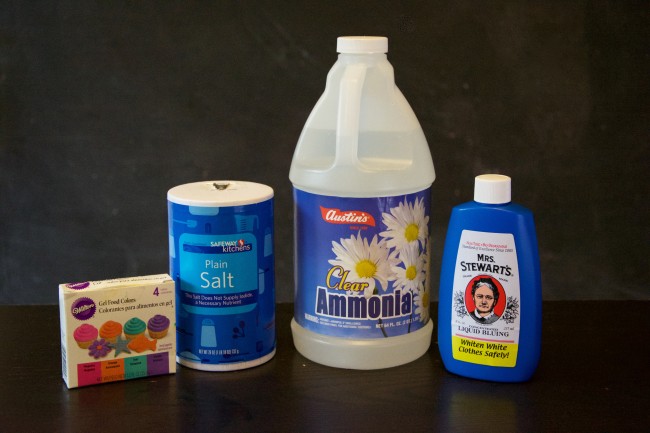
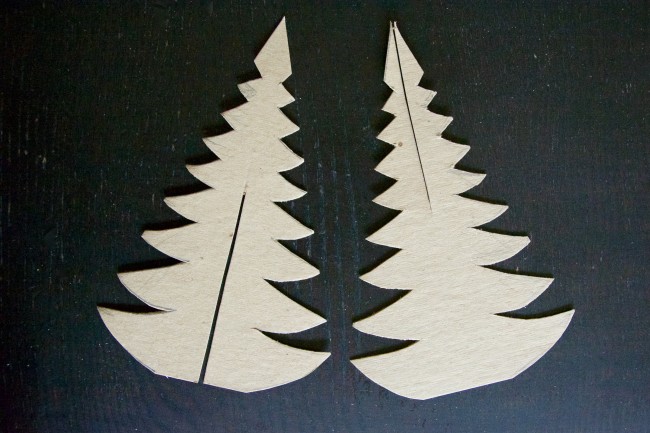
- Cardboard (the back of a paper pad works best)
- Dish (large enough to hold your tree, with room for the crystal to grow)
- Water
- Table salt
- Mrs. Stewart’s Bluing
- Ammonia (optional, but speeds up evaporation)
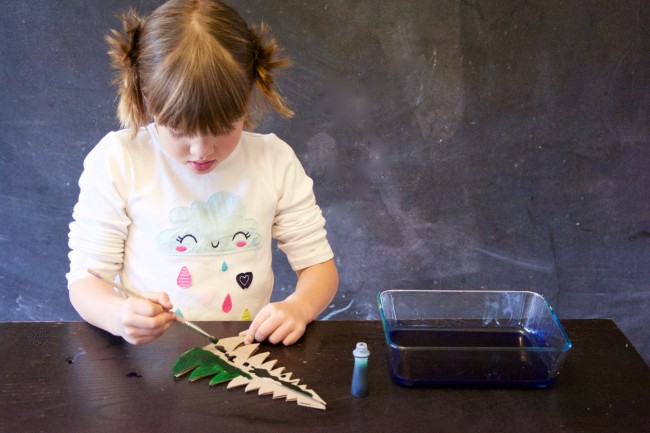
- Green food coloring (optional)
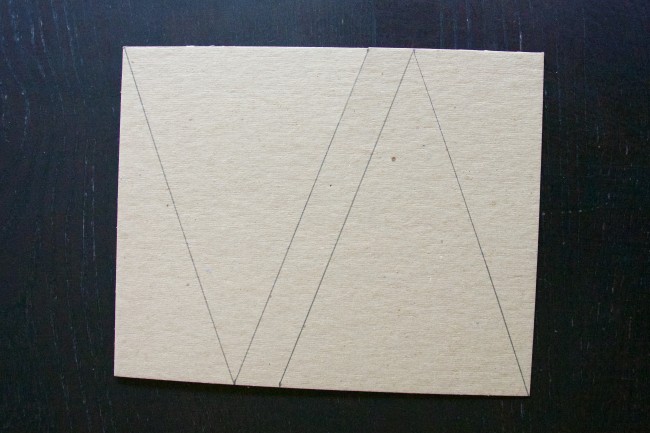
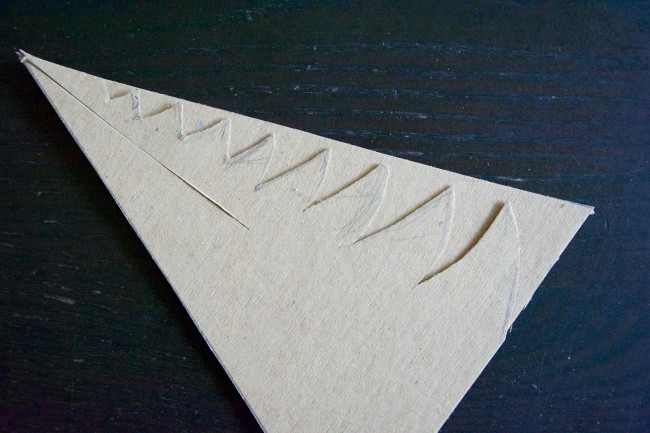
(The first time we tried this, I just eyeballed how big I wanted the tree to be. It ended up being 6 inches wide at the base and 8 inches tall. I later learned that a tree this height is way too tall for growing crystals.)
After I cut out the triangles, I cut out the branches and used the first tree to trace the branches on the second tree.

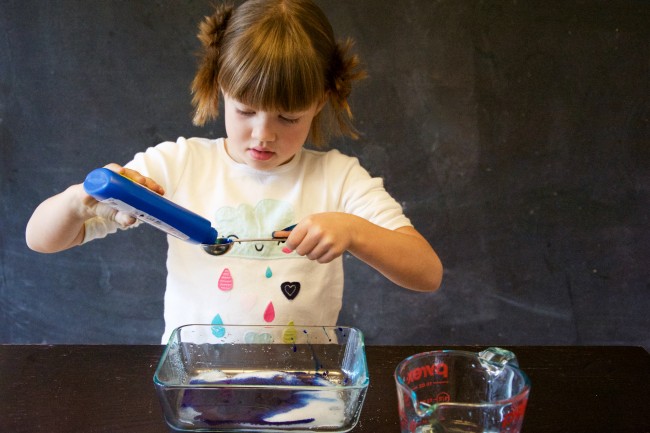
Making the Magic Crystal Solution
- 4 tablespoons warm water
- 4 tablespoons table salt
- 4 tablespoons Mrs. Stewart’s Bluing
- 2 tablespoons ammonia
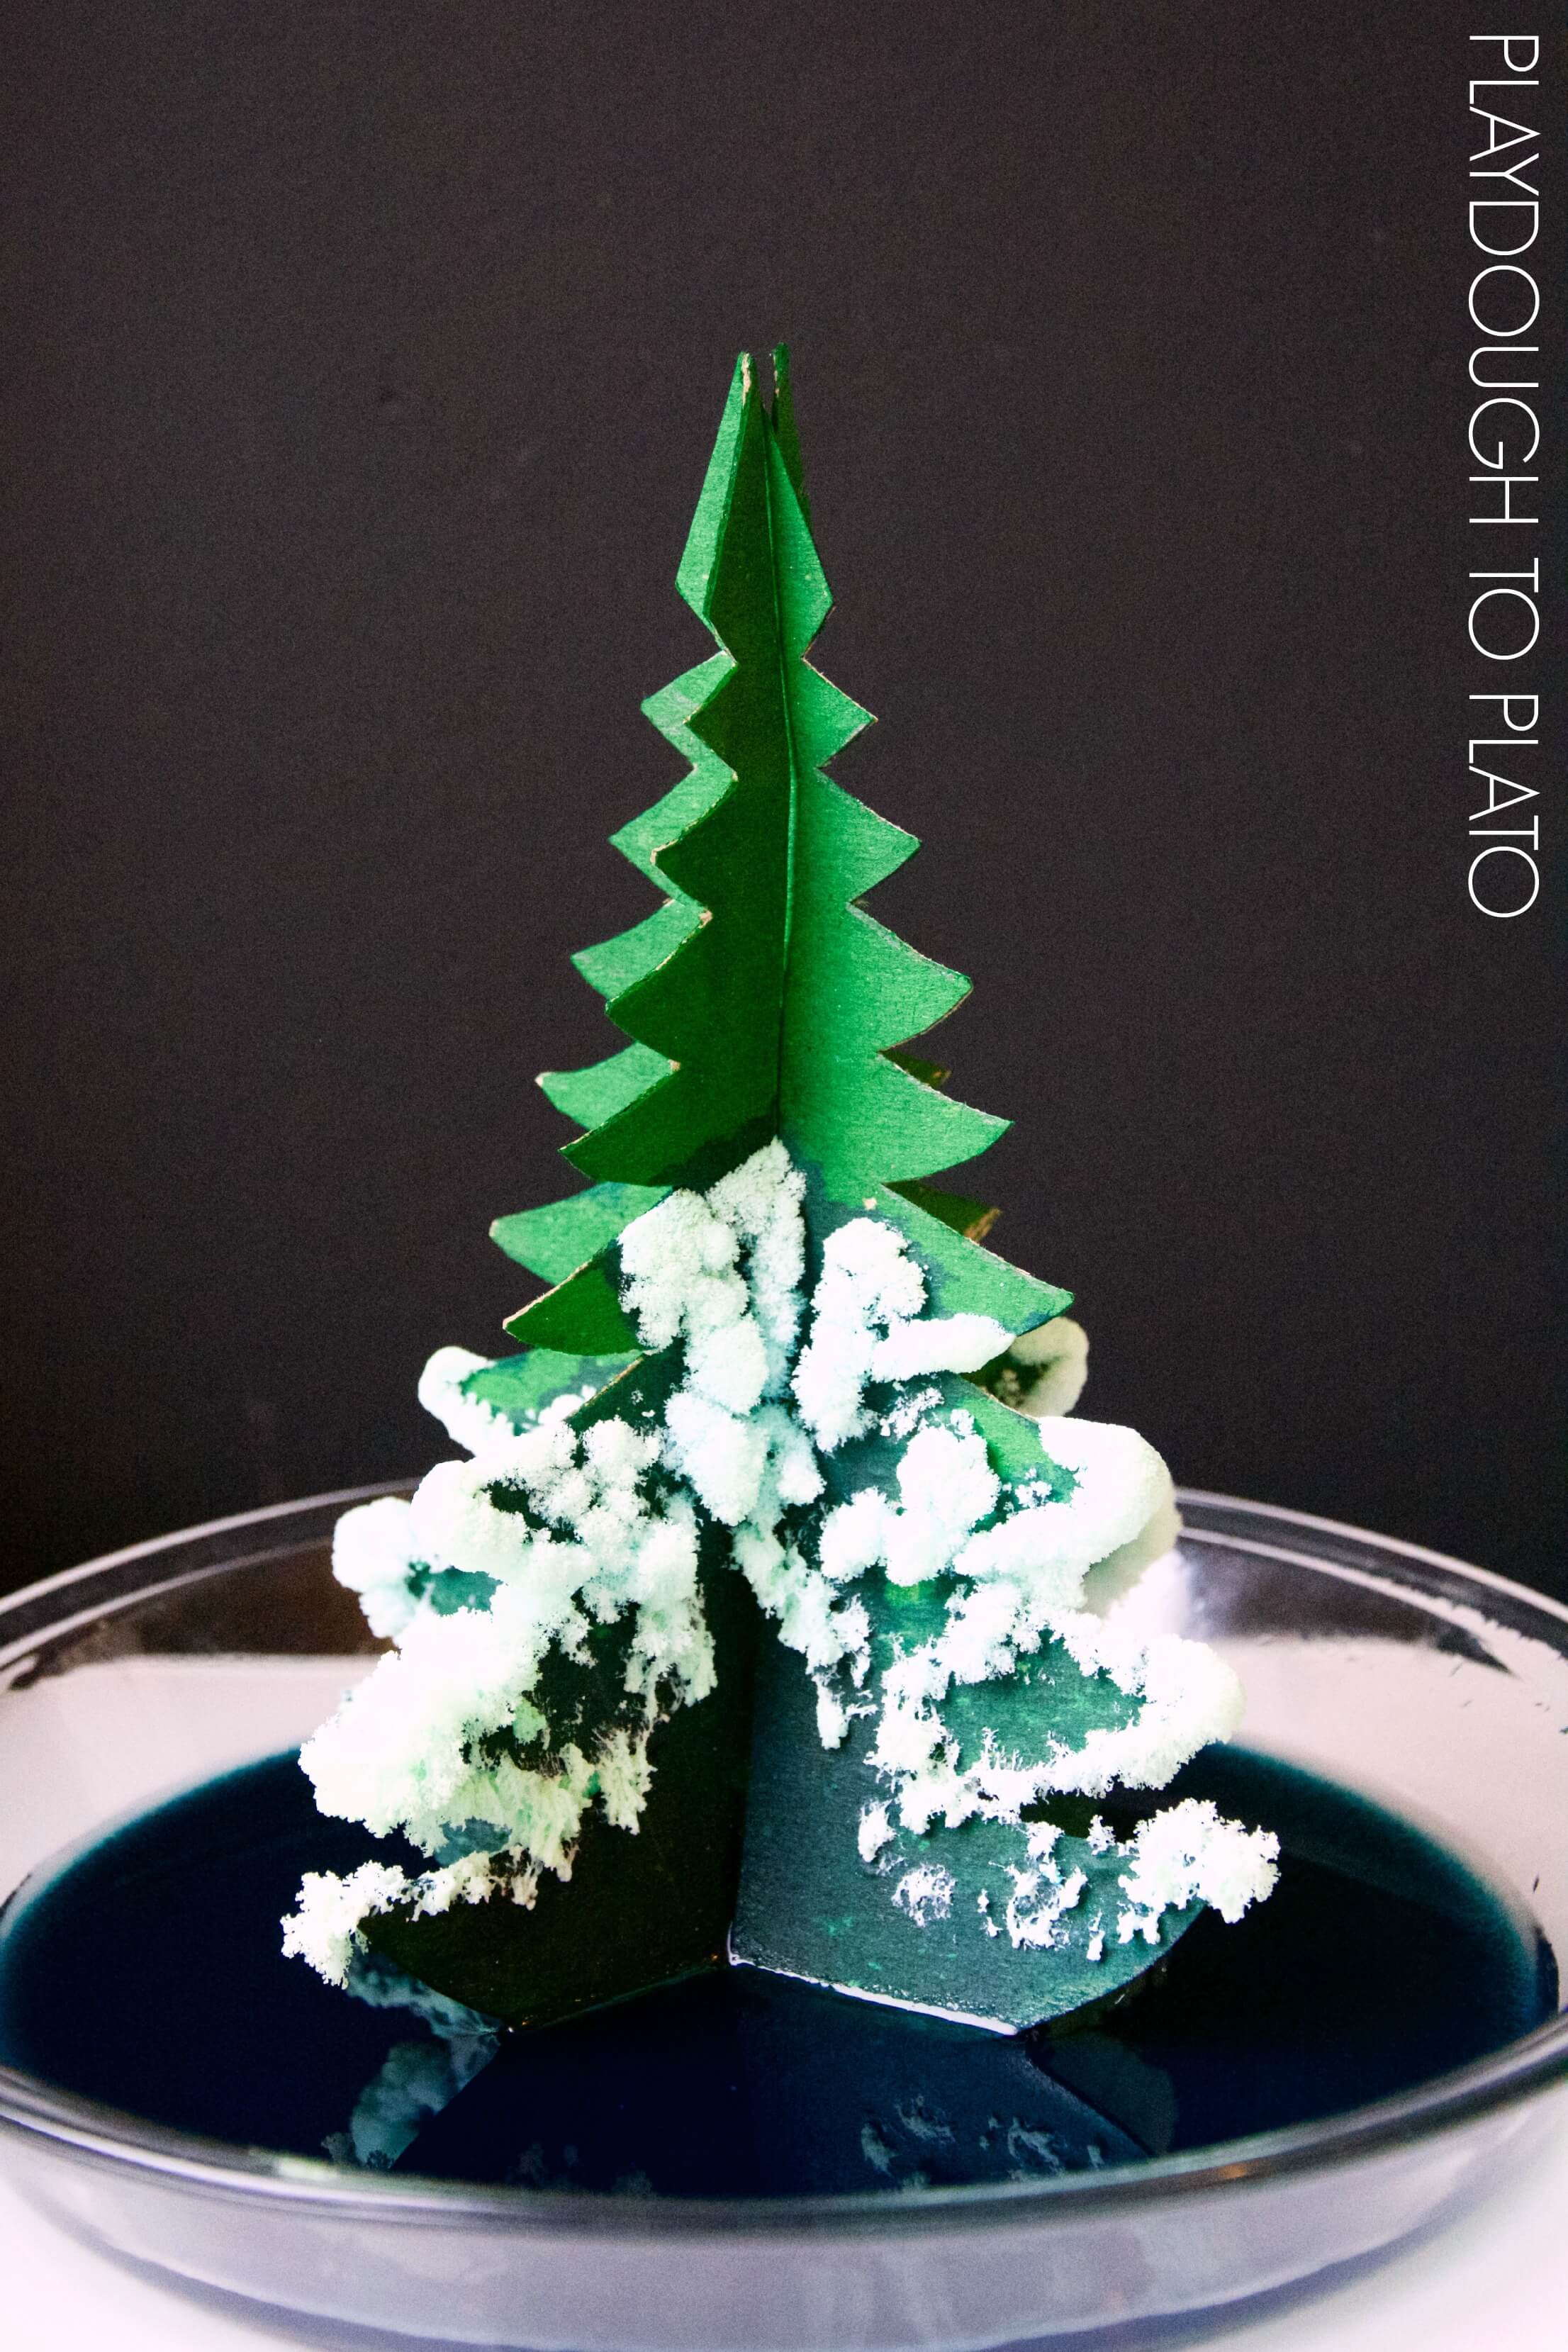
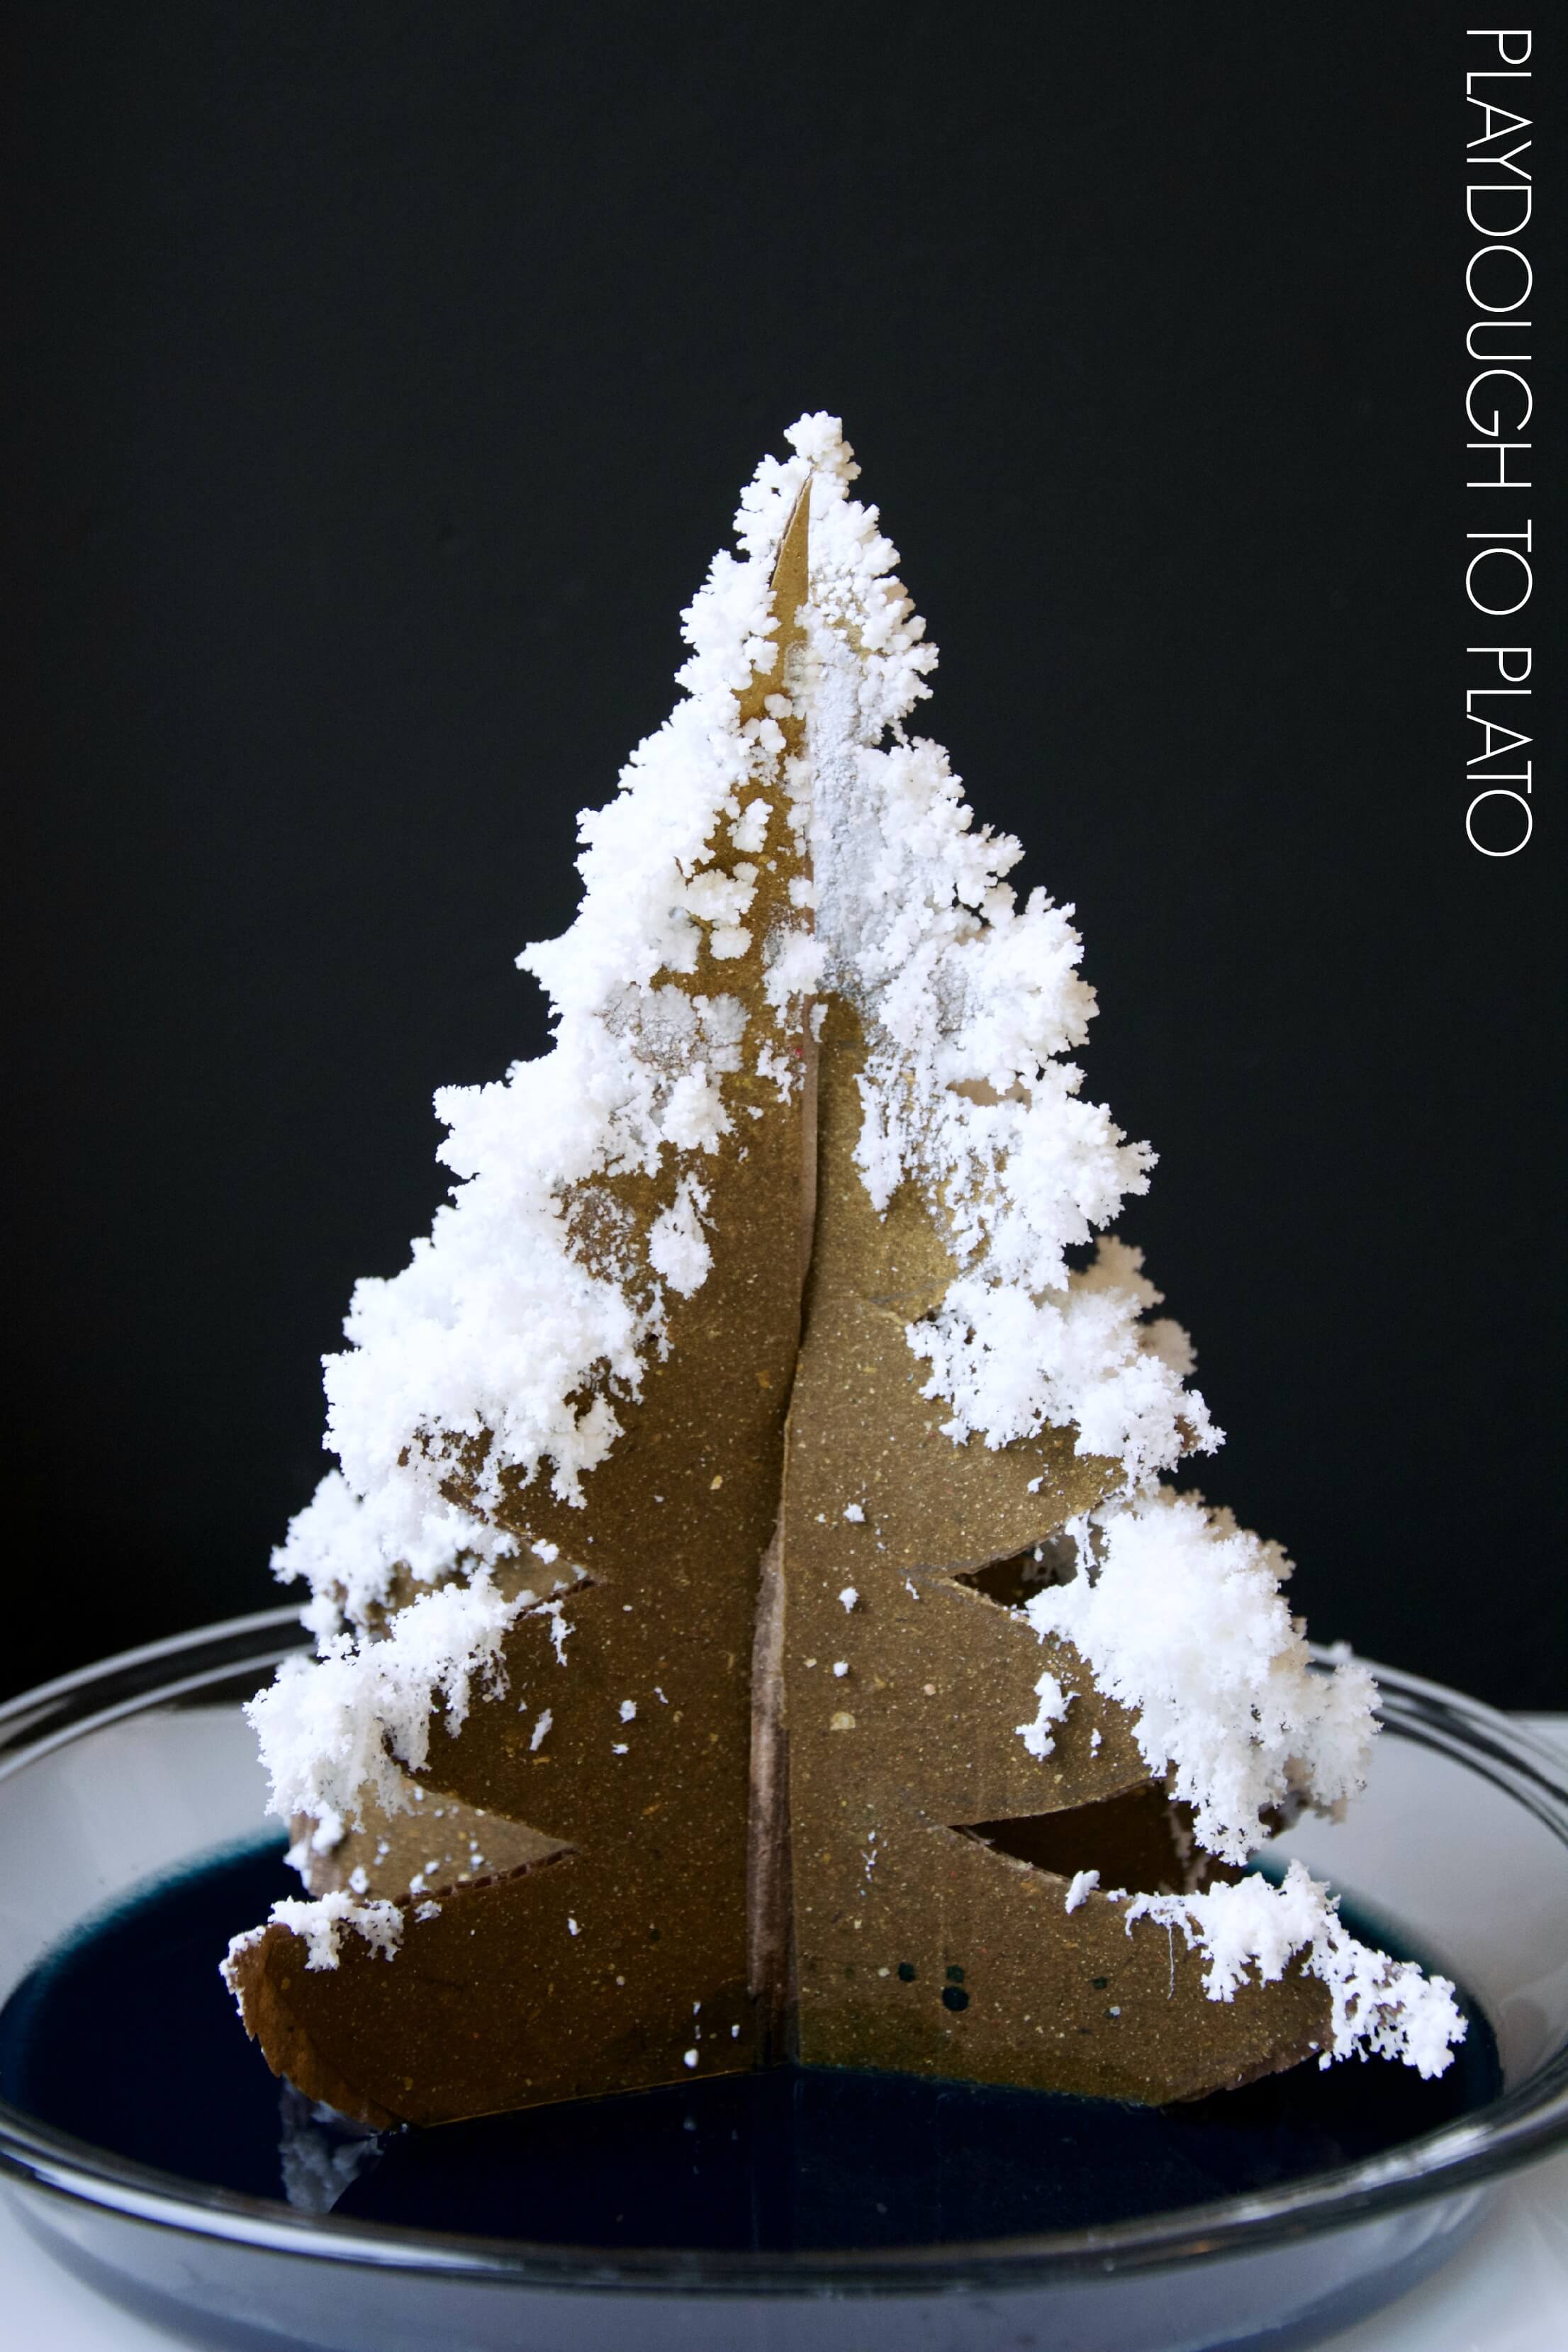
Several days later, the trees were covered in delicate needle-like crystals. My daughter thought they looked a lot like cauliflower.
My kiddos were so curious what the growing crystals felt like and since the white tree was getting pretty droopy, I let them go for it.


The Science Behind It
The solution we mixed up created a suspension, a mixture that has solid particles that are large enough for sedimentation (settling out). Our solid particles settled out on the cardboard tree due to a couple of processes.
First, the liquid suspension is drawn up the cardboard tree through a process called capillary action. Capillary action is the ability of a liquid to defy gravity and flow upwards.
In narrow areas, the combination of surface tension of water and the adhesive forces between the container and the liquid help to lift the liquid. This effect can be seen when a plant like celery draws up colored water through its capillaries, when paint is drawn up between the bristles of a paint brush and when porous materials like cardboard draw up water.
The next process is evaporation, where liquid molecules escape from the solution as gas molecules.
Ammonia evaporates much quicker than water and we added it to the solution to speed up the evaporation process. Once the solution travelled up the cardboard and evaporated, the next process could occur.
The final process, crystallization, occurred as the water and ammonia molecules leave the solution through evaporation. The bluing and salt that remain can no longer be supported in the remaining solution and begin to crystalize.
Mrs. Stewart’s Bluing is a colloidal suspension of extremely minute particles of blue powder (Ferric Hexacyanoferrate). These minute particles act as nuclei, or seeds, for crystallization to take place. This is similar to the process that occurs in cloud formation.
The Super Cool Science Kit
Want a simple, low-prep science experiment that wows students? The Walking Water Rainbow is a colorful way to explore capillary action and color mixing!


Which cardboard worked better? Thanks for clarifying.
“Although the corrugated cardboard grew crystals better, it became floppy so the corrugated cardboard ultimately performed better.”
Hi Jen,
Thanks for your question. If you want your tree to last weeks then I would use the back of a pad of paper like a legal pad. The thick cardboard holds up to being wet. If you want a quick demo that will last several days use the corrugated cardboard. The solution moved up the corrugated cardboard quicker and grew bigger crystals, but it eventually became soggy and flopped over. I hope this helps!
Awesome experiment! I think our kids will enjoy creating this crystal Christmas tree! Sharing!
Do you think the crystals would grow on a pine cone?
ZALUPA
ALLLLLLLLLLLLAAAAAAAAAHUUU AKBAAAAARR!!!!!!
SUC ZUPA!!!!!!!
Its fantastic ….Is it necessary to use mrs Stewart bluing? What if use en
Hello Amal,
Great question. You can use any brand of liquid fabric bluing agent, we just recommend Mrs. Stewart’s Bluing.
Hope this helps!
Warmly,
Kimberleigh
Could you add food coloring to the “magic mixture” to make colored crystals or would it have a negative/ adverse reaction to the chemical processes taking place?
Hi Nikki,
It wouldn’t have an adverse reaction but it doesn’t distribute evenly if you put the dye in the mixture. I hope this helps!
I’ve never seen Mrs. Stewarts Bluing here in Canada. Is there an alternative? Would borax work?
Hi Selina,
Unfortunately, we’ve only had success using Mrs. Stewarts Bluing. It’s tough to find here too. However, you can order it from Amazon HERE. Let me know if I can be of any further help!
Warmly,
Ashley // Happiness Ambassador
Love your web! I signed up for your email and understood that to download/print there would be a large blue box below each project. However, upon signing up for email, I haven’t been able to see a blue box! Please advise. You have so many wonderful learning projects for kids…thank you for sharing them.
Hi Kathie,
Thanks for reaching out. In almost every blog post with a freebie, there should be a blue box that says “Download Here.” There are a couple of our old posts that actually have the link in the text. However, either way, after you click the blue “Download Here” button, and box should pop up asking for your name and email. After entering your name and email, it should take you straight to the freebie. If it does not, you may need to adjust your pop-up settings. Please check out our troubleshooting video HERE for help. You can email me at hello@www.playdoughtoplato.com if you need further assistance.
Warmly,
Ashley // Happiness Ambassador
hello, I have tried several times but it doesn’t work … I thought that the problem could be the cardboard: I use those of the corrugated boxes …. can the dimensions also affect?
Does it matter if the salt is iodized?