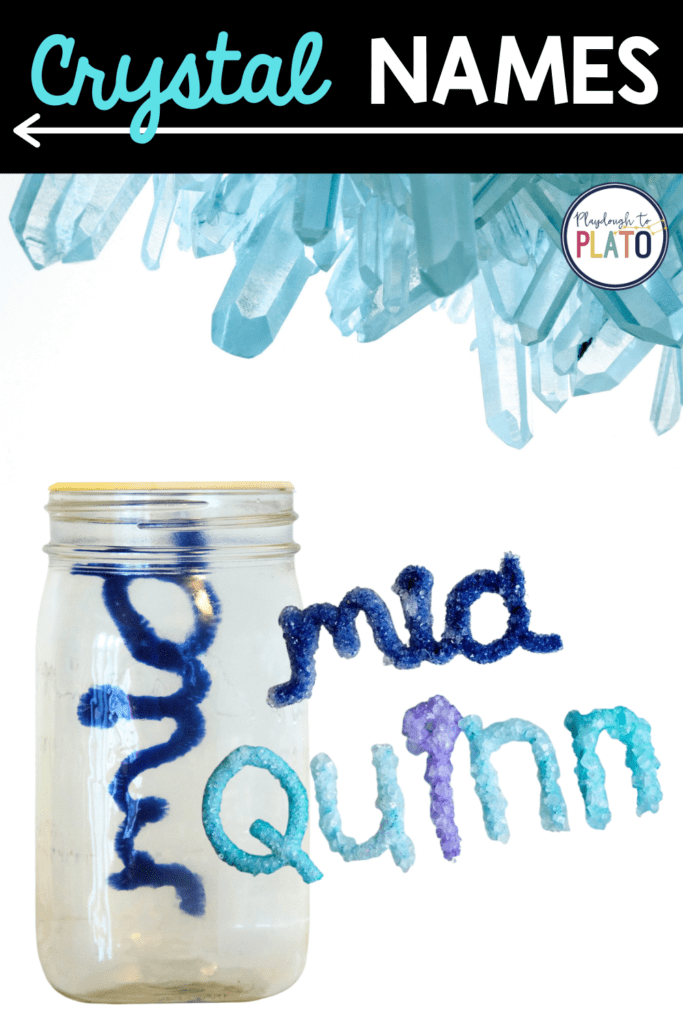
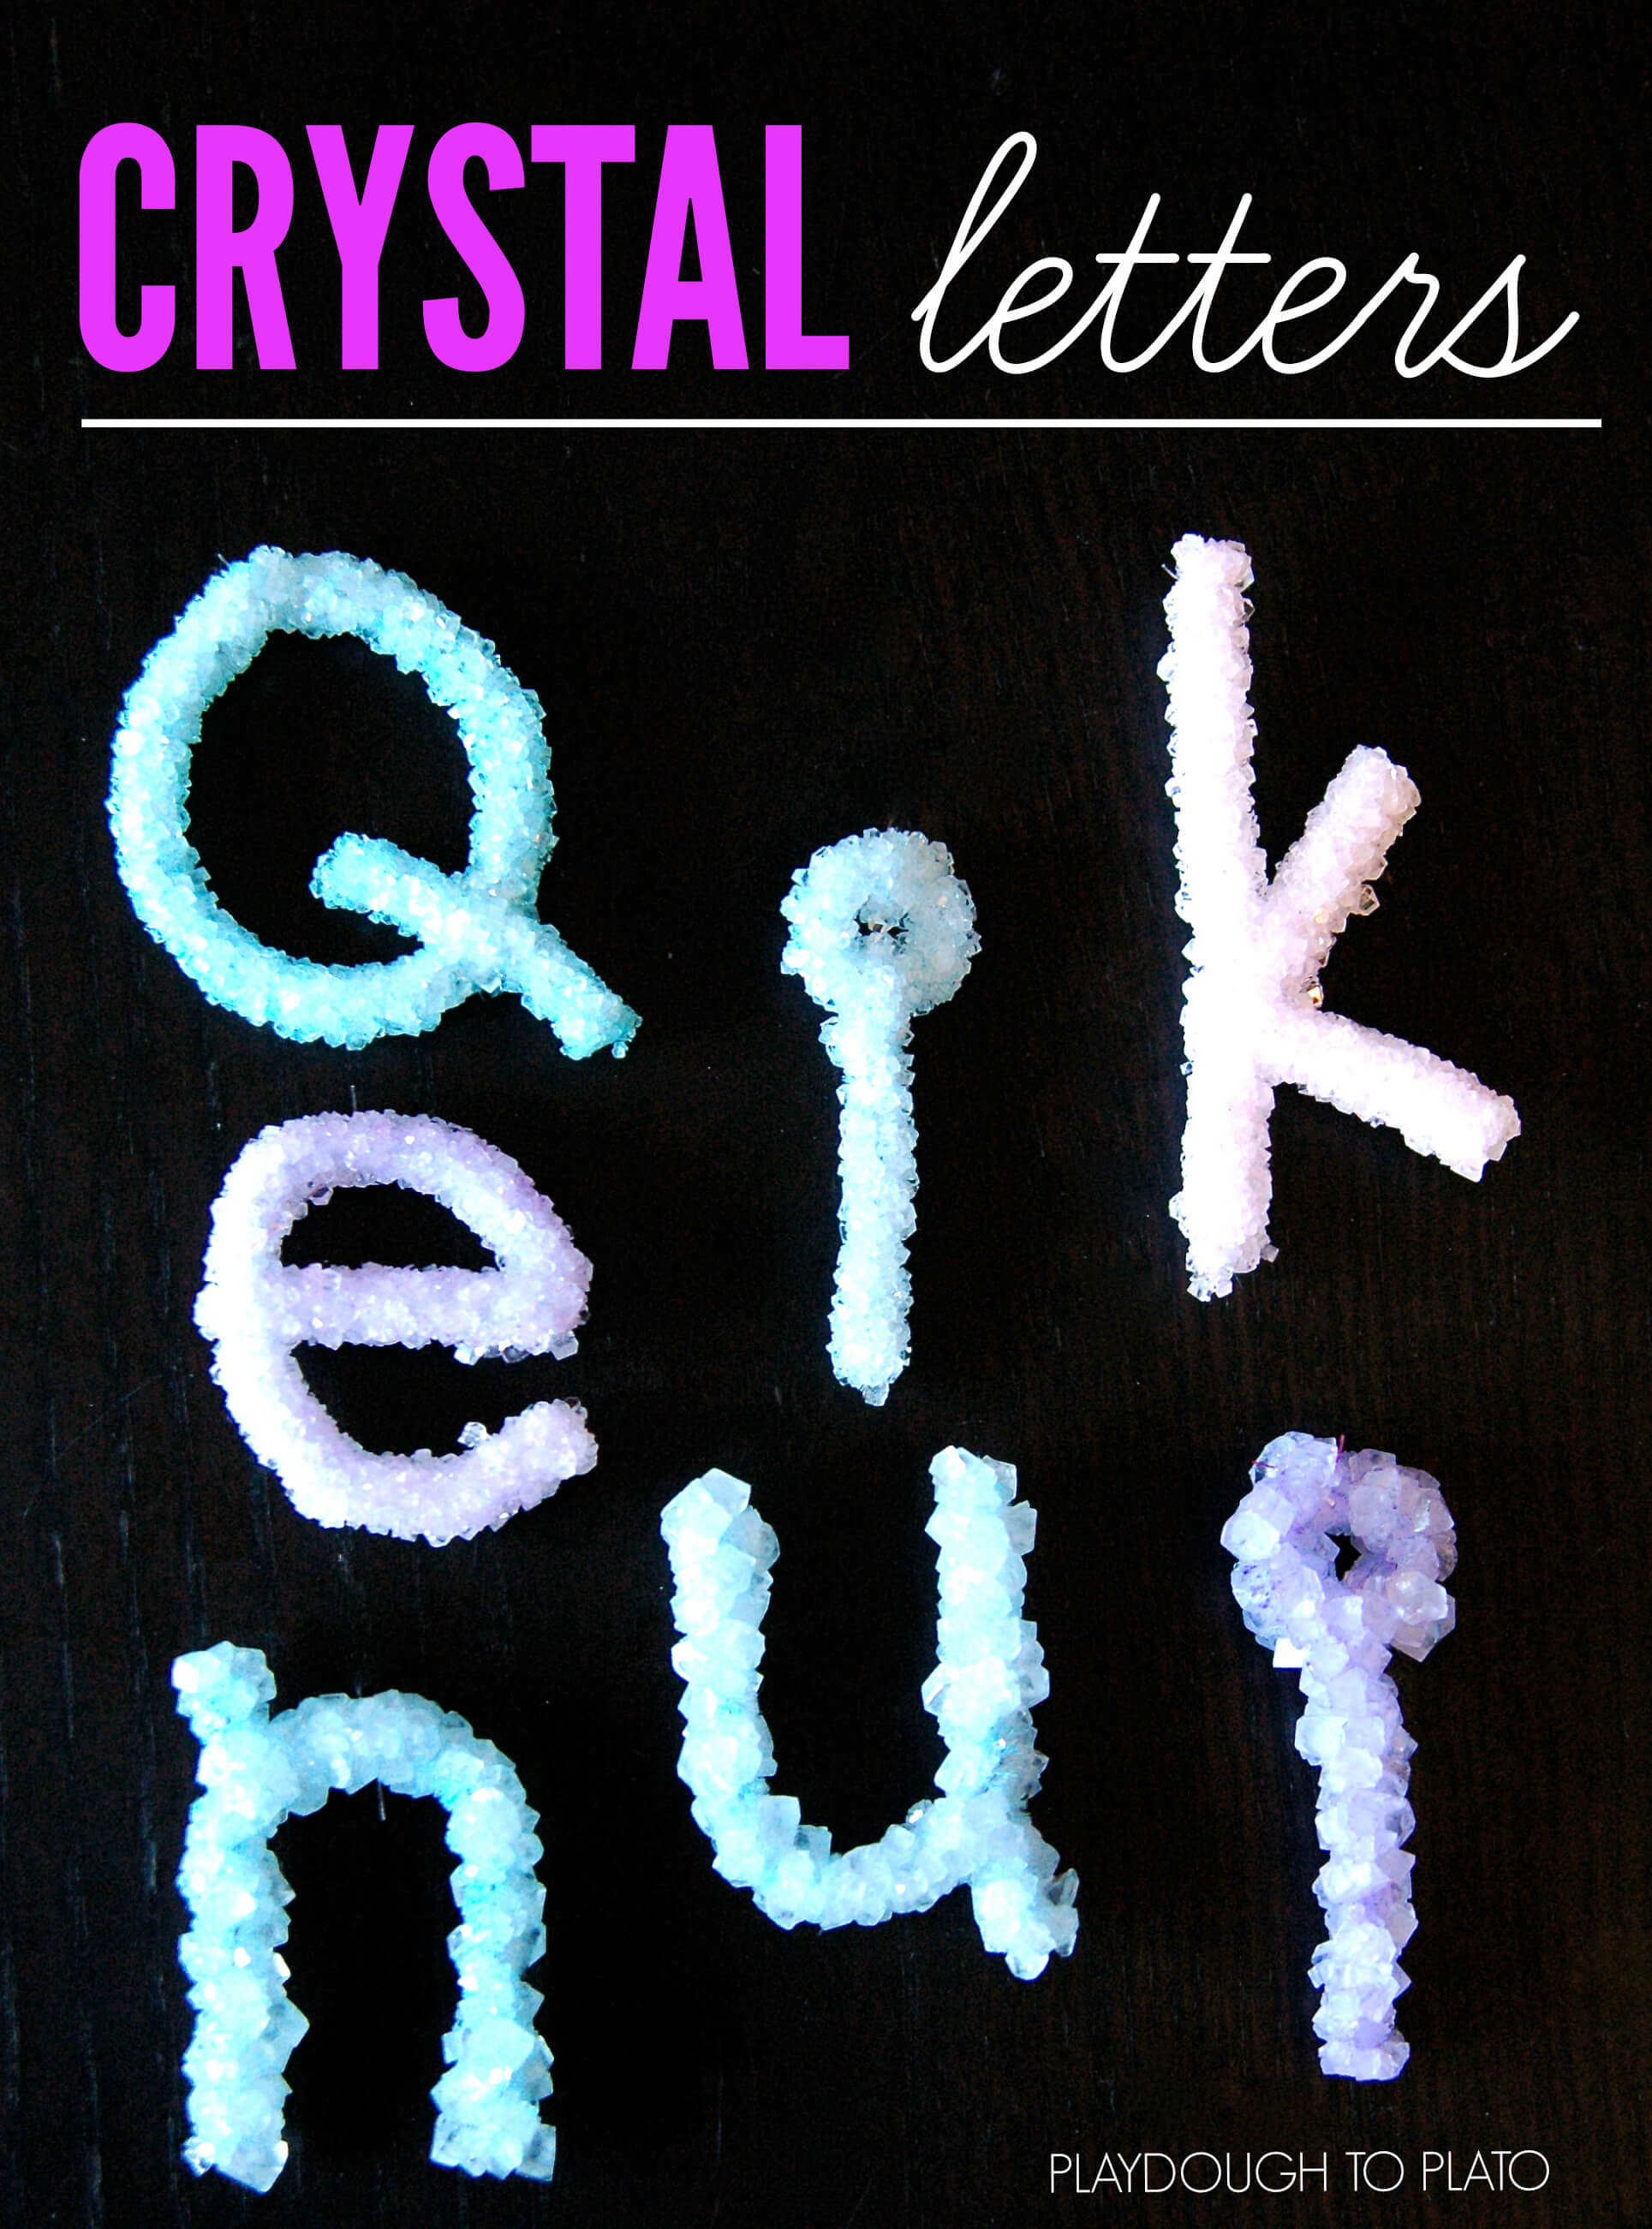
This easy-peasy, low-cost kids’ science experiment uses borax to grow crystal names. All kiddos will love seeing their name shimmer and sparkle in the sunlight!
Crystal names are one of our favorite science experiments EVER.
Follow the simple step-by-step below and then grab 30 more easy-to-follow science experiments kids will beg to repeat (plus a no prep science journal to keep track of their results!) in our shop!
Even though my 5 year-old can easily write her name, she never tires of seeing it, especially when it sparkles and glistens.
We decided to use the same technique used to make crystal snowflakes using borax, a common household laundry product, to make crystal names. The results were gorgeous and soon everyone in the family wanted their names in crystal too!
Getting Ready
To prep for this science activity, I gathered a few supplies:
- Pipe cleaners
- Fishing line (twine or yarn will work too_
- Pencils or wooden skewers
- Scissors
- Glasses or plastic container {one for each color}
- A container large enough to hold your name (if doing your name as a single piece written in cursive)
- Borax
- Food coloring (optional, if you want colored letters you can dye the borax solution or use colored pipe cleaners)
- Liquid measuring cup
- Tablespoon
- Heat safe mixing bowl
Shaping the Crystal Names
Once I gathered all my supplies, I called my daughter, A, over and explained that we were going to make the letters of her name and then grow crystals on them.
I had her take white pipe cleaners and use them to form the letters of her name.
I showed her the plastic container we were going to use to suspend the pipe cleaner letter in and explained that the letter had to fit in the container without touching any sides.
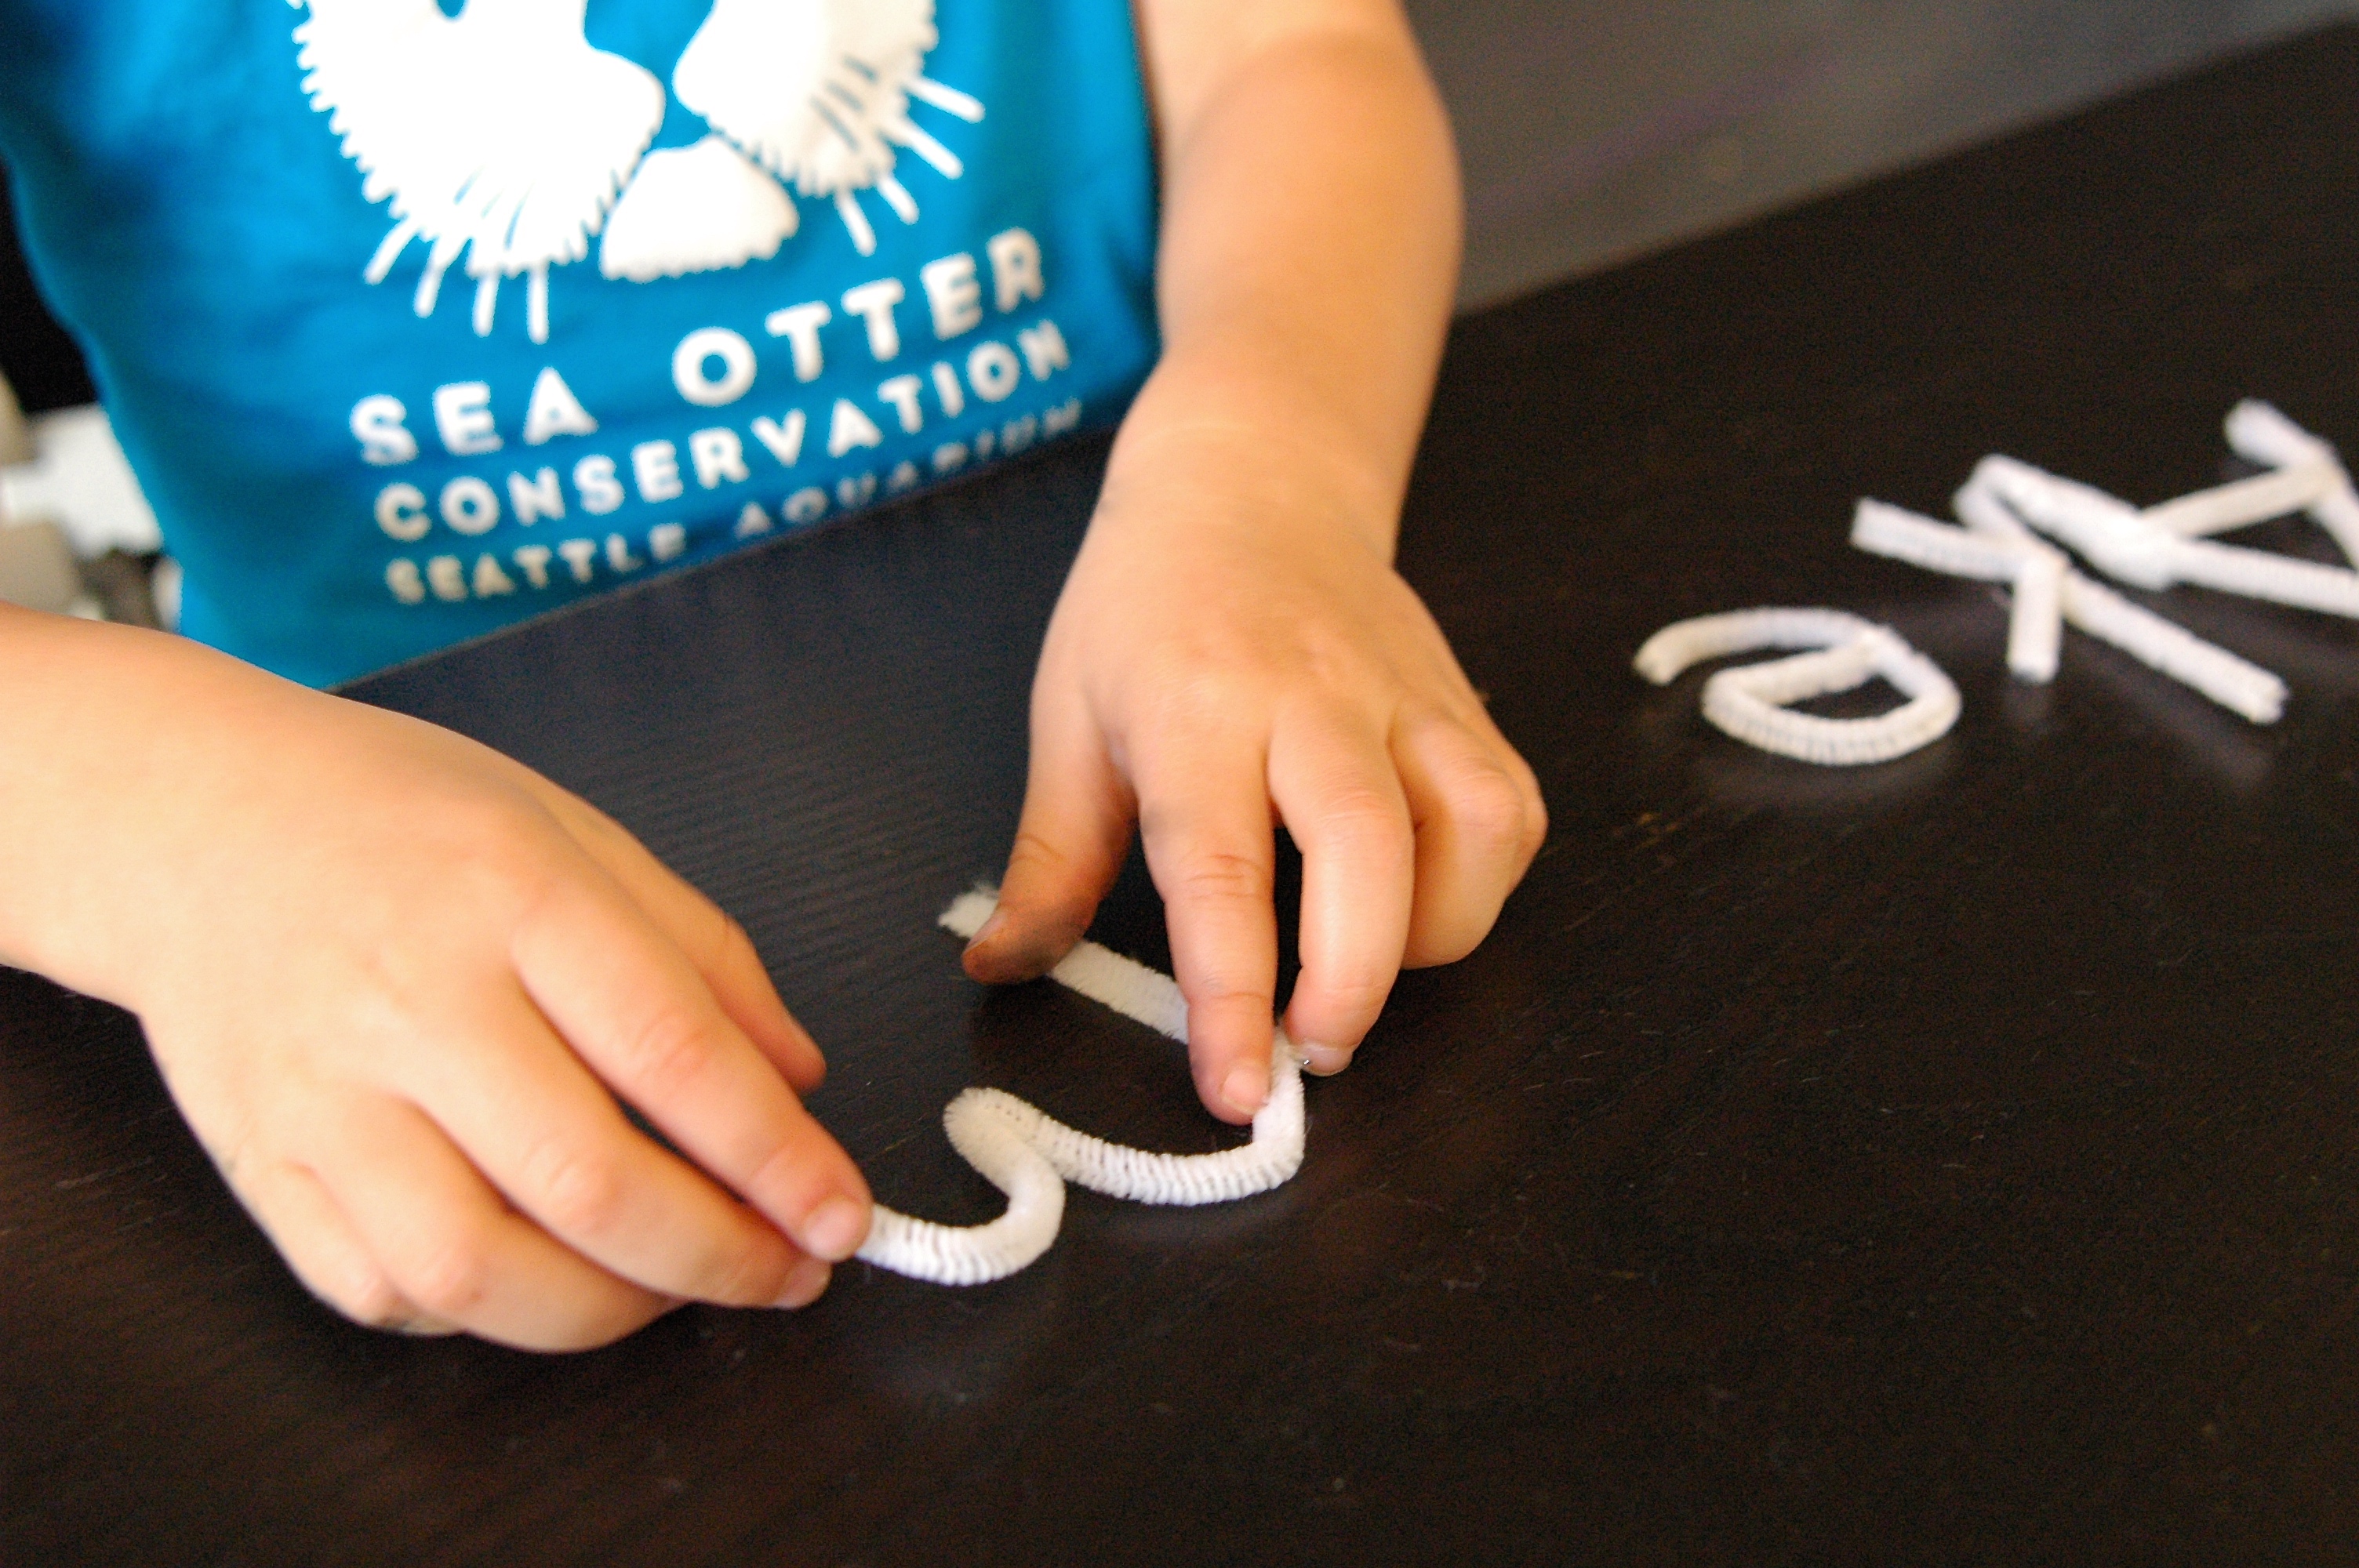
I wanted A to work on noticing what lines and curves made up each individual letter, so I intentionally had her form the letters one by one.
(Older children could connect a few pipe cleaners to form their name in cursive, making this activity even easier.)
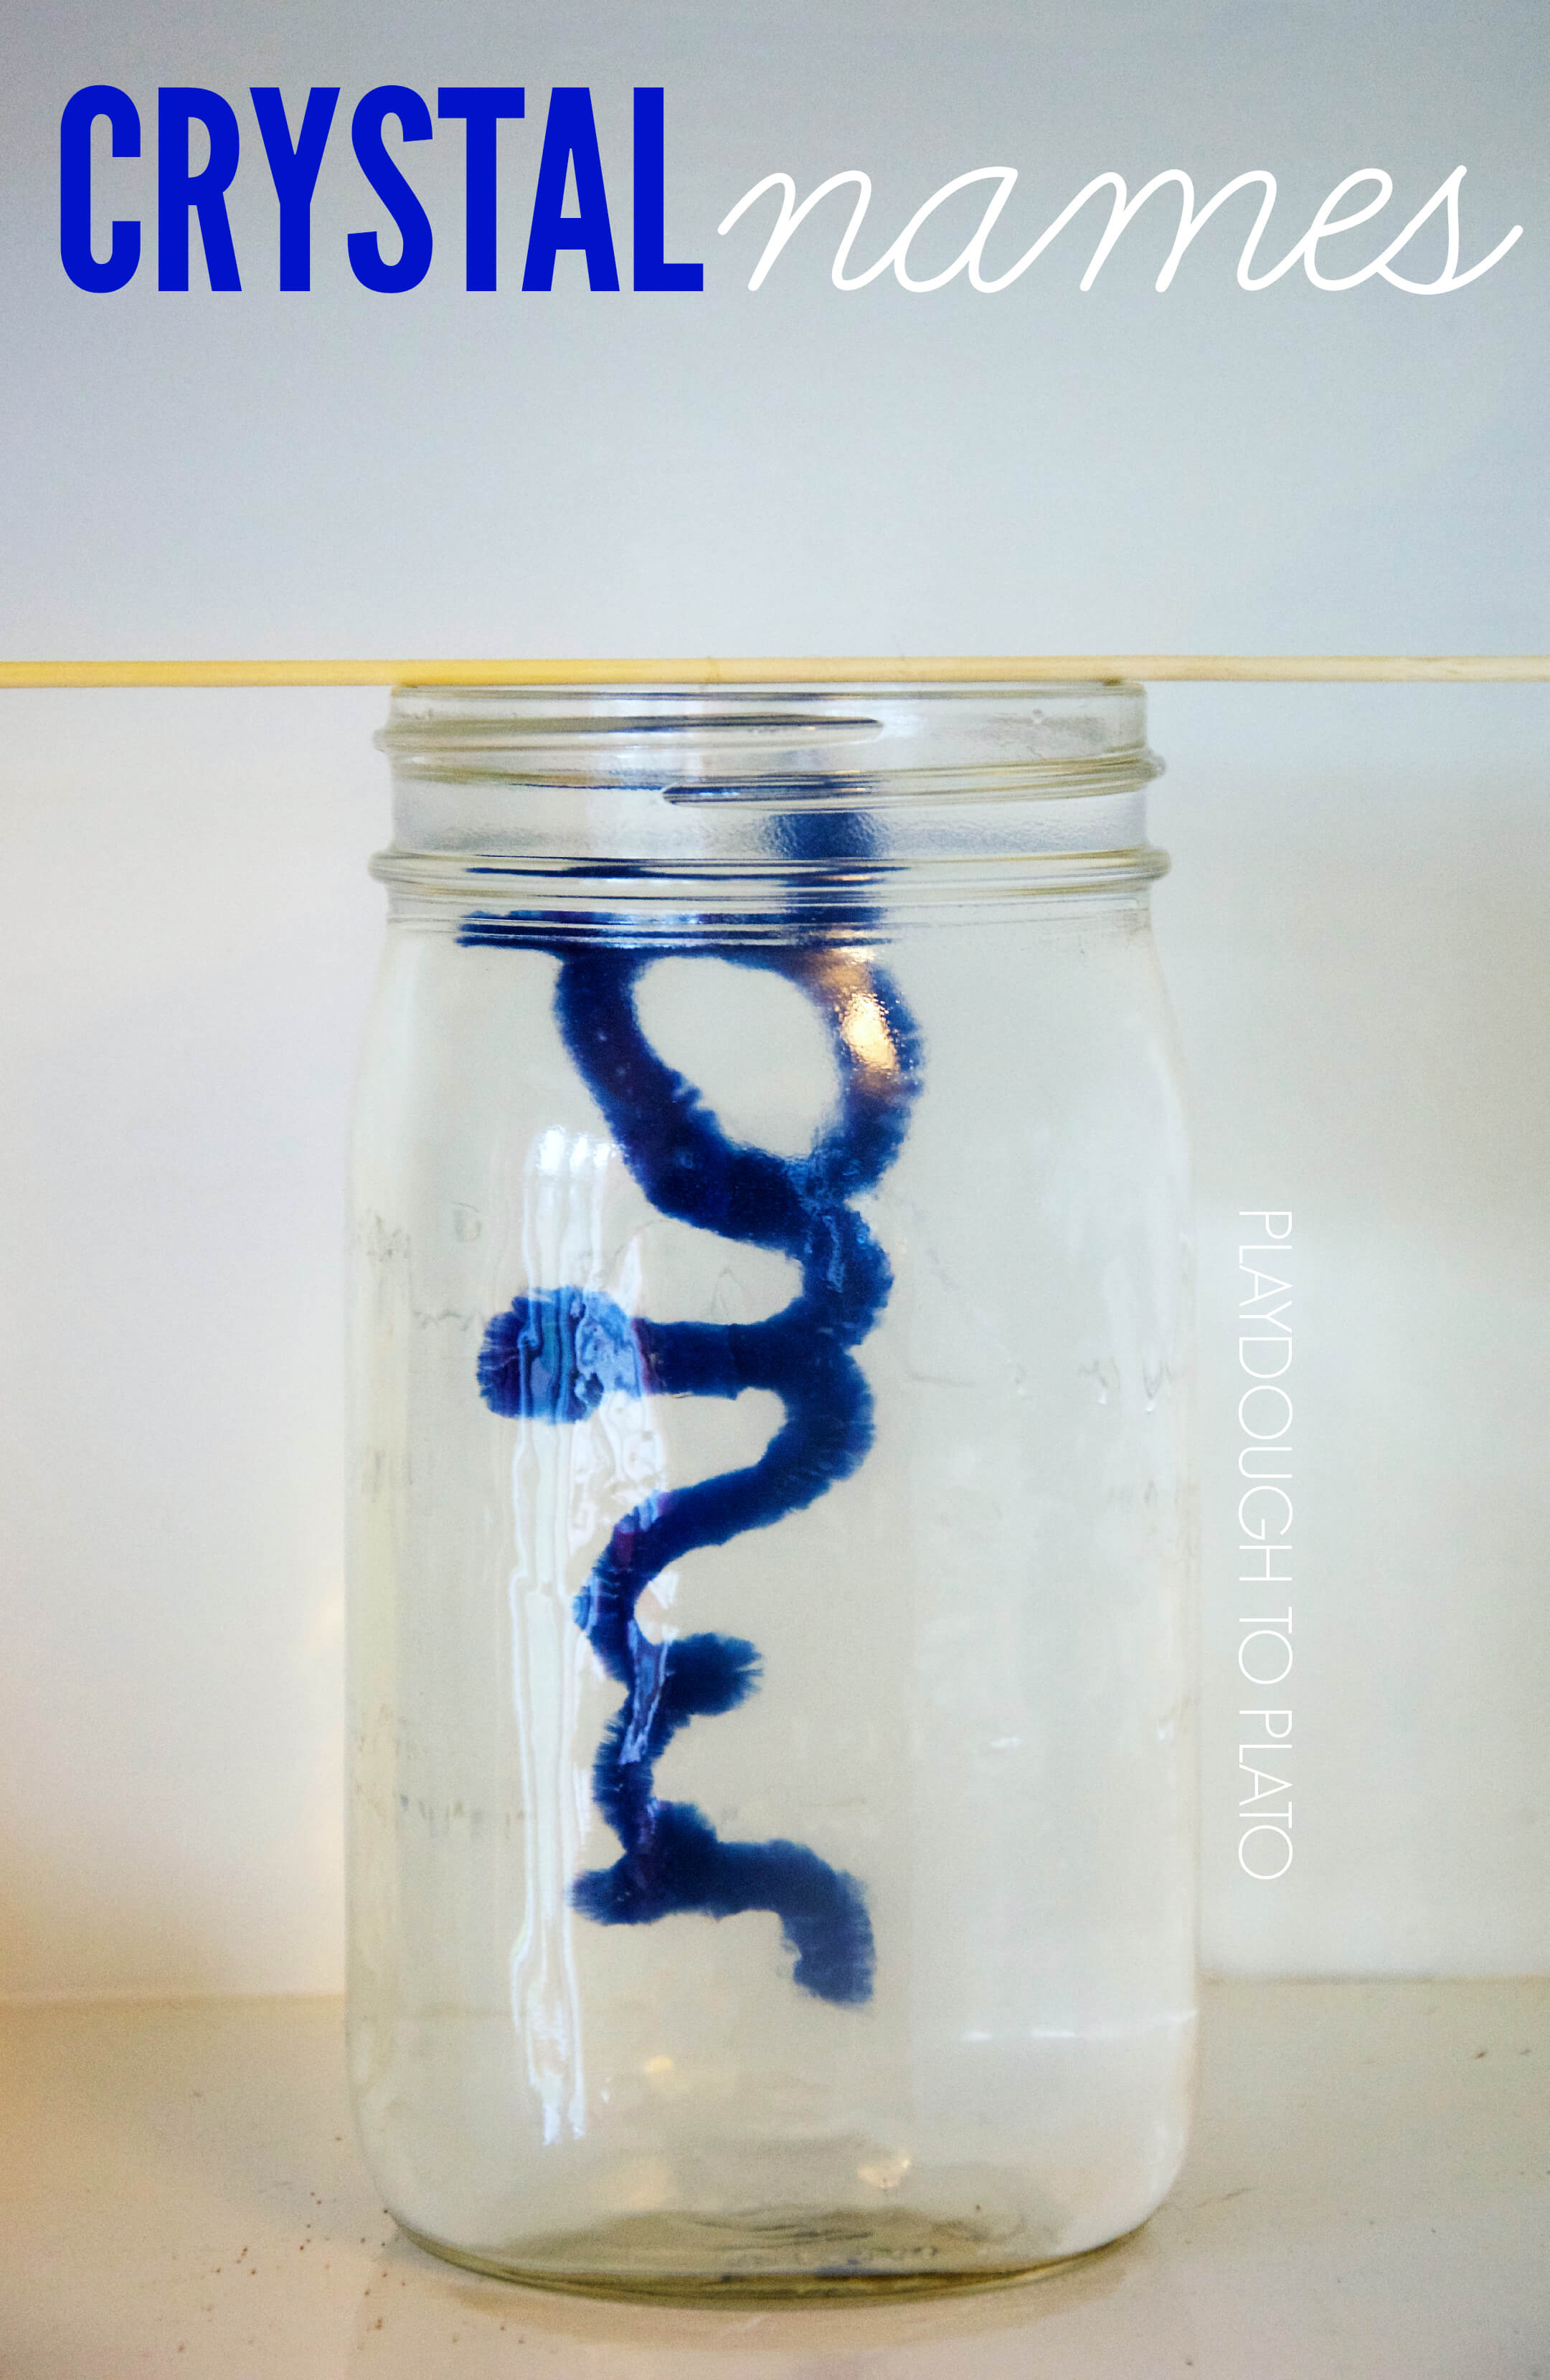
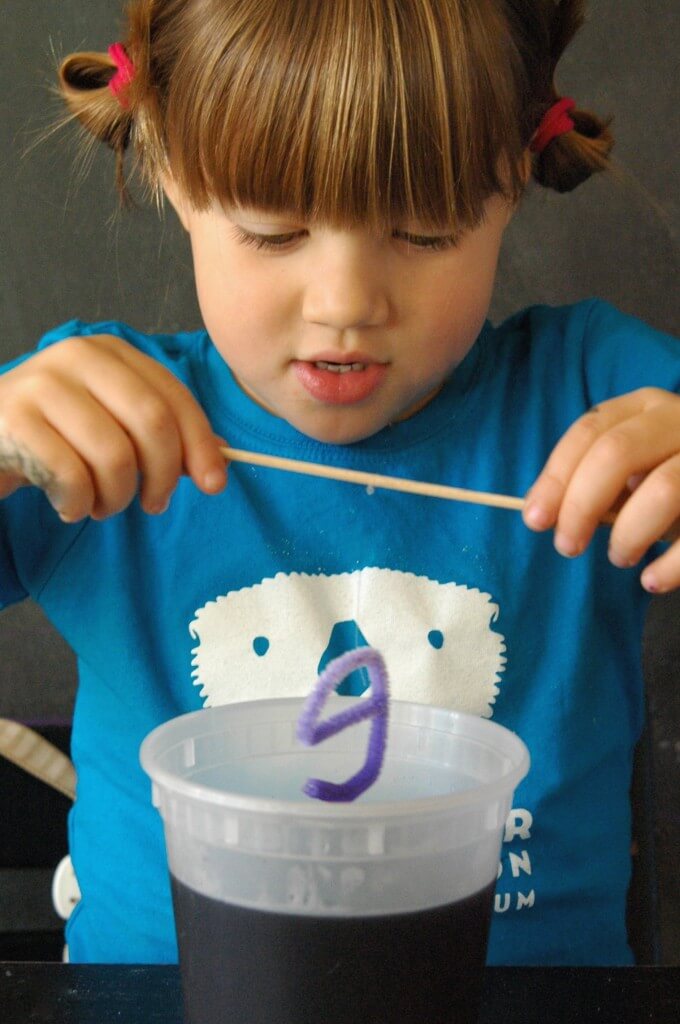
Once formed, we used fishing line to suspend each letter a few inches from wooden skewers.
Making the Solution
While A finished making her letters, I began heating a large pot of water.
I knew my 5 year-old would want to do the measuring and mixing, so I made sure the water was as hot as possible to help dissolve the borax quickly, without being hot enough to scald her.
A decided she wanted to make each letter a different color, so I set out 5 quart sized plastic containers and had A measure out 3 tablespoons of borax per cup of hot water (we used 9 tablespoons per container).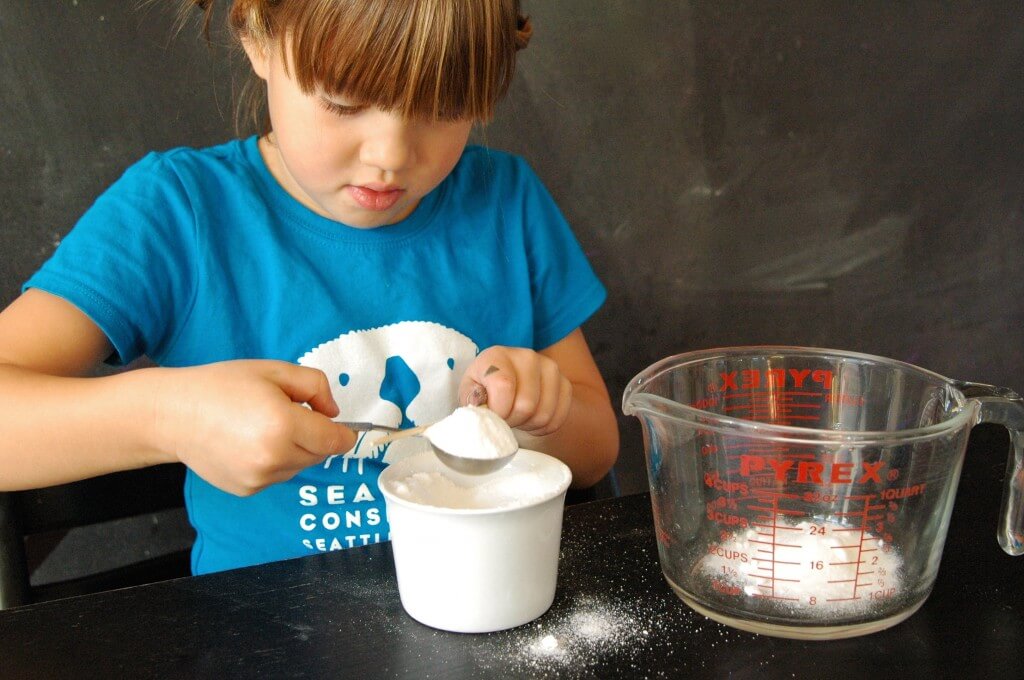
Once all the borax was measured, I poured 3 cups of almost boiling water into each of the 5 containers.
A, armed with a long wooden spoon, mixed each container until the borax dissolved. She felt like a real scientist in this kids’ science experiment!
Next, she added several drops of food coloring to every container and carefully lowered each letter into the color of choice.
Waiting for the Crystals
Next came the hardest part of the kids’ science experiment – waiting!
I put the containers on a shelf and let them sit overnight where they wouldn’t be disturbed by curious hands.
After a couple hours, we saw some changes – mostly crystals forming on the sides of the container and also settling onto the bottom.
It was difficult to see what was happening to the pipe cleaners through the dark food coloring solution.
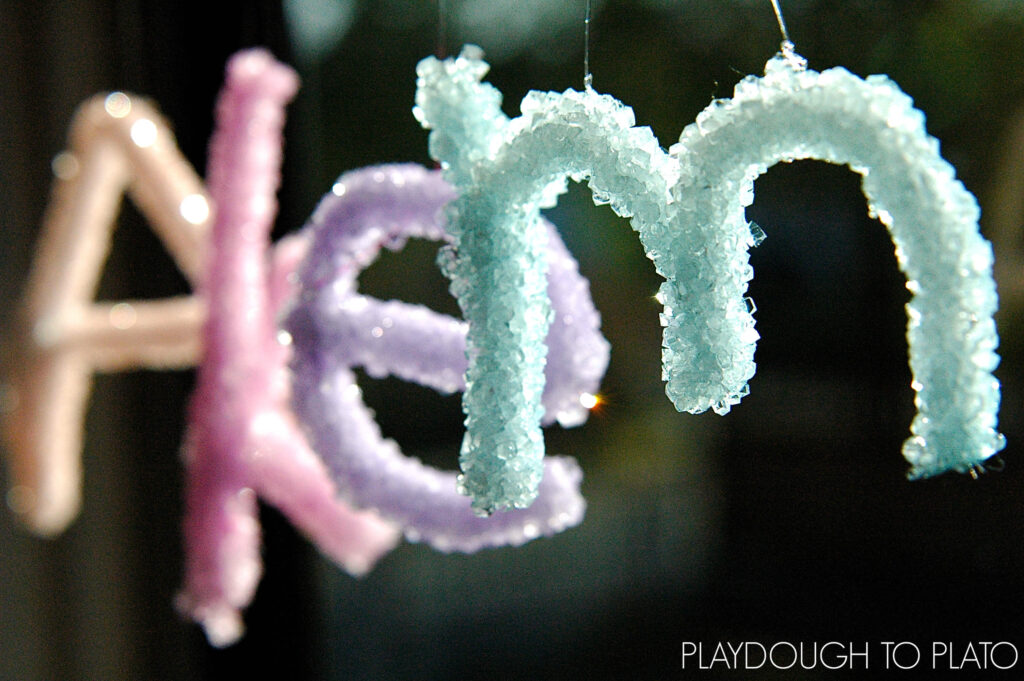
A and her little brother Q couldn’t wait to see how each of their names turned out and spent nearly an hour touching, arranging, and holding their letters up to the windows to see the crystals sparkle.
Once they were finished exploring their glistening letters, I carefully taped each child’s name up in a sunny window so they could be admired in all their sparkling glory. This kids’ science experiment was fun because it was so personal!
The Science Behind It
When borax is dissolved in water a suspension is created. A suspension is a mixture that has solid particles (the borax) that are large enough for sedimentation (settling out).
As the borax begins to settle, it starts to crystalize on all the surfaces it comes in contact with – including the pipe cleaner letters.
As the borax continues to settle out, it builds crystals on top of other borax crystals creating a thick layer.
More Kids’ Science Experiments
Want a classroom experiment that’s both engaging and educational? This Glowing Bouncy Egg activity lets students explore osmosis and chemical reactions in a hands-on way!


This is so clever! I really want to try this with my kiddos! Thanks 🙂
i love this website it is going to become my science expirement thank you very much cant wait to show my parents teacher and classmates
i got all the suplies question though do i leave it for a couple of hours or do i leave it for a week or overight please reply today my science pro is next thursdy
You leave it over night in a spot where it won’t get bonked. Have fun!
thank you very much ill get started right away
Now this is quite something!! I’m going to have to try it with my boys. They will love it, Did you help bend the letters or just allow the children to create their names?
I let my 5 year old bend her own letters and she was able to do it pretty easily. I pretty much bent them for my 2.5 year old and let him copy me with some spare pipe cleaners. I hope you enjoy this activity, we are obsessed with borax crystals in any form at our house!
im done doing everything exept for waiting man i cant wait
I helped my 2.5 year old form the letters but my 5 year old could do it herself. I did make sure she had twisted the like cleaners well on letter like “A” and “K” that had joining parts.
do i put the borax in first or water
It doesn’t matter which goes in first as long as the borax dissolves.
Going to do this with my kids
Awesome, Tonya! I hope they love it too.
I highly think that the ingredient list is highly absurd. i recommend going on a diet.
Hi! I look forward to doing this with the kids at work. Just a quick question, if the kids make one letter at a time, since they will not be able to do cursive letters just yet, can you put more than one letter in the jar together? Thanks.
Hi Gracie,
You can put as many letters in as will fit as long as they do not touch each other. Anything that touches will be joined together with crystals. I tried both ways and found doing each letter separately to be easier. Also be careful the letters don’t touch the bottom of the container or they will get stuck. You can get them off but some crystals break off too. Have fun!
Hello! I love this idea!!
I’m planning on doing this with a large group of kids (25+) and I was wondering if I could hang the letters in a box instead of a jar (so I could recycle my boxes and save money on the jars ^^). Is there a special reason of doing it in a jar? Thank you so much for the great idea!
Oops! I didn’t realize I had to keep it in the same container that has the liquid. I thought I had to keep it in an empty one 🙂
how long will these last/ I was thinking about making some for my daughters dorm room.
As long as they don’t get wet I think they will last for years. We still have ours hanging up and it’s been almost a year. If you dye your solution to make the letters colored the colors will fade, especially if exposed to sunlight. I would recommend using colored pipe cleaners to make the colors last. I hope you enjoy this activity, it’s pretty addicting!
This is a amazing idea … thank you for posting. I’ve never seen anything like this. I am getting started now and these will be my Christmas gifts for my family and friends …. and I have a very large family and extended family.
What a wonderful Christmas gift, Lil!! We’re thrilled that you love the crystal name science activity too. 🙂
I saw a pintrest post for the alum egg crystal geodes. Do you still have that available?
Thanks
I’ve done these before and seem to remember that the faster they cool the smaller their crystals. I think the slow cool down creates the biggest crystals. I and my granddaughter are working on them now and are experimenting by cooling them at different temperatures.
Any tips on cleanup? I can’t seem to get the crystals out of my jar. :O
Hi Becky,
Soaking your jar in hot water should dissolve the borax. I usually just run mine under hot tap water and it loosens the crystals enough so I can pour them out. I hope this helps.
A great article. Thank you very much
How do the crystals hold up? If I did this with my afterschool kids would they make it home or would the kids end up with a baggy full of dust?
Hi Anna,
The crystal are pretty sturdy. They should make them home in a backpack provided the backpack isn’t tossed around a bunch. My kids never tire of making these so I’m sure your afterschool kids will love doing it too. It might be worth making one at home as a test run before trying it with a group of kids, then you can see how durable they are. Good Luck! Hope it’s a success!
Awesome. I will try this with my class. Thank you so much.
Thank you so much for this awesome post! Its such a lovely idea!
I looked for borax but its not so easy to find here in germany. Is it also possible to produce crystals with salt or Alaun?
Thank you and I wish you a great and sunny day! 🙂
Louisa
Will the crystals form overnight or is it best to leave them for a few days? I teach a five day fairy camp and thought this would be a great craft to introduce ourselves!
Hi Vanessa,
The crystals take overnight to form. This would be such a fun craft to do for fairy camp!
We are doing this right now. Our pipe cleaners are floating. Any idea why?
Hi Stacey,
The only reason I could think of for your pipe cleaners floating is perhaps tiny air bubbles are trapped on the little fibers of the pipe cleaner and making it buoyant. I think of you give the pipe cleaner a few taps in the solution it should sink. Hope this works!
HI! so we tried this yesterday and three of the colors seem to be working but one is not, and definitely not as cute and crystal covered as yours. Can you think of something I may have done wrong? I added as much borax as you did for 3 cups to 2.5 of hot water. Was that to much?
My girls were so pumped to do it and I feel like I messed up somehow. Any suggestions?
Correction to my quick typing. “too much” sorry!
Hi Marisa,
Just to be clear, you added 9 tablespoons of borax to 2.5-3 cups of boiling water? That should have worked. Did all your borax dissolve in the hot water before adding the letters? If some of the crystals don’t dissolve the borax that does dissolve tends to precipitate out to the bottom where the undissolved crystals are ans not onto the suspended pipe cleaner. Also colored pipe cleaners produce brighter letters (although the crystals are clear/white) than the colored crystal solution does. I hope this helps.
Thanks…. I am thinking that I did not put enough borax in…. For an ex teacher my direction reading skills seem to be suffering…. 3 tbsp per cup not container.. ohhhhhhh hahaha I will try again.
thanks. 🙁 sorry for being “that” person.
I’m planning to do this tomorrow. The only food coloring I could find was a Betty Crocker gel. Its made from corn syrup, sugar, water and artificial colors. I’m afraid the corn syrup will interfere with the process. Is this what you used?
I did something similar trying to make a snowflake and used gel. It works but for deeper colors use more than you think you need. The solution was a deep blue I couldn’t see through it. The crystals came out a pretty baby blue but I wanted a deeper color.
Do you know how much to use if the Borax is in a liquid state already? I inherited a huge container of liquid borax when I moved into my science lab.
this is beautiful! How heavy would you say they are? I know each letter by itself is probably super light, but if I did a medium size cursive word?
The results are so beautiful, I’m definitely going to try this!
I don’t think they are that heavy but I did use fishing line to hang the cursive name by the first and last letters. I think a single string would still work as the crystal is quite stiff and strong for hanging but I just wanted a little more support and balance when hanging. I hope yours turned out well! It can be addictive!
Borax isn’t available in the UK do you know if this will work with soda crystals or borax substitute? I can get both of them and want to make these with my kids
I also have the same problem…
Any thoughts to alternatives?
I bought borax via Amazon a couple of weeks ago. I’m in the UK.
me too no problem
I also have made snowflakes with pipe cleaners and glitter, they came out very nice. My grandkids would also love their names ! I was wondering if a child could touch or play with these? Is borax a chemical?
Hi Marcia,
Borax is a chemical called sodium tetraborate. It isn’t good for people to inhale in it’s powdered form, so I either do the pouring or have my kiddos keep the borax low in the bowl when pouring it out. Once the borax is dissolved and crystallized it doesn’t pose a hazard. It hasn’t been shown to be a skin irritant but has caused lung irritation in its powdered form. I usually let my kiddos explore the crystals for a day or so, washing hands after as a precaution, then hang them to display. Hope this helps!
Hi Noirin,
Thank you for this fantastic idea and kindly-detailed-instruction.
I am planning to implement this activity next week to my children in a class(4-5 year olds).
There is a question for you. You said “Food Coloring {optional, if you want colored letters you can dye the borax solution or use colored pipe cleaners}”
Wondering coloured pipe cleaners would dye the crystal without additional food colouring. If so, it would make this activity much easier. (I don’t need to find out 25 seperate containers for each child)
I am so excited to see the children surprised and happy with the result.
Thank you.
Joanne
Hi Joanne,
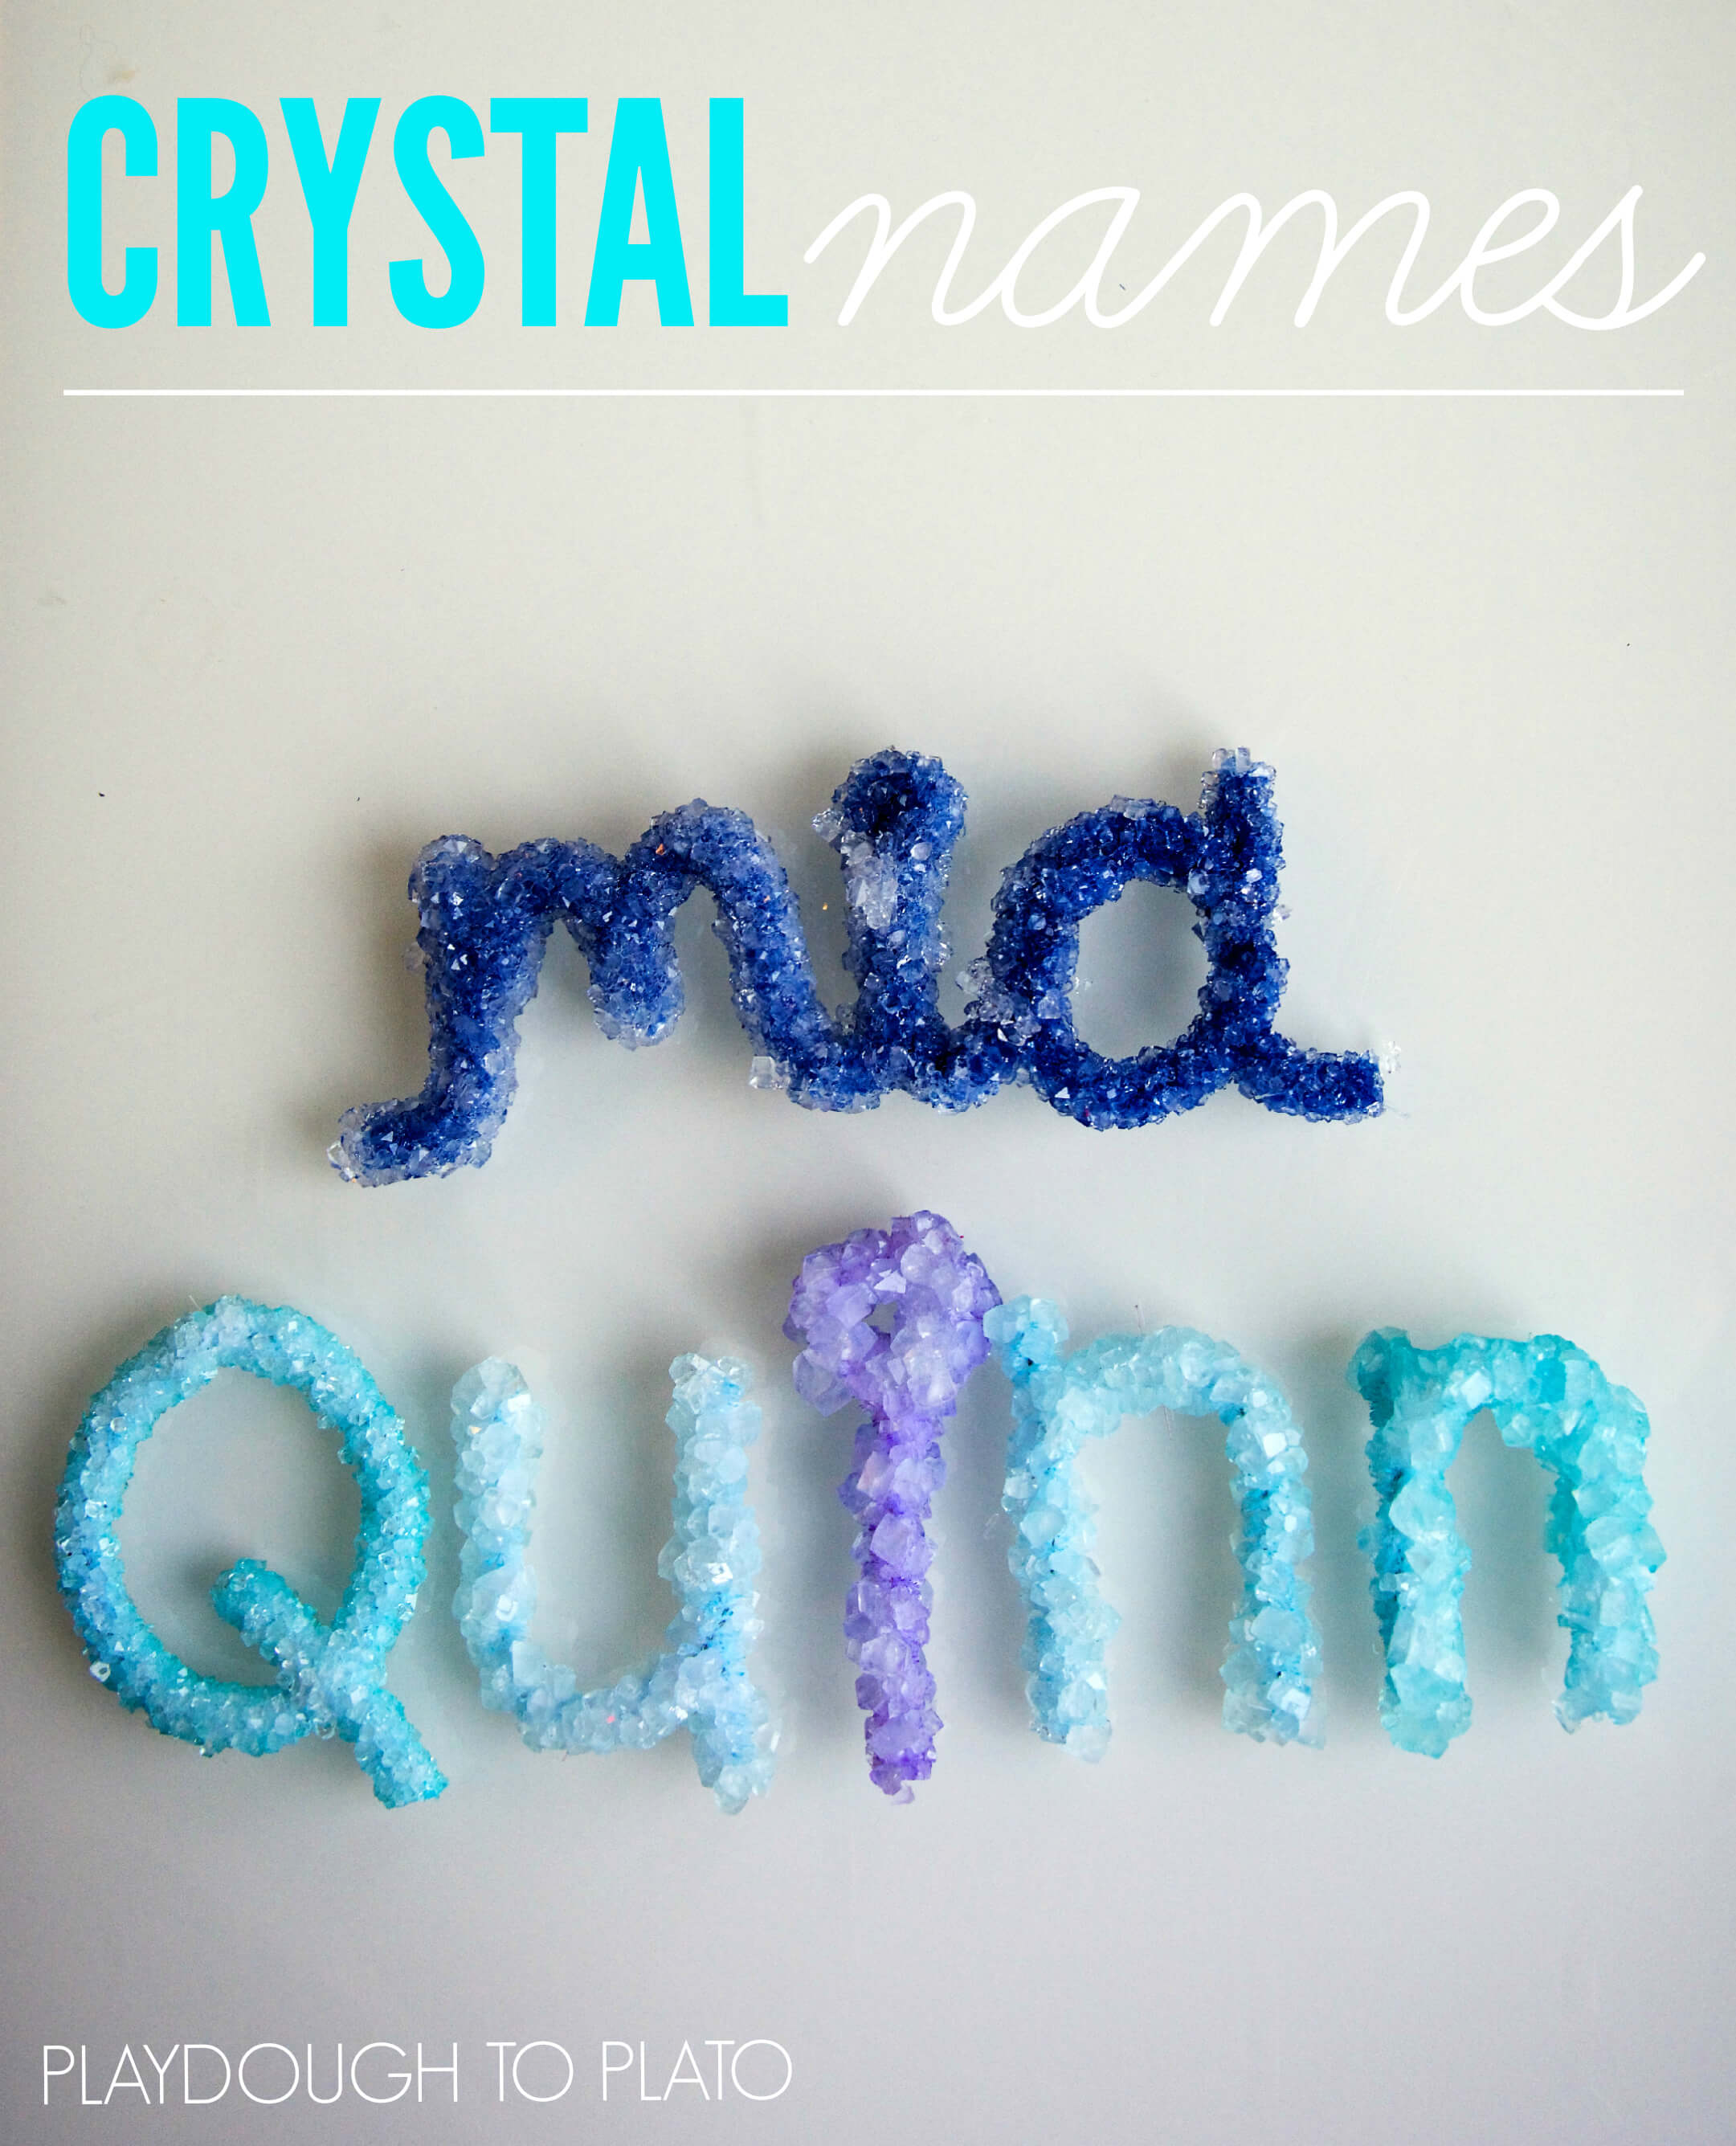
In the photos above the cursive Mia was made with a blue pipe cleaner and the name Quinn was made with food coloring. The pipe cleaner color actually lasts longer too as it doesn’t fade in the sunlight. For your classroom I would use pipe cleaners, just make sure to use the fuzzy ones and not metallic ones. Also, if you are putting more than one name in a container make sure they do not touch or the kids names will crystallize together. Have fun!
Hello, I am a summer camp worker and am looking to do this activity with my kids. I have three groups of kids and each group will be doing it at a different time. Each group has 25 kids in it, so how many batches of the solution do you think I would need for 25 kids to do this project?
Hi! Thanks for this activity. Question: can I pre-mix the solution (say a couple hours ahead of time) before putting the pipe cleaners in?
Thank you!!
Hello, H ow can I introduce this scientific idea about over saturation and crystallization for 3 years old kids?
Hello Samira,
Here is the simple science of the crystals: When borax is dissolved in water a suspension is created. A suspension is a mixture that has solid particles {the borax} that are large enough for sedimentation {settling out}. As the borax begins to settle, it starts to crystalize on all the surfaces it comes in contact with – including the pipe cleaner letters. As the borax continues to settle out, it builds crystals on top of other borax crystals creating a thick layer.
Hope this helps!
I can’t find on the “recipe” how long it needs to wait in the suspension. I see it “starts to chrystalize” after an hour or so, but to thoroughly coat the pipe cleaners? Overnight? More than that?
Hello Midori,
Great question. The crystallization does start within a few hours but it will take over night and into the next day for the full crystal to form, it can vary slightly from experiment to experiment.
Hope this helps!
Kimberleigh
That is very cool and neat of you! How very neat and impressive! Good Job!
Hello Sage!
Thank you so much for your kind words!
We love this crystal name activity and I hope your kids love it as well!
If I can help you find anything, please let me know.
Warmly,
Kimberleigh
I’m wondering how long these will last – indefinitely? I’m hoping to make one
to put in a shadowbox for my daughter’s room. I love the way the Mia one turned out. Am I correct that it was made using a blue pipe cleaner and not a colored solution? Is there any special care I should take to make this last longer once it’s made?
Thank you for the inspiring craft!
Hello Jessica,
Great questions!
As long as they don’t get wet, they will last a long time. We have had many over the years that have lasted for months.
If you choose to dye solution, just be aware that the sun will fade the colors, but using colored pipe cleaners will help the color stay intact.
I hope this helps!
Enjoy!
Kimberleigh
That is SO cool I am doing that for a presentation in my classroom and it is really cool to do what you guys/gals did. Honestly it looks and sounds like PURE AWESOMESS you guys are really cool thank you-Madlynne Nevaeh Marie Gagne.
I cant wait to try this with my school.age group .
I think I will try initials to go quickly .
Have so much fun, Silvia!
Let us know how it goes.
Warmly,
Kimberleigh
approximately how long does this activity take? do you recommend using both coloured pipe cleaner and coloured dye or would using coloured pipe cleaner suffice?
I’d like to do this in my classroom–how many letters could work in one container of borax/water? I’d like to do many at once instead of one container per letter. Ideas?
Hi Mary,
It will really depend on the size of your jar. You don’t want the letters to clump together – as that’s how the crystals will form. I would experiment with the jars you plan to use, but I’d probably say no more than 2-3 letters at a time.
Warmly,
Ashley // Happiness Ambassador
How about a used aquarium? I’m planning to do this in my first grade classroom at the beginning of the year when we read Chicka Chicka Boom Boom. I think 3 small used aquariums (hello, parents?) would provide three colors to choose from. I hope that gives you an idea that might work.
~Jen
Hi Jennifer!
That sounds like a great way to accommodate a lot of names.
You may want to experiment ahead of time in order to be sure you have the solution ratio correct.
We’d love to hear how it goes!
Warmly,
Ashley // Happiness Ambassador
Do you have to use only white pipe cleaners?
Hi Amy,
No, you don’t have to use only white pipe cleaners. The white just makes the crystals stand out a little more. A colored pipe cleaner might just now look as “clean” in the final product. Other than that, any pipe cleaners will do!
Warmly,
Ashley // Happiness Ambassador
Definitely going to try this with my after school group! Do you need to use glass containers specifically, or will any clear container work (plastic, acrylic, etc.)
Hi Anna,
So glad you’re going to try it! You can use glass or plastic containers. We’ve just found the glass to be a little more sturdy, but either would work!
Hope your kids absolutely love it!
Warmly,
Ashley // Happiness Ambassador
Hi, what could I use in the UK instead of borax please?
Hi Joelle,
I’m so sorry, but I don’t know of a substitute that would give you the same results.
Noirin, who actually wrote this post, might have some ideas, but I don’t have substitute. So sorry about that.
If you find one, we’d love to hear about it!
Warmly,
Ashley // Happiness Ambassador
About how long did you have to wait in order to remove the crystal letters. I’m wanting to do this for a parent/teacher connection night that we are doing that is STEM-inspired, but need a timeframe to tell parents to wait…or to know if it’s even a possibility to do in the timeframe we have!
Hi Theresa,
Thanks for reaching out!
You need to leave the crystal letters overnight or longer. You’ll start to see some changes after a few hours, but probably not enough to do in a parent-teacher connection night. You could build the names and send them home in the solution to sit overnight if you think that would work. Hope you have a lovely STEM-inspired connection night!
Warmly,
Ashley // Happiness Ambassador
About how long did it take for the crystals to form? I started these with my afterschool kids about 4 days ago, and so far, we’re only seeing a few tiny crystals forming on the sides of the glass. I have a feeling something didn’t work right with our batch.
Hi Anna,
Thanks for reaching out.
Yes, you should really be able to see the crystal formation after about 24 hours. If it’s already been 4 days and you’re not seeing many crystals, the solution may have been off 🙁
Let me know if I can be of any further help.
Warmly,
Ashley // Happiness Ambassador
Thanks- we tried again with hotter water and double the borax powder, and they worked SO much better! And the process made for a great trial-and-error experience for the kids to learn from.
That’s wonderful, Anna!
Thank you for reporting back!
And you’re right, what a great learning experience for your kids!
Warmly,
Ashley // Happiness Ambassador
What measured amount should be mixed with borax? I do not find the indication … I tried but it did not crystallize, I guess my measurements are wrong.
Hi,
I’m sorry about that.
We used 3 Tablespoons of Borax per cup of water. So if your container held 3 cups of water, you would need 9 tablespoons of Borax.
Hope that helps.
Warmly,
Ashley // Happiness Ambassador
After how many hours do I take it out
Hi Santos,
We recommend allowing the names to sit overnight.
You might see some slight changes after a few hours, but for the best results, allow it to sit for at least 12 hours.
Warmly,
Ashley // Happiness Ambassador
She did use 9 tablespoons of Borax.
Norin, thank you for sharing!
You are very welcome!
Warmly,
Ashley // Happiness Ambassador
What happens if my students return to observe their jars in 2 days? Is that too long to wait? I plan to use small canning jars – 8 oz each. Thanks for your feedback.
Hi Terri,
I’ve had it sit overnight, but I’ve never tried it two days later.
You should be okay, but I’d love to hear your results.
Warmly,
Ashley // Happiness Ambassador
Thanks so much for this fun idea! What kind of food coloring did you use? Our food coloring darkened the water, but we still got clear crystals.
Hi Andrea,
We just used a good amount of regular food coloring. However, in some cases we also used colored pipe cleaners, which made the colors appear darker as well.
Warmly,
Ashley // Happiness Ambassador
These are so cool!
So glad you enjoyed them, Avery!
Warmly,
Ashley // Happiness Ambassador
What can we use instead of borax?
Hi Bel,
Sorry, but you need Borax for the experiment to work well.
I don’t know of a comparable substitute.
Warmly,
Ashley // Happiness Ambassador
Sugar or salt will also crystalize, but they may take longer
Thanks for the tip, Aaron!
Warmly,
Ashley // Happiness Ambassador
Hello, thanks for this cool idea! I was wondering if you have any suggestions for containers that can be used in a classroom setting of about 25 students? This would be for an after school program so they would need to be a container students can take home or would be suitable for storing in supply area (out of the daytime teacher’s way) so students can retrieve their names the following day. Thank you!
Hi Alexis,
You may want to look at canning jars.
The lids could be put on top so the jars could be stacked (by an adult of course) and placed out of the way.
Hope that helps!
Warmly,
Ashley // Happiness Ambassador
Suggest cutting quart milk cartons open, and using twigs or similar to tie thread to and suspend over the carton.
Thank you for the suggestion, Fran.
We’d love to hear how it works for you!
Warmly,
Ashley // Happiness Ambassador
Do you know if premixed borax would work for this experiment?
Hi Amy,
We’ve never tried it with premixed borax, so I’m not sure if it would work.
I’d suggest trying it on a small scale to see if it works before using it for an entire project.
We’d love to hear how it turns out!
Warmly,
Ashley // Happiness Ambassador
My 4th Graders had so much fun with this simple project! They were in awe how it crystallized to the pipe cleaners. We learned that if you don’t follow the directions precise, the crystals will not form. We also learned to NOT put as many letters into a cup as you can. They will only crystallize together. As a note for others, the ORANGE came out the BEST. I wanted to attach photos of our results, but did not know how to attach.
Thank you so much for sharing, Melissa!
Love the tips you shared!
We don’t have the option of sharing photos in the comments, but we’d love it if you shared a photo on Facebook or Instagram and tagged us!
Thanks again!
Warmly,
Ashley // Happiness Ambassador
I’m going to try this with my grandkids.
Anything activity with making crystals with my name or any interesting ideas I can do with my kids to create interest in sfience
This project did not work for us at all. I’m so sad! It was time consuming to attach the string/stick to each letter and very adult driven because of the hot water and Botox measuring. No crystals have formed at all after 24 hours.
This is such a cute idea! Kind of a cross between science and a craft project! What a great way to get kids invested!
Thanks for sharing! Does the crystal keep very long afterwards?
Hi Malia, this looks like it would be fun experiment and have tried it, but how long do I wait before I start to see the crystals forming? Thanks! K
How long does it take to make this project?
Hi Erin!
Depending on the age of the child and the name you are shaping with the pipe cleaners, it could take 15-40 minutes to complete the project. It’s then best to let the names sit overnight to let the crystals develop. I hope you try it!
Warmly,
Sarah // Playdough to Plato Team
I love this experiment! I’m a teacher, and I have used this experiment for every summer school since 2021 and for the regular school year as well. I still use it today because the students love it so much! Thank you for making this post! I use the post every time I make these with my classes! Please leave it up and don’t take it down; it would be a tragedy to lose this fun experiment. Thank you so much!