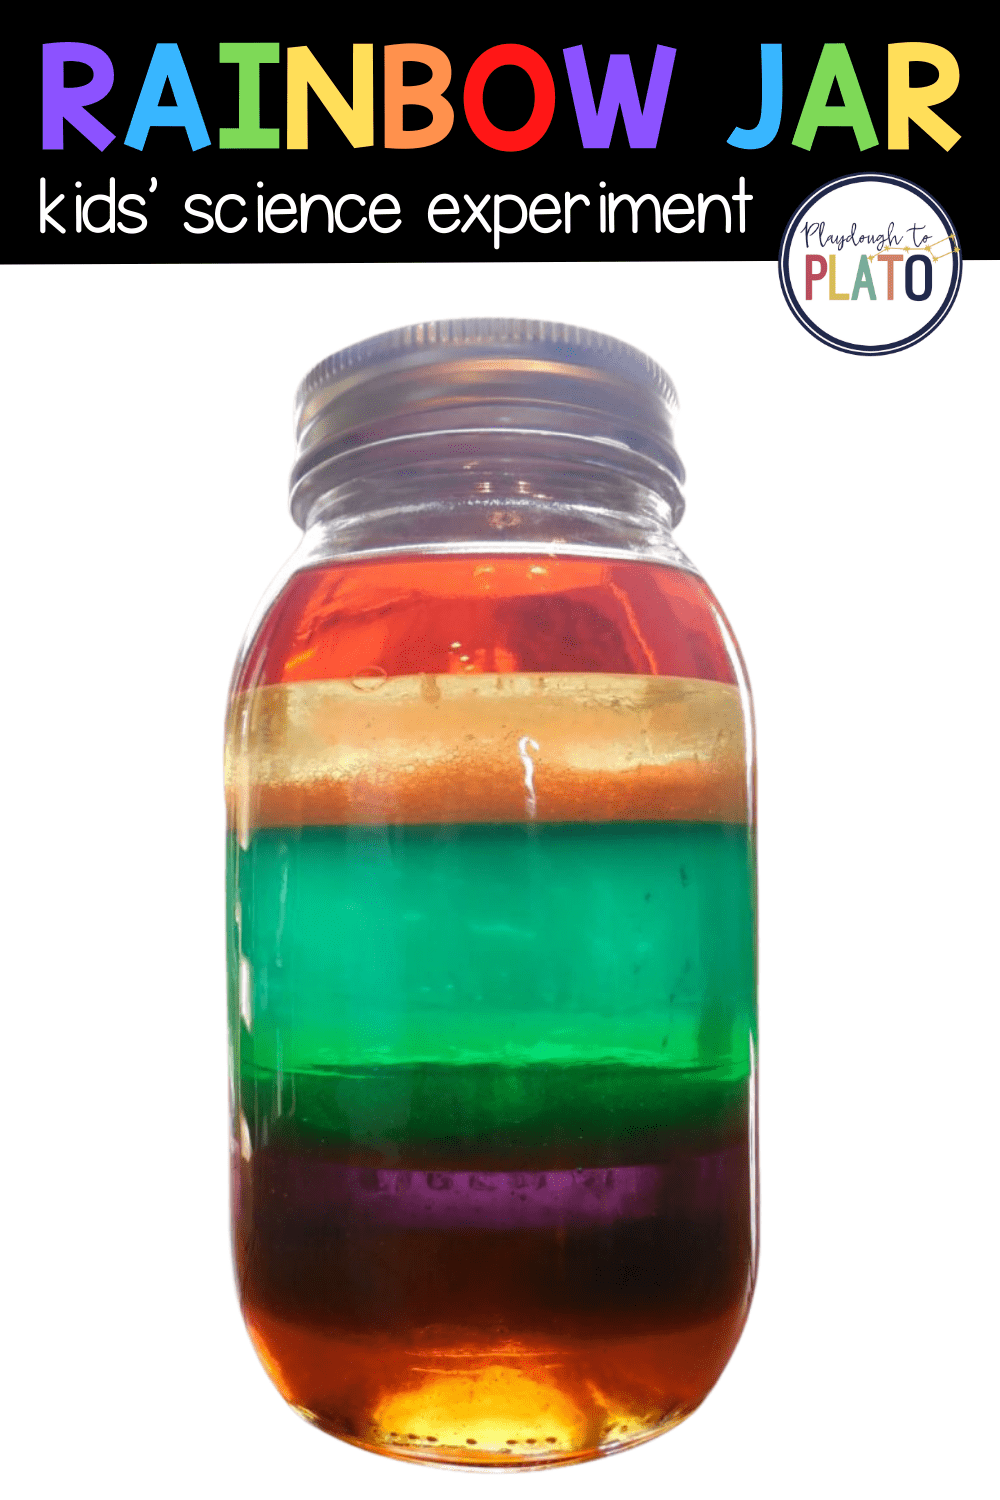
We love fun kids’ science and this easy rainbow jar activity is one of our all-time FAVORITES! With just a few common household ingredients like dish soap and honey, little scientists can actually pour a rainbow in a jar. There’s no need for any magic – just 100% kid-friendly science.
Follow the simple step-by-step below and then grab 30 more easy-to-follow science experiments kids will beg to repeat (plus a no prep science journal to keep track of their results!) in our shop!
Getting Ready
This project requires quite a few supplies, but most of them are probably things you already have in your pantry.
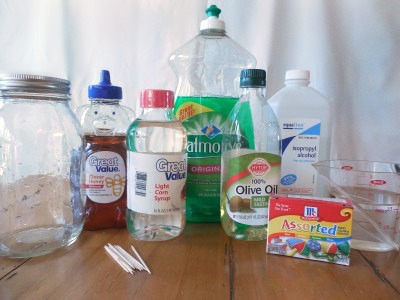
To get ready for the science activity, I grabbed my materials:
- A tall, see-through container (I used a clean mason jar.)
- Honey
- Light corn syrup
- Dish soap (either blue like Dawn or green like Palmolive)
- Olive oil
- Rubbing alcohol
- Water
- Food coloring
- A dropper
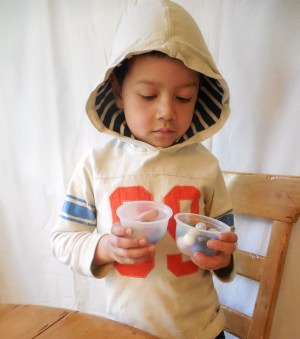
I also grabbed two identical containers and some marbles so that I could give my son a brief explanation about density.
The Science Behind It
As always, my son was really excited when I told him we were going to do some kids’ science with a rainbow jar! Before we jumped into the project though, I wanted him to understand what was about to happen, so I decided to introduce him to the concept of density first.
I explained that different liquids have different weights.
“Everything is made up of teeny tiny things called molecules,” I said. “Some of these liquids have a lot of molecules in them and some of them have only a few.”
I showed him two containers that were the same size. One had a bunch of marbles in it, one only had six.

I had my son hold the two containers and asked him which one was heavier.
“The one with more marbles,” he said. I explained that it was the same with our liquids — the ones with more “marbles” (molecules) were heavier and would stay at the bottom of the jar.
Pour a Rainbow in a Jar
Now it was time to make our rainbow jar! First, my son poured in the honey, being sure to pour it into the middle of our container. He was careful not to let it touch the sides.
Next, he poured in the corn syrup. (We’d colored it purple using the food coloring.) Again, my son poured it into the middle of the container, not touching the sides.
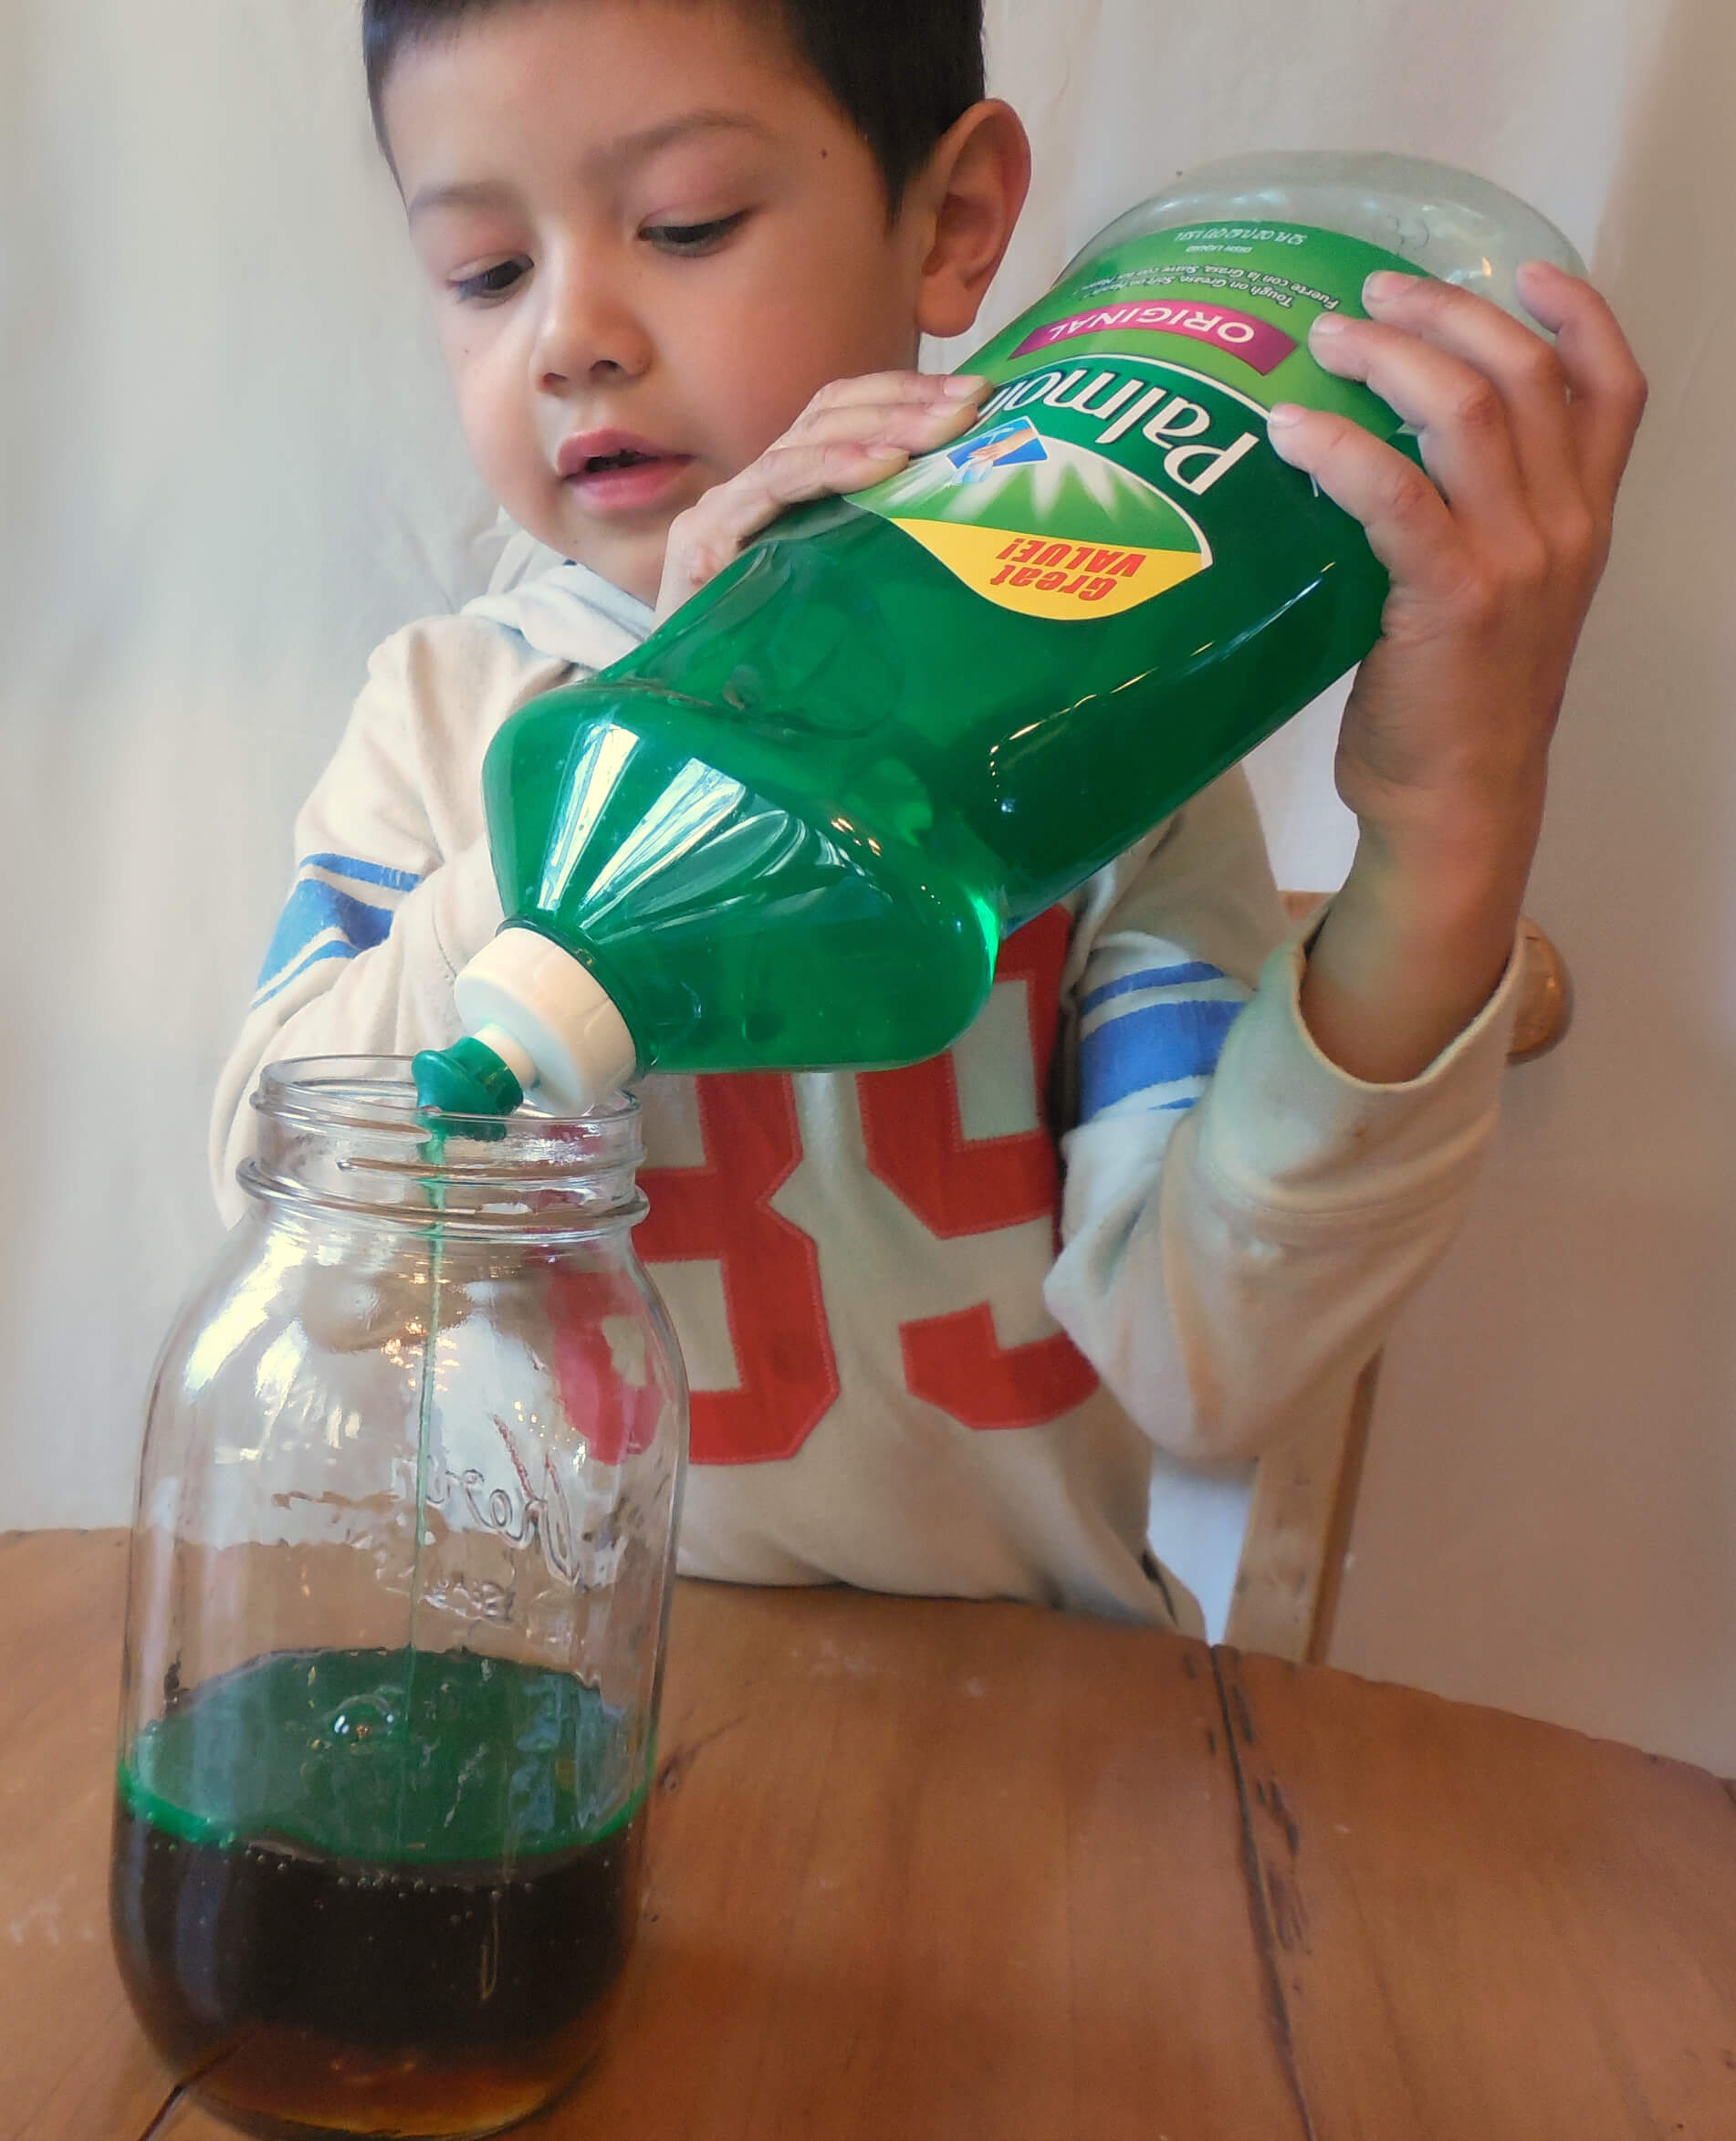
The dish soap came next.
We poured in regular water that we colored blue. (If you’re using blue dish soap, obviously color your water something different. Again, in the middle, in the middle!)
The olive oil went in the rainbow jar next. Do you know what I’m going to say? That’s right, we poured it in the middle! Also, I recommend pouring a fairly thick layer of oil – it will come in handy for the next step.
Last but not least was the rubbing alcohol. We colored it red – that in itself is a cool peek at different densities because the food coloring just sits at the bottom of the alcohol when you first drop it in. BUT WAIT! DON’T POUR IT IN THE MIDDLE!
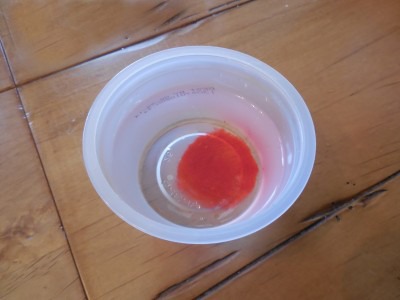
This is where the dropper comes in. If you pour the alcohol straight in, it’ll probably pick up the blue food coloring you used in the water and your rainbow will be ruined.
We found the best way to add it was by dropping the alcohol along the side of the container using a dropper. The key was not “breaking through” the oil layer into the blue water layer beneath it – that’s why I suggested putting a thick layer of oil.
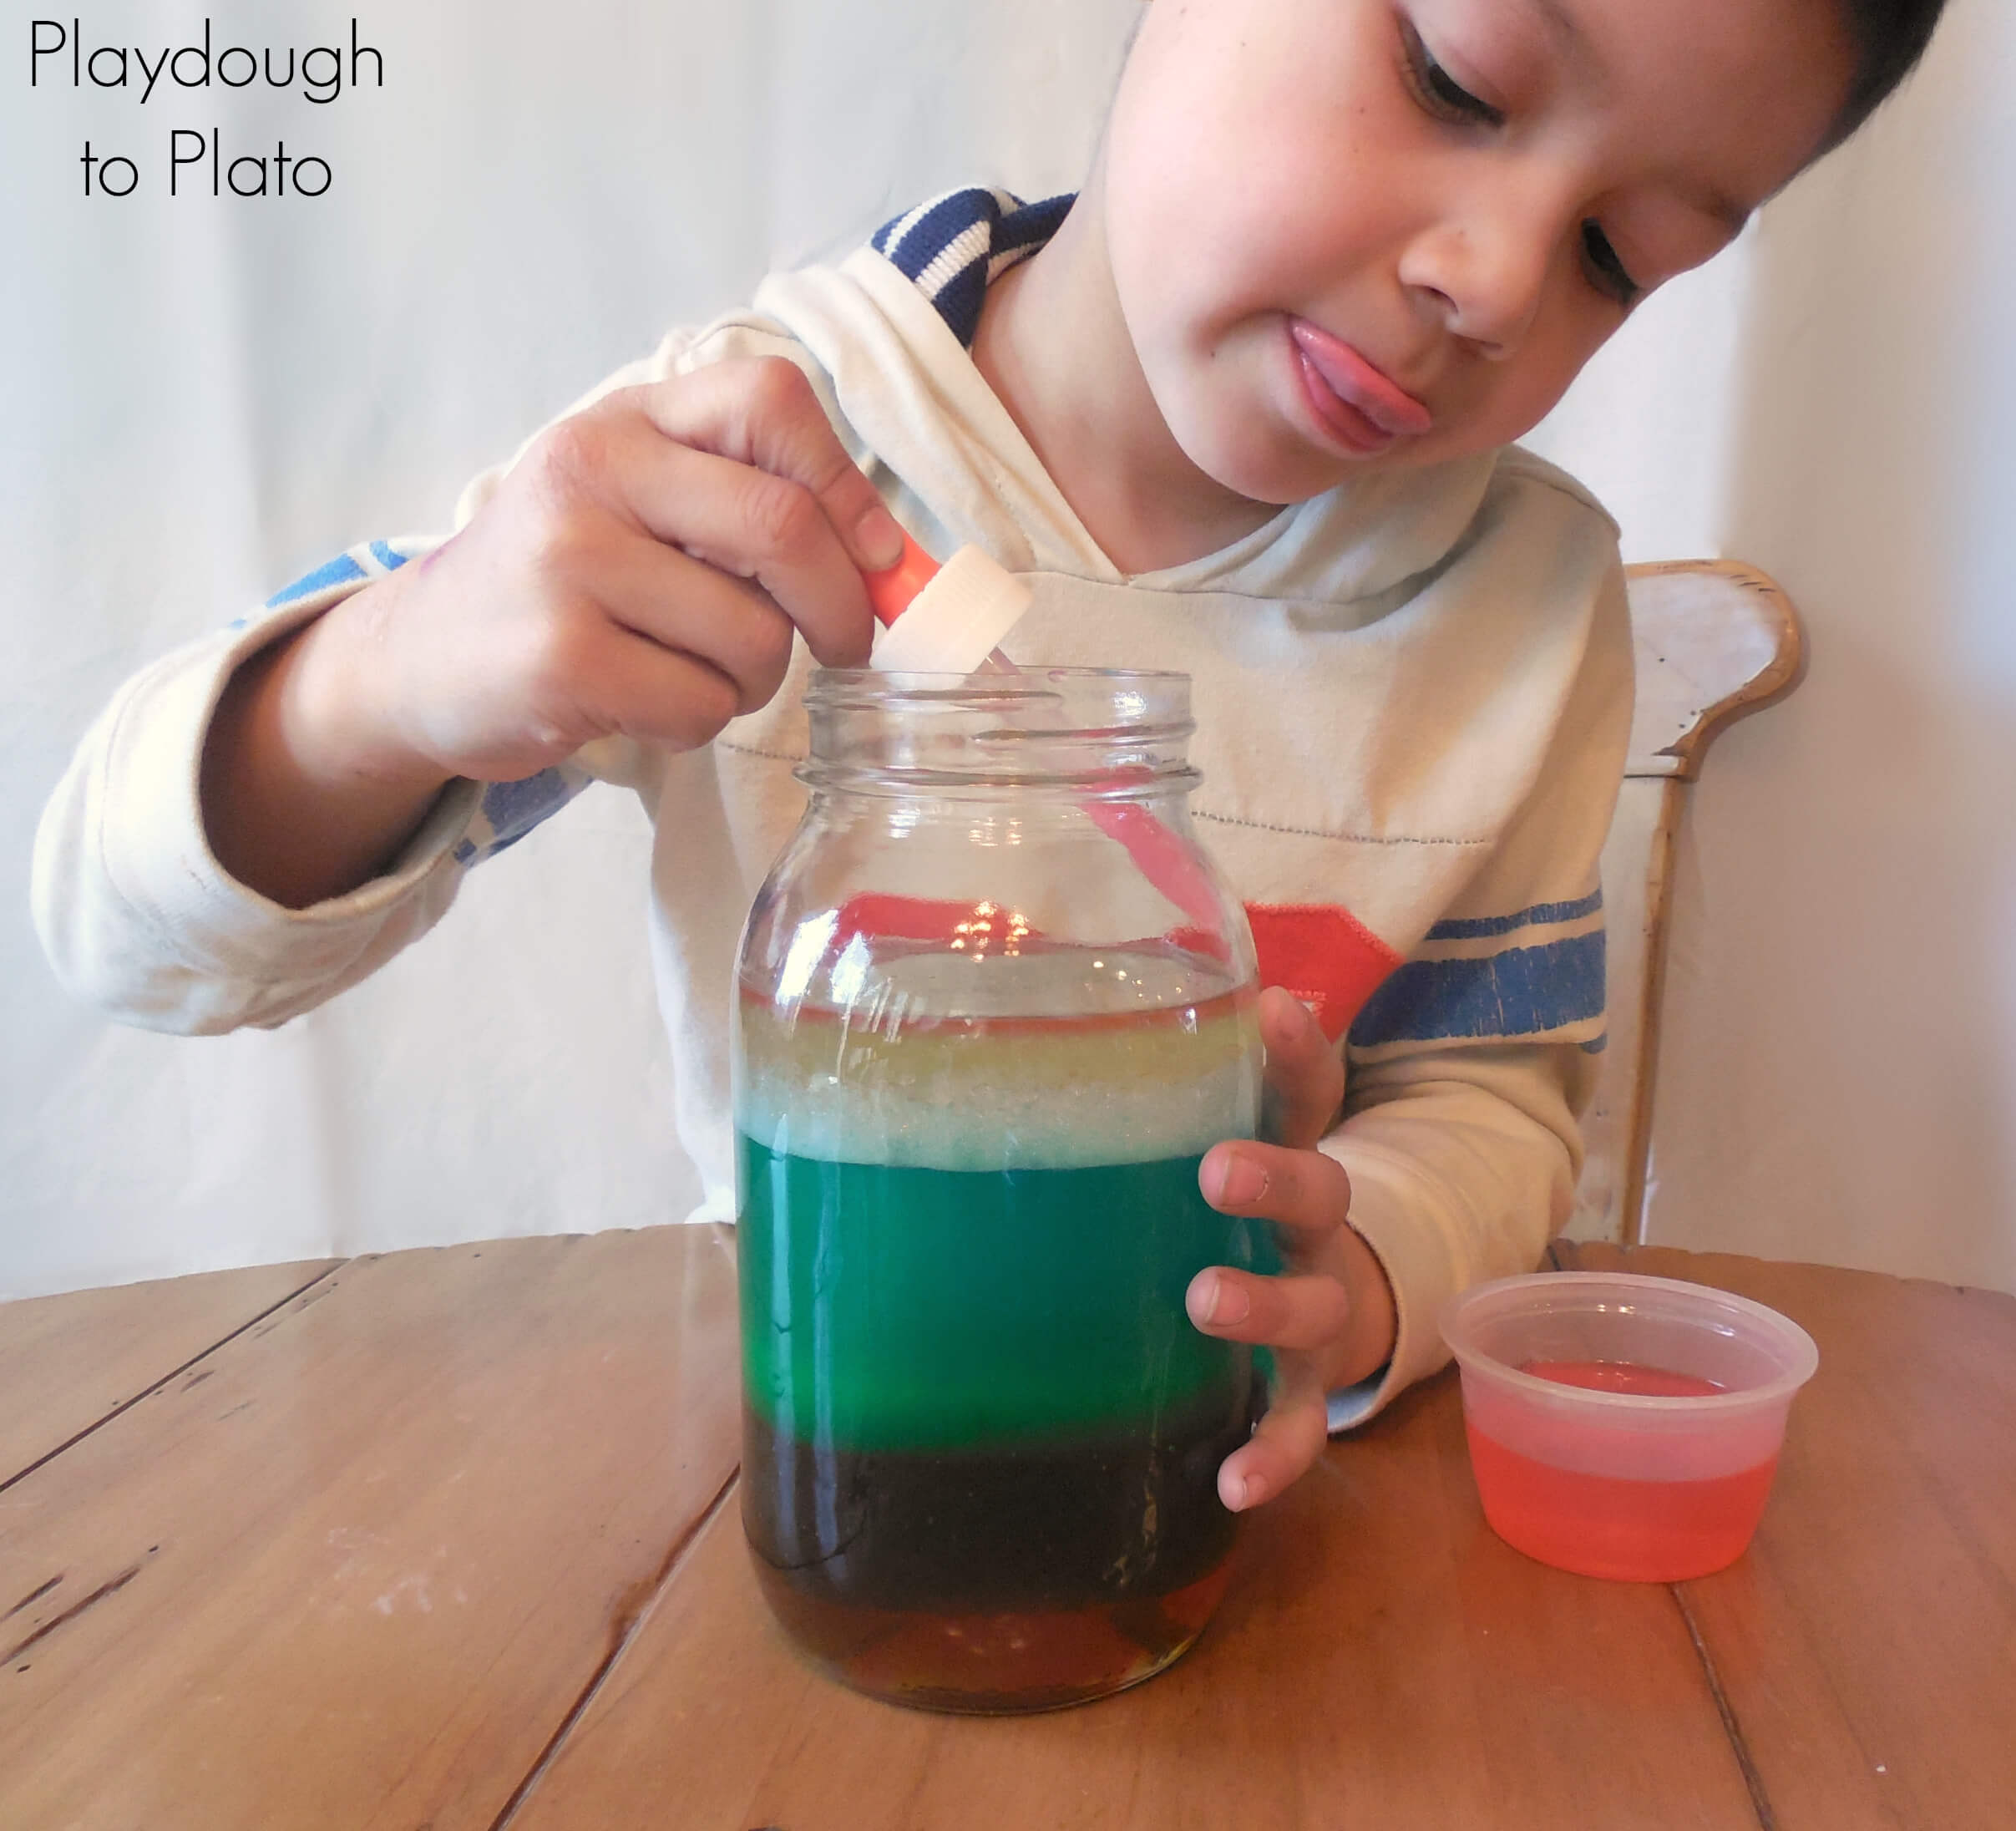
Our rainbow was done! We held it up carefully to the light, making sure not to shake it, and admired our beautiful creation.

More Simple Science Kids Will Love
Want a classroom experiment that’s both engaging and educational? This Glowing Bouncy Egg activity lets students explore osmosis and chemical reactions in a hands-on way!


Can’t wait to try it.
So fun! I did this with a group of 3rd graders today, and they thought it was amazing! Thanx for the great idea!!
Going to do this tomorrow with my three year olds.
Thank you for a great idea! I’m looking forward to do this with the children in the preschool where I work. I live in Sweden and corn syrup isn’t something we have here. Is there anything I can replace it with, or is it an option to just skip it? Is it like any other syrup?
Thank you for your answer!
I am happy to read that the rainbow jar is helpful, Jenny!
You could skip the corn syrup. You will lose a layer but it will not be too noticeable.
Fingers crossed that your preschoolers love the activity too!
Has anyone shook up the bottle? what happened? did the layers separate again? I know that my pre-kg kids will shake up the bottle, so I just want to be prepared!
Lovely! As a chemistry teacher though I cringed a bit at the explanation. I know you’re trying to simplify for kids, but it will make it more confusing when they’re older. Instead of more marbles, put the same number of, say, marbles and packing peanuts in two cups. They take up about the same amount of space, and have around the same number of pieces (molecules) but one is heavier than the other because there are either more small particles or heavier small particles (atoms for your reference) in each bit of space. Or you can compare balled up paper to stacked paper. Put as much of each as you can in a shoebox (same volume) and the stacked paper box will be heavier. More ‘stuff’ (matter) can fit into the same space so that shoebox (unit of volume) is heavier.
There are NOT necessarily more molecules in denser liquids in the same amount of space… There could be more, there could be fewer. There IS more matter in that bit of space than for the less dense liquid. (I keep emphasising ‘same bit of space’ because you can’t compare the weight of one cup of water to one drop of oil- density is mass per unit volume. It’s like that brainteaser, what weighs more, a ton of feathers or a ton of bricks? They both weigh the same! But the bricks will take up much less space because they’re more dense. Or to flip it, if you have identical boxes filled with bricks vs feathers the box of feathers will be lighter because they’re less dense. See why volume is important?)
I know this may sound pedantic, but it really does make a difference later. And my students always complain that every year they need to unlearn the ‘lies’ they were taught before (their words not mine!)
Thanks for hearing me out!
Very interesting activity for kids. I’ll try it very soon with my pre school kids. Thanks for sharing it to us.
So excited that you’ll be making a Rainbow Jar with your preschoolers, Raouza!! Let us know how it goes. 🙂
Thanks much for this pretty, graspable activity. And thanks to DIVYA K for your insights.
hi there. You say not to let some ingredients like honey or the syrup touch the sides. So does it have to be a very thin layer for those ingredients? Because i immagine that as one pours them in the middle they will inevitably start “sliding”/”slipping” towards the sides…
Darling little boy! 🙂
Thanks for sharing rainbows!
I’m with Kristi. What happens if the liquids mix? after a while like when the kids come back the next day will it be a rainbow again or will the food coloring mix together but the liquids separate?
This would be fun for Grayson
i think what she is saying by ” don’t touch the sides is don’t pour your liquids down the side of the jar, like if you were pouring a pop/soda into a glass and you pour it on the side of your glass to avoid fizz and making it flat. It will spread to the sides as you pour the layers
well the first thing my little one wanted to do was shake this thing up and we got done with it so we will see if it will separate doesn’t look like it’s going to but we will see and by the way I use the brick density thing for my daughter cuz I kinda thought the marble thing was a little wrong to.
Such a cool experiment! I am adding this to our Summer Fun Pinterest Board!
I would love for you to share this post {and others} at my Show Me Saturday linky party. We are live now!
i hope 3-4 year old children can do this/ with an adults help.
Our rainbow jar is perfect for 3 to 4 year olds to complete with an adult’s help. Hope your kids love it too.
Learning all sorts of things – listening to instructions, patience etc as well as Science – & having fun – great
Thank you, Elisabeth!
After a day will everything mix in the jar
I just made this with my 7 & 9 year olds for a summer activity. We even looked up the molecular density of each of our ingredients and predicted what might happen. They look great and the kids enjoyed doing them!! Thanks for such great idea!!
our flopped just a black blob….lots of wasted ingredients!
Are there any standards for elementary school grades that would go with the activity? I am actually using this activity for my science course I am taking this summer and am making a lesson plan based on it.
After making the rainbow jar, for how long can you keep it?
My guess is that there are fairly stable at room temp, but I’m not sure.
would you have another suggestion to use in place of the corn syrup?
We do something similar in my 8th grade science classroom. Yes you can shake it up (the soap will get foamy), yes you can let the liquids touch the sides, and yes it is stable at room temp. Ditto to the please don’t over simplify to the point of confusing weight with density.
A better way to explain this is that it is all about floating and sinking. You can push a low density object like a beach ball to the bottom of a swimming pool but it will float up to the surface because it is less dense than the water. Exactly the same thing happens if you pour the less dense liquids first. In my class each kid pours a small amount of liquid in so we don’t have any layers to start and we see them form. ***food coloring has its own density so it may not travel with the layer you started it in or it may bleed between layers***
Thank you so much!! I used this for a science project the night before on the layers of the earth. It was ironic because we were also studying density, and the density of each layer in the ‘rainbow’ was what kept them from blending into each other.
Hooray! I’m excited that the Rainbow Jar experiment came in handy, Grace. Thanks for your thoughtful note.
How can we use it in normal routin?is it useable or not kindly reply
I love the marble activity you did with him first to introduce
Hey, I love this. Just started homeschooling my 10 yr old this year and he is very visual and needs cool things like this to help him learn in a fun way. Wish I was taught this way at school!!!!!!
I was wondering is rubbing alcohol the same as acetone ( nail polish remover)?
That’s a great idea, it amused me, I can only imagine how kids react and want to make this imagine immediately! Well, I want to try this myself, thought I’m already an adult. Thank you very much for sharing!
Can u use vegetable oil vs. olive oil?
Our red layer did not stay red. The food coloring migrated down through the oil but the alcohol stayed behind. We used vegetable oil instead. I wonder if that is the difference. I also am curious if different types of food coloring would have different results. My almost 8 year old had so much fun doing it though. She is presenting it today at her first science fair.
My son and I tried this and loved it! We used coconut oil instead of olive oil. It had to be melted first, but it actually added a cool element to the project. After we made our layers, we shook the jar up. This made the colours mix into a swampy brown and allowed the coconut oil to harden on the top- creating a seal! Lots of fun, thank you!
WOW
How steady are the liquids? If I make this with a class at school will the liquids hold their place when the kids take them home (if they are as careful as kids can be)?
SOO COOL
What can we substitute corn syrup pls?
Hello Joyce,
Thanks so much for reaching out. If Corn Syrup is not available, I would look for a heavy syrup to substitute or skip the layer, while you will not have a perfect rainbow you will still have a fun science experiment!
Stay inspired,
Kimberleigh
Do you have exact amounts of ingredients?
Hello Linda,
No exact amounts are needed, just layers of the different fluids, but we usually just strive for even. The fluidity of this science activity makes it a perfect project for little ones.
Warmly,
Kimberleigh
Do you mix dish soap with water?
Hello Izzy,
No need to mix the soap with water- the density of the soap is what we need to make the layers 🙂
Hope this helps!
Warmly,
Kimberleigh
What are the measurements on all the ingredients?
Hello Nicole,
No measurements needed- just pour the liquid into even layers and the container is full.
Hope this helps!
Warmly,
Kimberleigh
I am in Saudi Arabia. Is the rubbing alcohol necessary?
Hello Ray,
Great question. You can either skip the layer or find something light to use to replace it.
I hope this helps!
Warmly,
Kimberleigh // Happiness Ambassador
I love your site..thanks…I’m a Montessori Educator and home schooler with children ages 2-9 years in Ontario. Thank you and Happy New Year.
Lisa Beeke
Hello Lisa,
Thanks so much for stopping by and saying, “hello!” We are delighted to have you.
If we can help you find anything, let us know.
Warmly,
Kimberleigh
like this this is very easy
Hooray Ava! I hope that you enjoy this fun and colorful project.
Warmly,
Kimberleigh
Thank you for sharing this science experiment my daughter will be doing rainbow jar for the Science fair on Tuesday, May 22, 2018.
Very nice idea I like it. Now I am trying to make it!
Wonderful!
I hope your students enjoy it!
Warmly,
Ashley // Happiness Ambassador
I am a student not a teacher!!!!!!!
So sorry about that! I hope you enjoy!
Warmly,
Ashley // Happiness Ambassador
Thanks a lot for this easy and attractive observation
You are most welcome! Enjoy!
Warmly,
Ashley // Happiness Ambassador
This is such a cool experiment. Would all the levels return to their original spots if you shook the container? Maybe without the red rubbing alcohol in it.
Hi Kimberly,
Yes, all of the materials should settle back to their original spots if you were to shake it.
Hope you enjoy!
Warmly,
Ashley // Happiness Ambassador
This is so cute! I can’t wait to do it with my 5K kiddos!
Wonderful!
We hope they love it, Ashley!
Warmly,
Ashley // Happiness Ambassador
amazing science activity for all age groups.
Yes! So glad you enjoyed it!
Warmly,
Ashley // Happiness Ambassador
The experiment sounds great but how much of each ingredient is needed?
Hi!
Great question! There’s not a specific amount required for each ingredient. You just want to have enough to see the different layers. The key is pouring each ingredient into the middle of the jar, not letting it slide down the sides. Hope your kids love it!
Warmly,
Ashley // Happiness Ambassador
Can you use vinegar or hydrogen peroxide instead of rubbing alcohol?
Hi Alyssa,
You can try one of those materials, but since it all has to do with the density of materials, I’m not sure if it will work. You may just want to omit that layer.
Hope it turns out well!
Warmly,
Ashley // Happiness Ambassador
Does it have to be olive oil or will any oil work?
Hi Rosemary,
Other oils should work, but it really depends on the density of the oil.
We’ve found success with olive oil, but would love to hear if you used other oil as well.
Warmly,
Ashley // Happiness Ambassador
We used both olive oils and vegetable just to increase our oil layer. It worked well for us. The children loved it. Thank you.
Love it! Thanks for sharing, Candy!
Warmly,
Ashley // Happiness Ambassador
I noticed that you used a clear cup to add the rubbing alcohol with the red food coloring, is this the only item you used a clear cup to add the item in the jar or clear container? I’m assuming because of the use of the honey, corn syrup and dish soap you would just pour straight in, is that correct?
HI Luis,
Great question! The other items do not need to be added using a clear cup, but it is important that they are poured into the middle of the container, rather than the sides.
The rubbing alcohol with the red food coloring was mixed in the clear cup and then added using a dropped along the sides of the cup so as not to break the layer of oil.
Hope it turns out great!
Warmly,
Ashley // Happiness Ambassador
Why do you add the ingredients to the middle. What will happen if I add it to the side of the jar
Great question!
By adding it to the middle, rather than the sides (other than the alcohol layer), the layers are less likely to mix.
Hope that helps!
Warmly,
Ashley // Happiness Ambassador
These are absolutely amazing!!
Can you use vegetable oil in place of olive oil?
Sorry just read old comments section and found the answer to my question.
I love a rainbow in a jar it’s really creative and fun
Thank you for sharing such a nice and interesting blog. They are really awesome blog post.
Thanks for the best blog. it was very useful for me. keep sharing such ideas in the future as well.
I am glad that I saw this post. It is informative blog for us and we need this type of blog thanks for share this blog.
Quan es barreja i es deixa reposar ,que igual que quan s’ha elaborat O queden els colors tots mesclats?
On aconseguim el xarop de blat de moro?
Hi Rita,
As you’re assembling the layers of the liquids, you should slowly pour them in to the jar to create the layers. As long as the jar is not disturbed, the layers should remain intact. You can find corn syrup near the baking supplies in grocery stores!
Warmly,
Sarah // Playdough to Plato Team