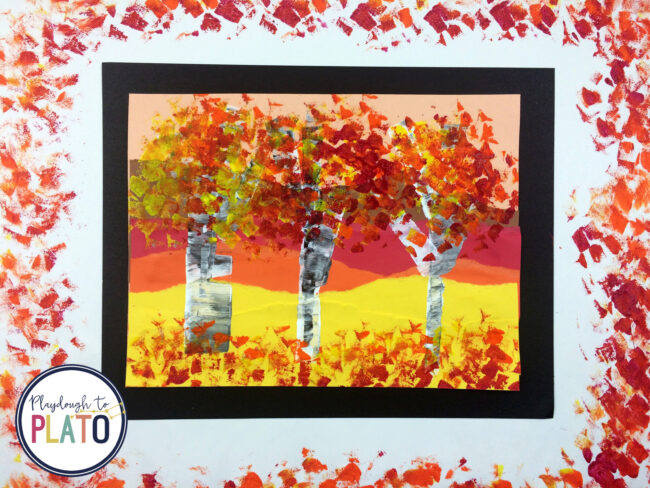
This colorful fall art project reinforces fine motor skills by showing students how to create a layered landscape using torn paper. Isn’t it gorgeous?!
This post contains an Amazon affiliate link.

Getting Ready
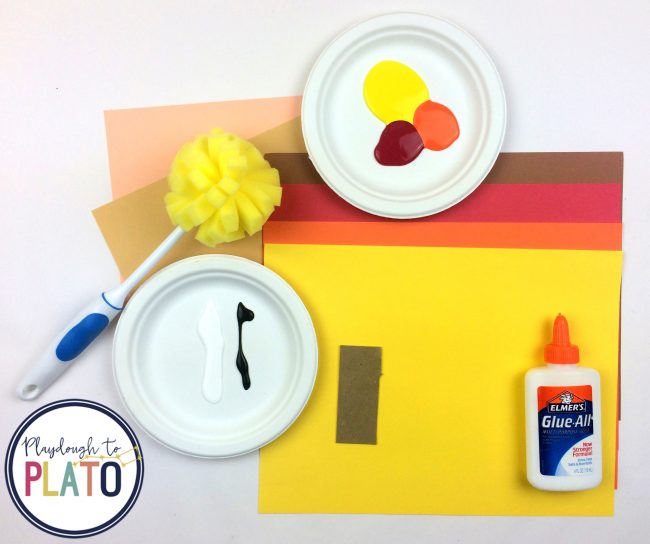
To get the art project ready, I gathered supplies for each student:
- One 9″ x 12″ piece of peach (or tan) construction paper for the background sky
- One 4″ x 12″ piece of yellow, orange, red and brown construction paper for the torn layers
- Glue
- Cardboard scraper (3″ long)
- Small plate of white and black tempera paint
- Small plate of yellow, orange, and red or magenta tempera paint
- Foam dish cleaning sponge with handle, for creating the leaves
Creating the Torn Layers
Before starting the art project, I read “Time to Sleep” by Denise Fleming to help the students get excited about the change of seasons.
Then, I displayed a couple of paintings and photos of landscapes. (A landscape is a picture of the outdoors, usually highlighting hills, rivers, trees and plants.)
I explained to the children that there are different colors in a landscape.
In our layered landscape, the yellow construction paper foreground was brighter and the brown construction paper background was darker. The middle ground was the area that would contain the orange and red torn construction paper.
I had the children begin with one piece of peach construction paper for the background sky.
Then, they tore the other pieces of construction paper into uneven strips. I showed them how to hold the paper flat in a vertical position on the work surface and then, placing one hand on the paper, start tearing at the top and slowly pull towards themselves.
I encouraged them to tear an inch at a time so that they wouldn’t accidentally tear too much into the strip.
The children glued the brown strip down first, about 3 inches (or 3 finger widths) from the top of the background paper.
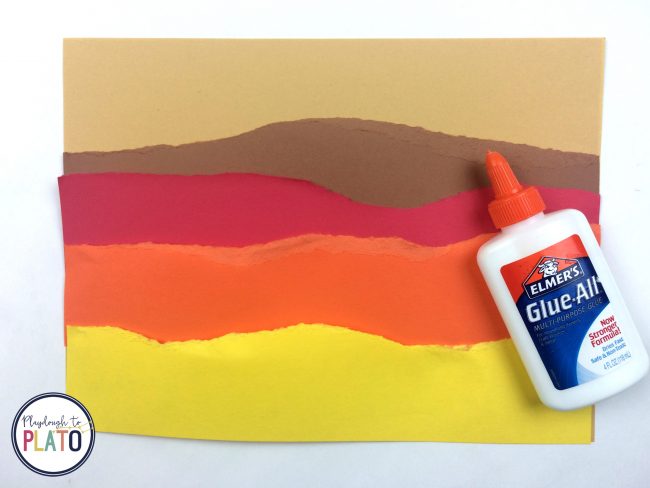
Next, I demonstrated how to overlap and then glue the red strip on top of the brown strip to make a middle ground.
Children used the same steps to tear and glue the orange and yellow papers in place.
Creating the Trees
After the layers were secure, it was time to create the tree trunks on our art project!
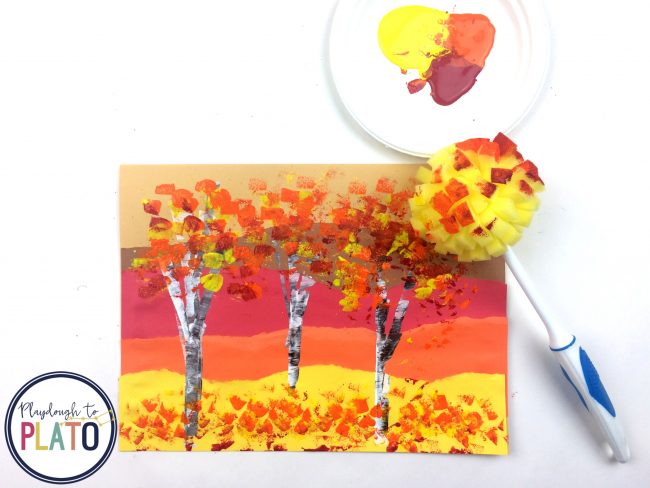
Students dipped the longer edge of the cardboard scraper into white tempera paint and then into black tempera paint.
They placed the scraper vertically on the layered strips and drug about one inch across to create tree trunks.
Children continued creating more trunks and adding branches – re-dipping the scraper in the paint as needed.
I had students make at least three trees on their papers – one small tree to represent the tree in the background, another medium-sized tree to represent the tree in the middle ground and a larger tree to represent the tree in the foreground.
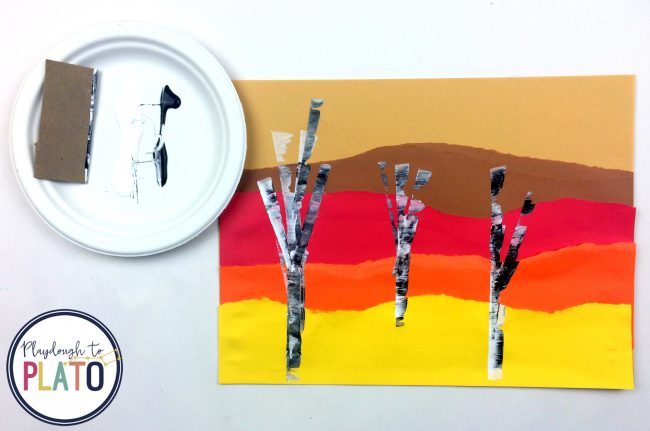
Once the trees dried, kids dipped the handled sponge in the yellow, orange and red tempera paint and gently tapped the sponge on the tops of the trees to create leaves.
Several students decided to tap their sponge at the bottom of their paper too to make fallen leaves.
The result was spectacular!
Students loved exploring with paint while creating a beautiful piece of landscape art.
Teaching is one of the hardest jobs out there, and it’s easy to feel like your efforts go unnoticed. But here’s the truth: what you’re doing matters, and we see you. The Science of Reading Formula is here to make your job easier and remind you of the incredible impact you’re making every single day. Let’s celebrate your wins and tackle those challenges together.