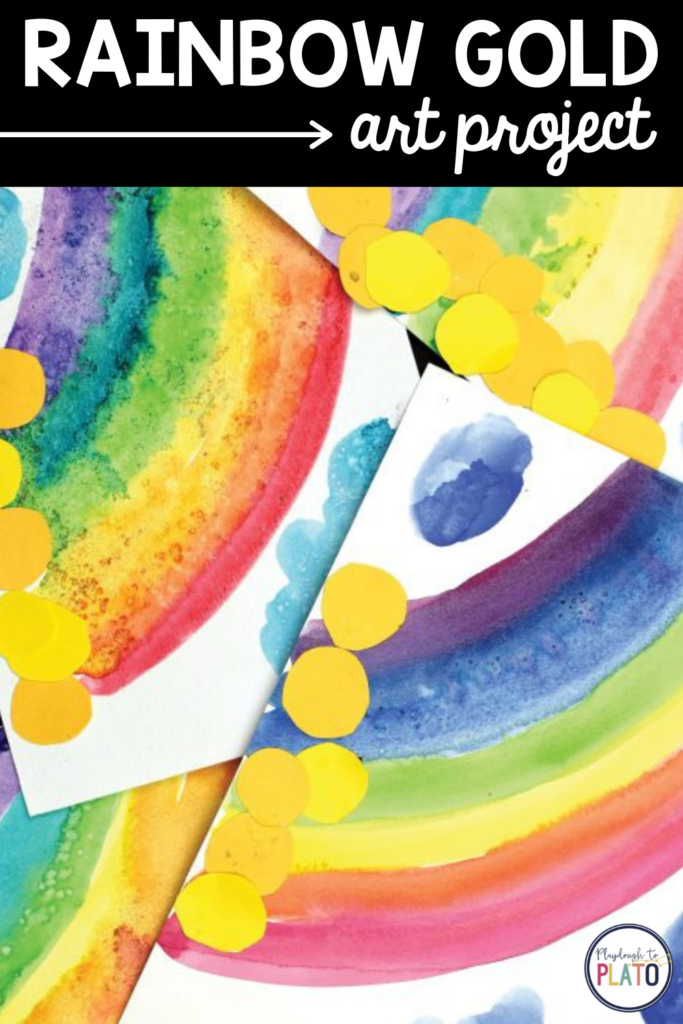
This rainbow art project is perfect for introducing rainbow order plus combines literacy with art when paired with the book What Makes a Rainbow? Magic Ribbon Book by Betty Ann Schwartz. The ribbons in the book make the rainbow. This book shows great examples of color with the different objects through out the book.
Getting Ready
To start this beautiful rainbow art, I gathered supplies for each student:
- One 7 x 9-inch piece of watercolor paper for the background
- Tray of Watercolors
- Paint brush
- Water container
- Course Table Salt
- Glue Sponges (glue stick)
- Scissors
- Yellow Construction Paper
- Optional: What Makes a Rainbow? Magic Ribbon Book by Betty Ann Schwartz
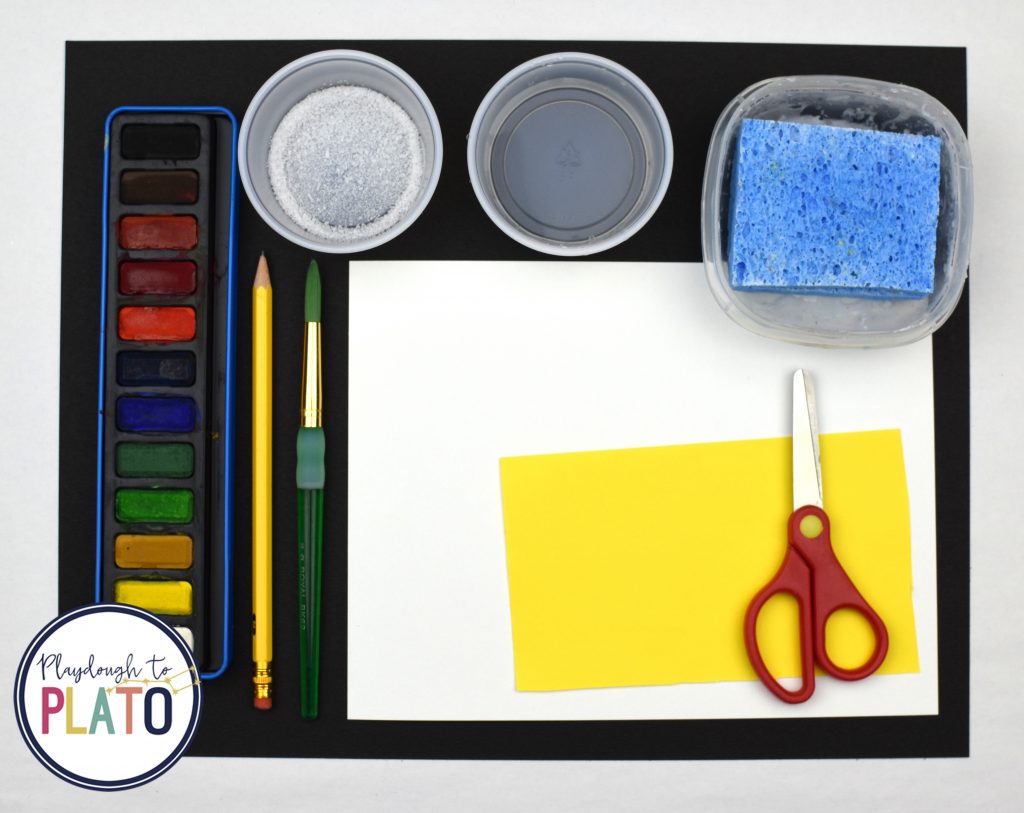
Tip: Using watercolor paper is the key to a bleeding effect on the paper. Make sure to apply the course table salt not regular salt to paper for a fun science project and a beautiful piece of art.
Introducing the Rainbow
I wanted to get the children thinking about the colors of the rainbow and their placement, so I decided to start the lesson by pulling out the adorable book What Makes a Rainbow? Magic Ribbon Book by Betty Ann Schwartz. and reading it aloud.
Talking about the different colors helped get the kids’ creative ideas flowing.
Then it was time to paint!
Creating Rainbow Art
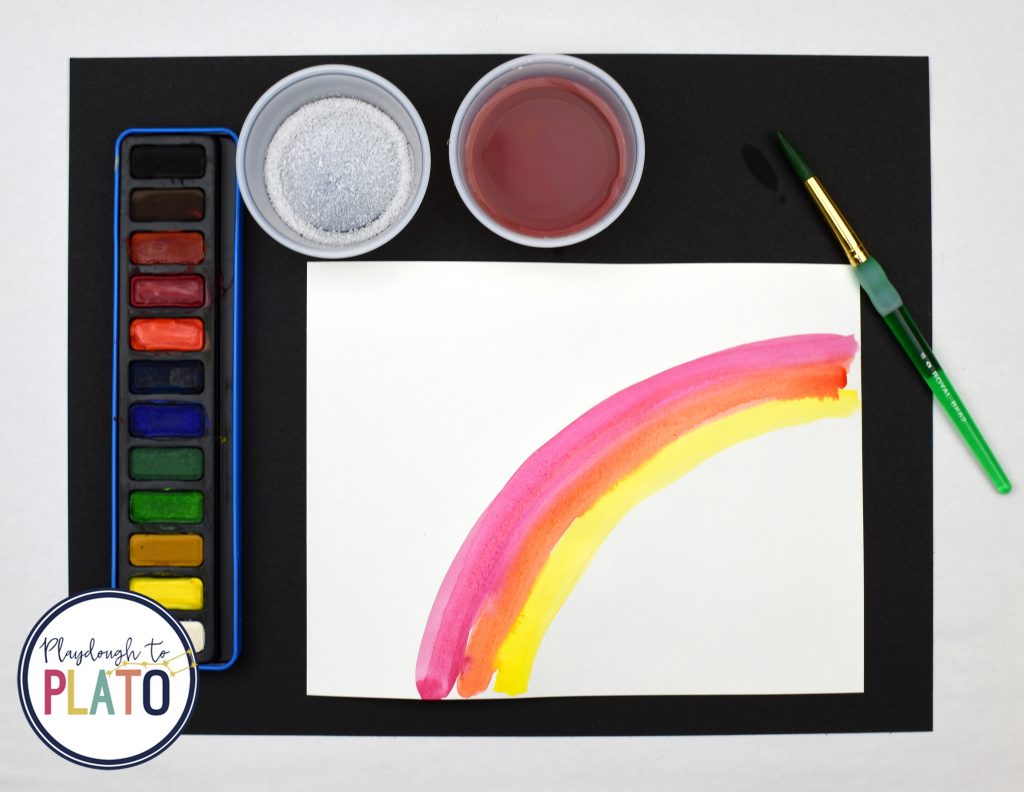
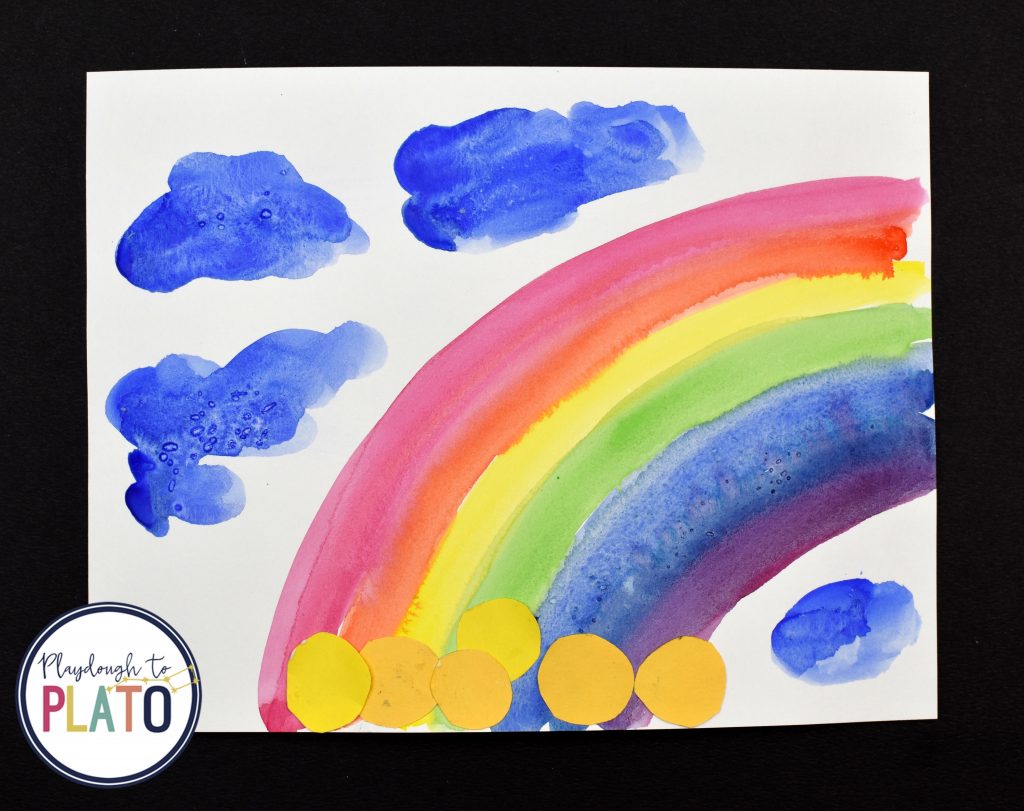
First, I had the children choose one piece of water color paper to start painting.
Each student painted a curved yellow line from the upper right corner of their piece of 7 x 9 watercolor paper to the bottom center of the paper. Next, they painted orange, followed by red. Every time they used the paint tray have them clean their paint brush in the water container, then apply the wet brush into the next color.
After the red, students cleaned their brush in the water container and proceeded to use green, blue and purple paint on the other side of the yellow line of paint.
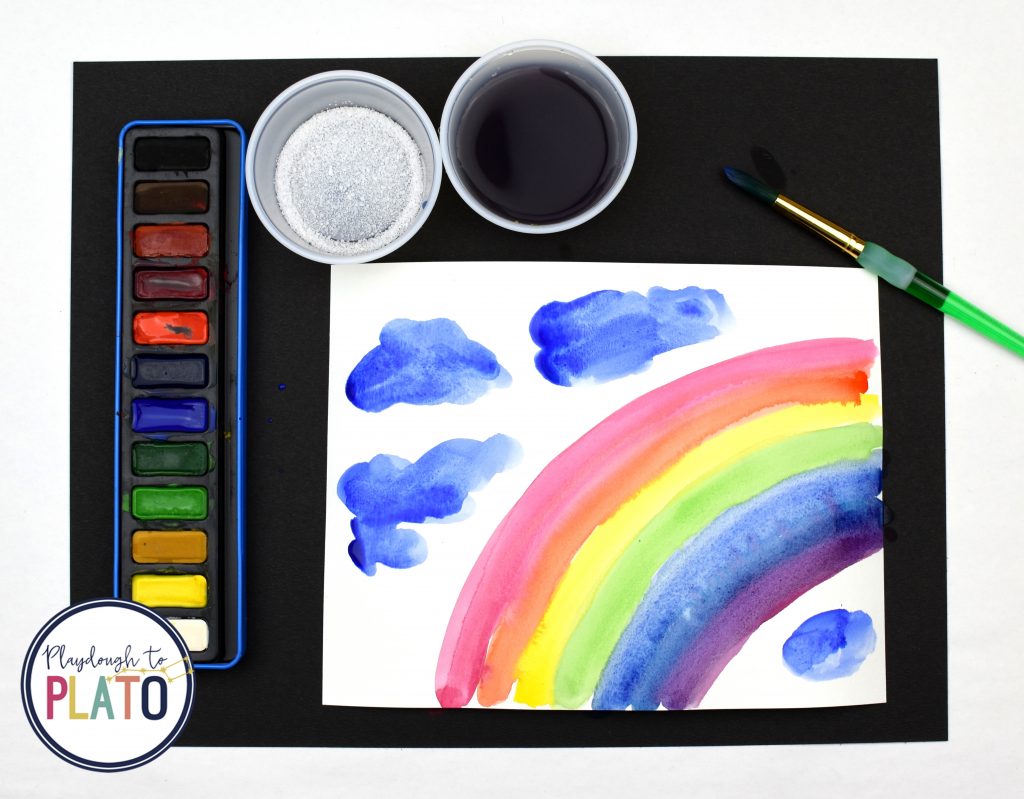
Once all the colors were applied, I encouraged them to create small clouds in the sky.
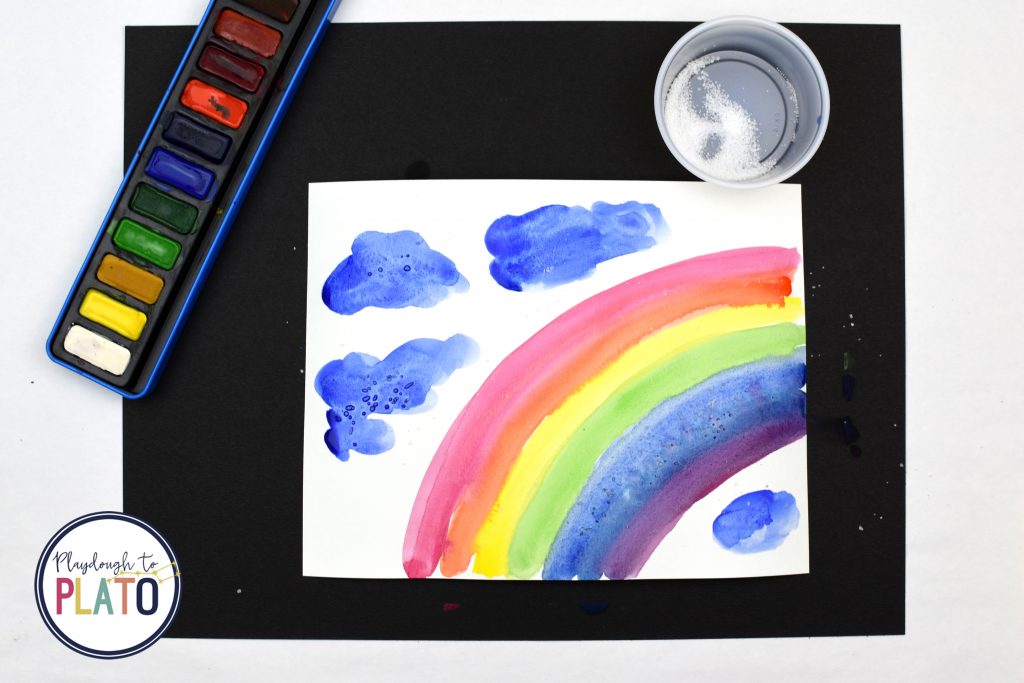
Adding the Salt
Once the rainbow and clouds were painted, students immediately sprinkled course table salt on top of the wet watercolor. The salt absorbs the colorful paint and leave white marks on the watercolor paper. This simple trick will sure to delight your students. It does every time with mine. Let Dry. Brush off salt over garbage can once paper is completely dry.
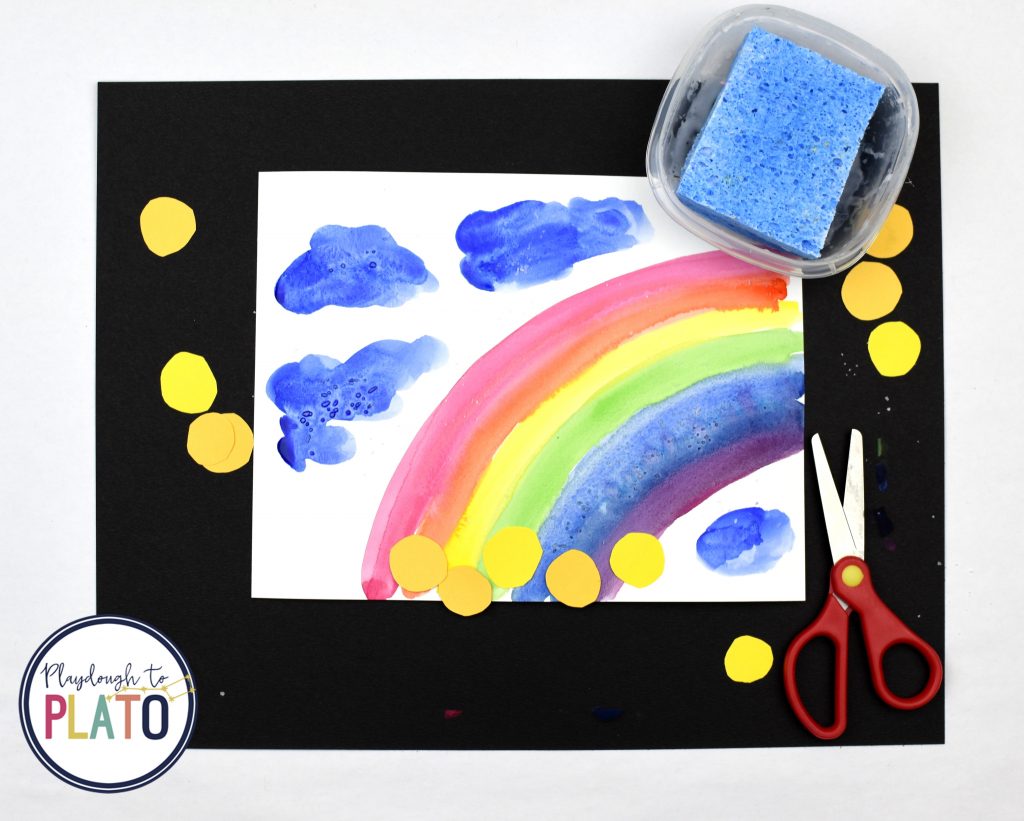
Adding Gold Coins
For a fun twist have students add yellow construction paper at the bottom of the rainbow to represent the gold coins. Cut out small circles of yellow construction paper and glue down.
It was so fun to see all of the beautiful rainbows the kids created.
The end result of this rainbow art was visually stunning!
Teaching is one of the hardest jobs out there, and it’s easy to feel like your efforts go unnoticed. But here’s the truth: what you’re doing matters, and we see you. The Science of Reading Formula is here to make your job easier and remind you of the incredible impact you’re making every single day. Let’s celebrate your wins and tackle those challenges together.