Wondering how to make a worm bin? We’ve got you covered. Our homemade worm bins are a simple backyard kids’ science project with a major cool factor.
Your kids will love this squiggly project! And speaking of projects, check out our awesome 30 Science Experiments in our shop that your kids will beg to repeat!
This post contains Amazon affiliate links for worm books.

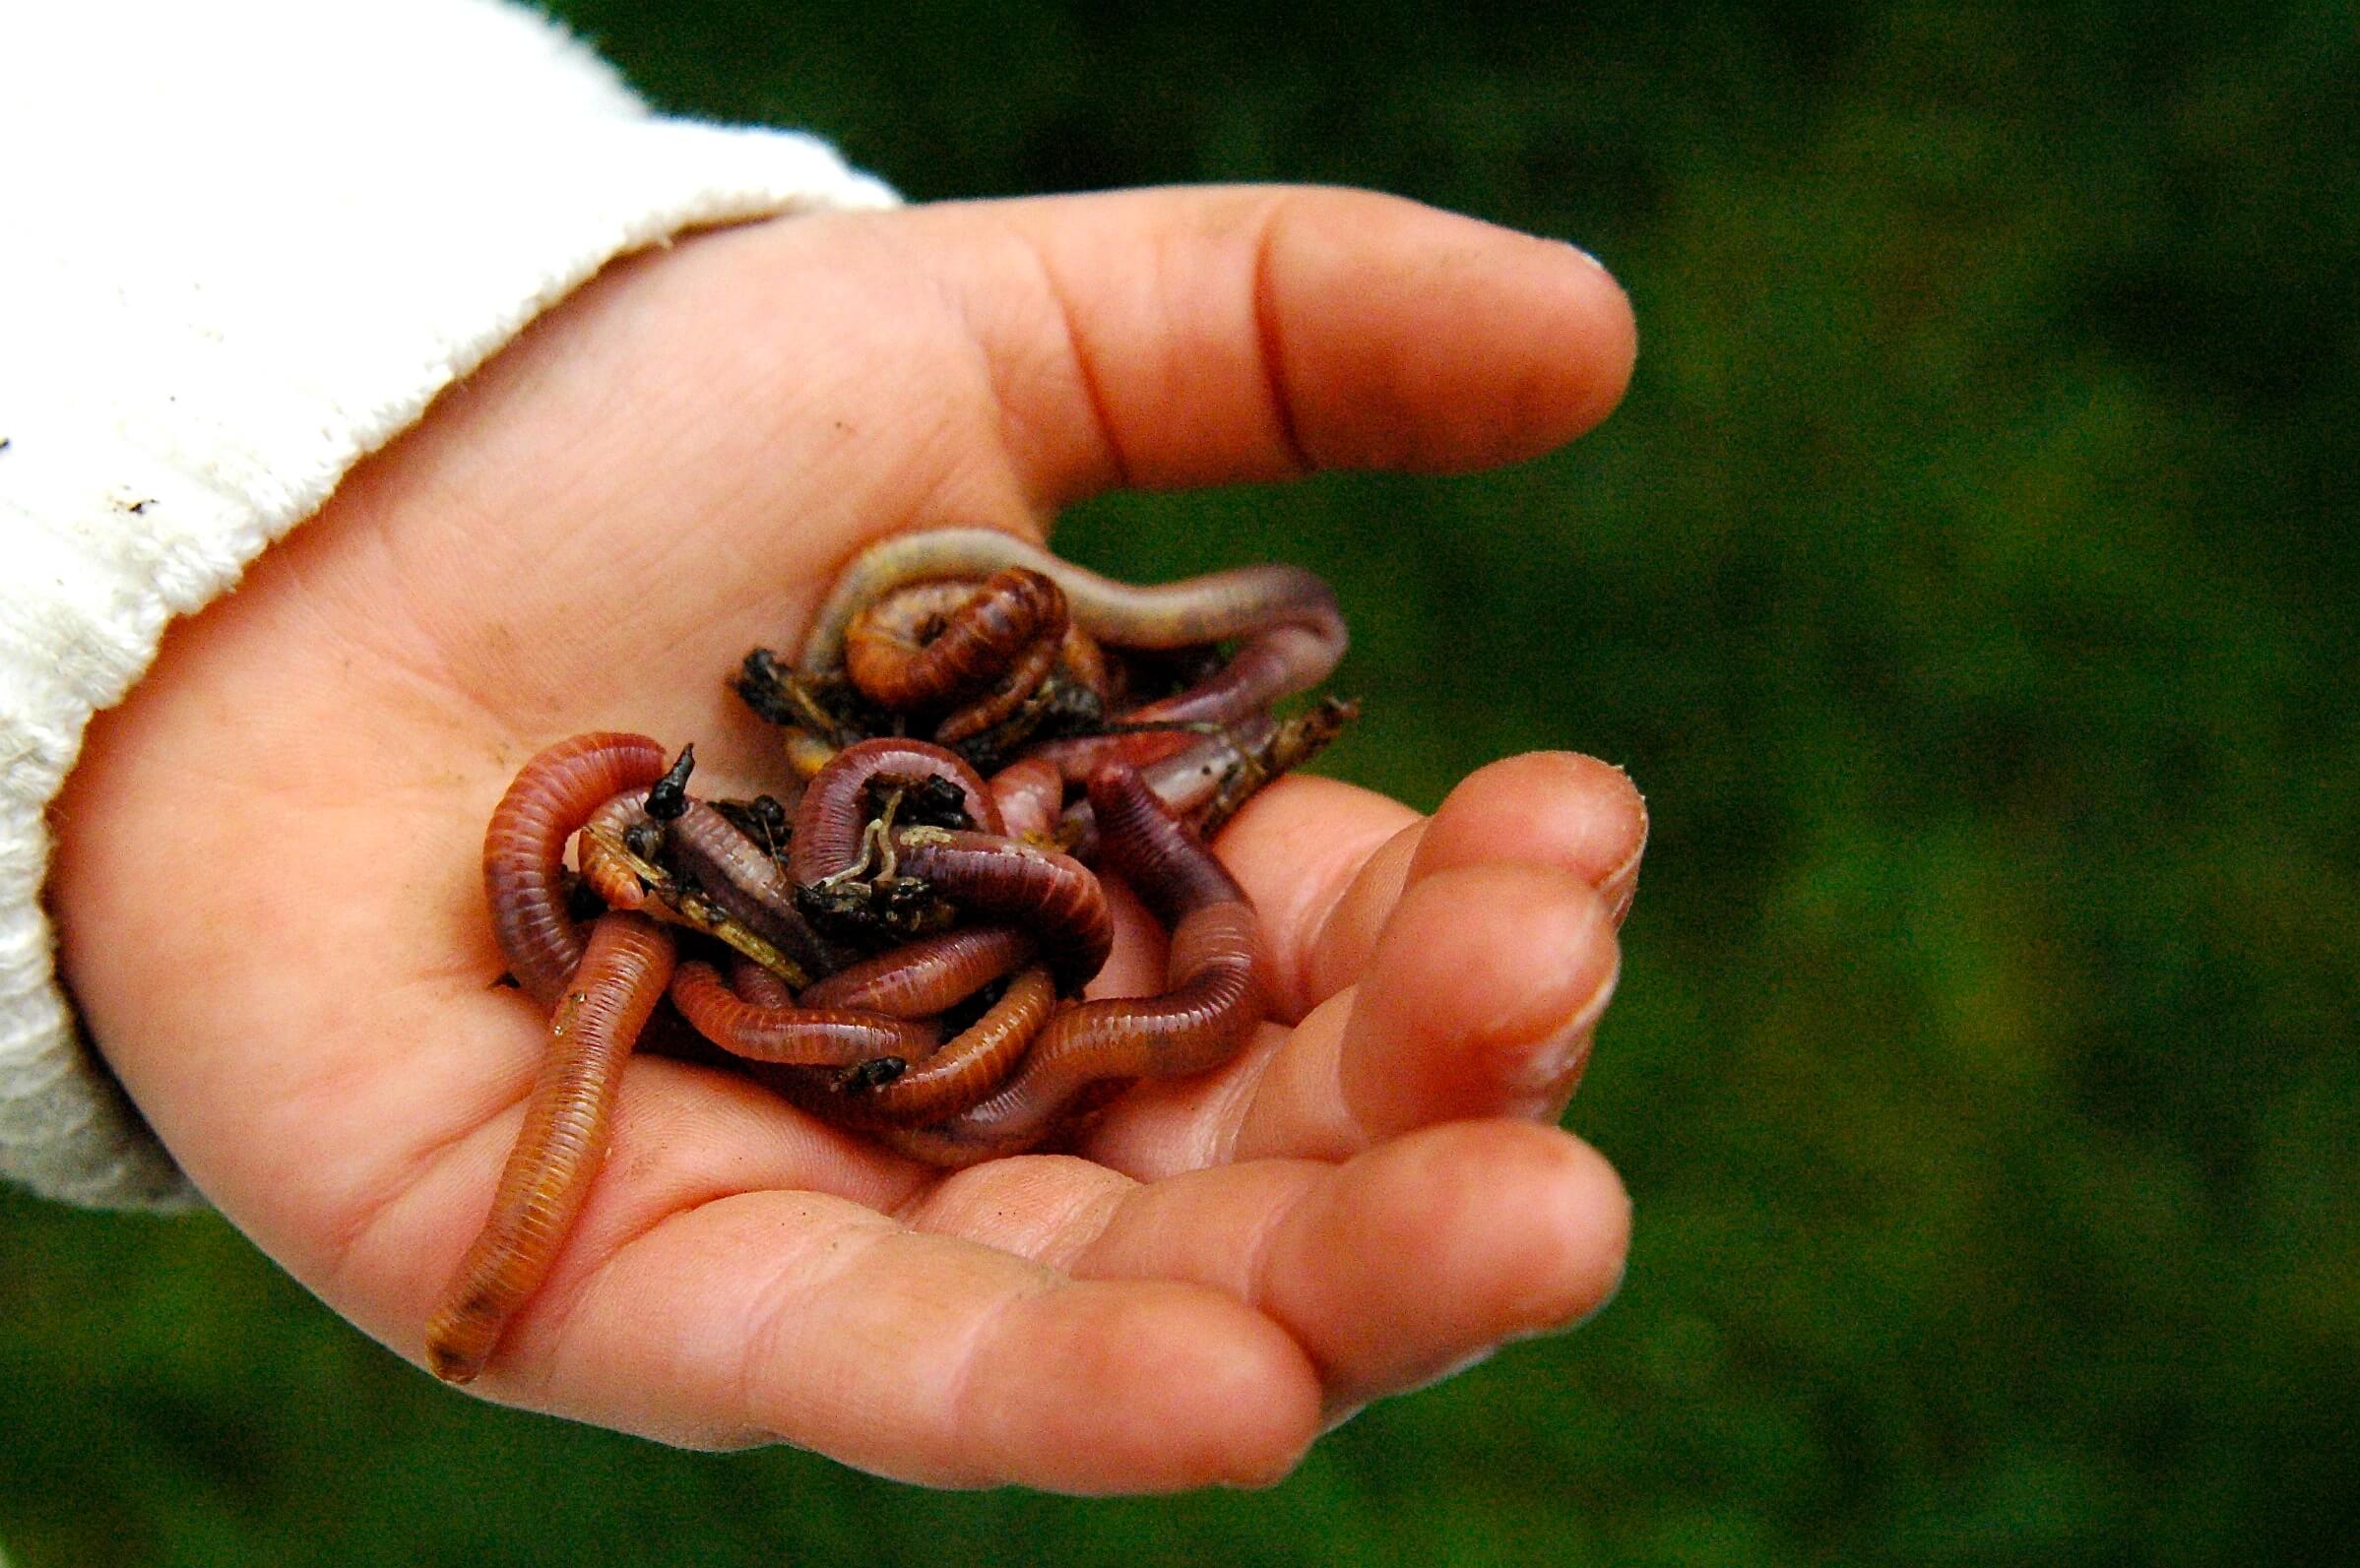
It seems any spare moment our family has we’ve been spending it digging in the garden. With all that digging, we’ve unearthed more than our fair share of those marvelous wiggly little earthworms. My 4 year-old loves reading about our slimy subterranean friends, so we decided to really see what worms do by building a worm bin.
I wanted a simple, cheap, under-the-sink bin to introduce vermicomposting (or composting using worms) to the kids. With just a few supplies, a tub of red wigglers, the leftovers from lunch and a little less than an hour we had our own worm farm right under our kitchen sink.
Getting Ready
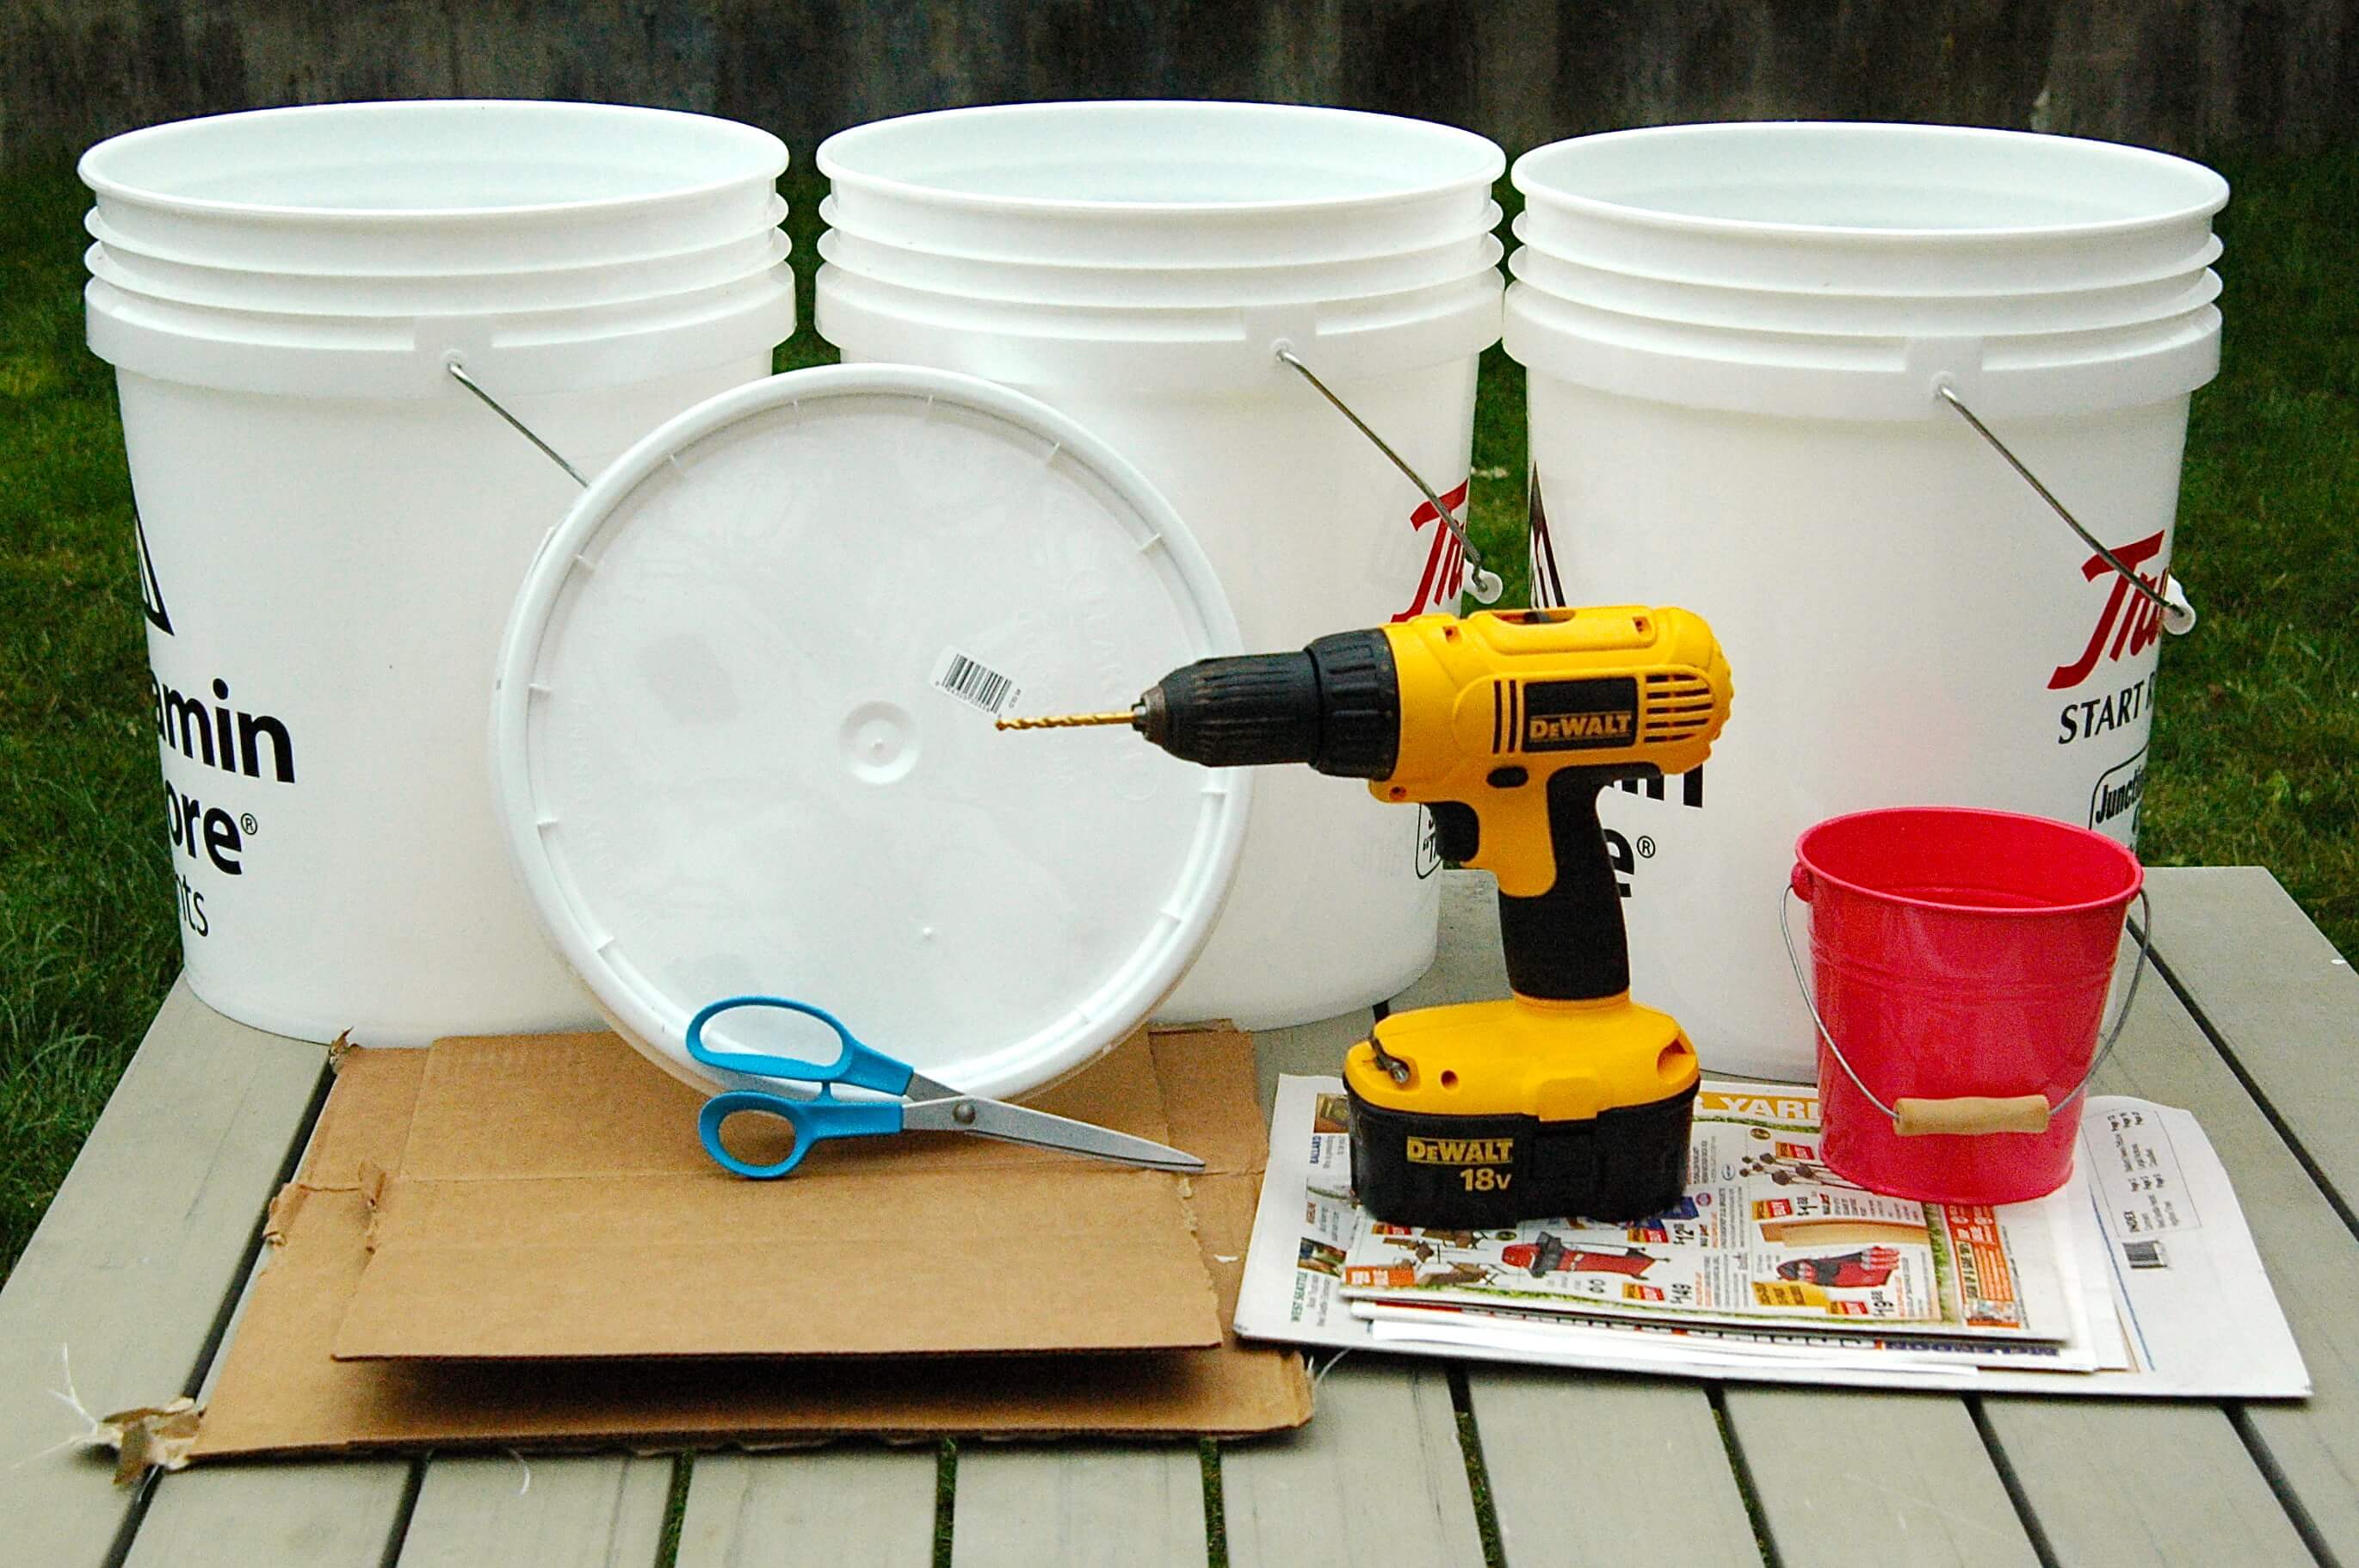
To make our worm bin, we first gathered a few supplies:
- Three 5 gallon buckets (available at most hardware stores)
- One 5 gallon bucket lid
- Newspaper
- Cardboard
- Bowl/bucket of water {not shown, used to wet newspaper}
- Scissors
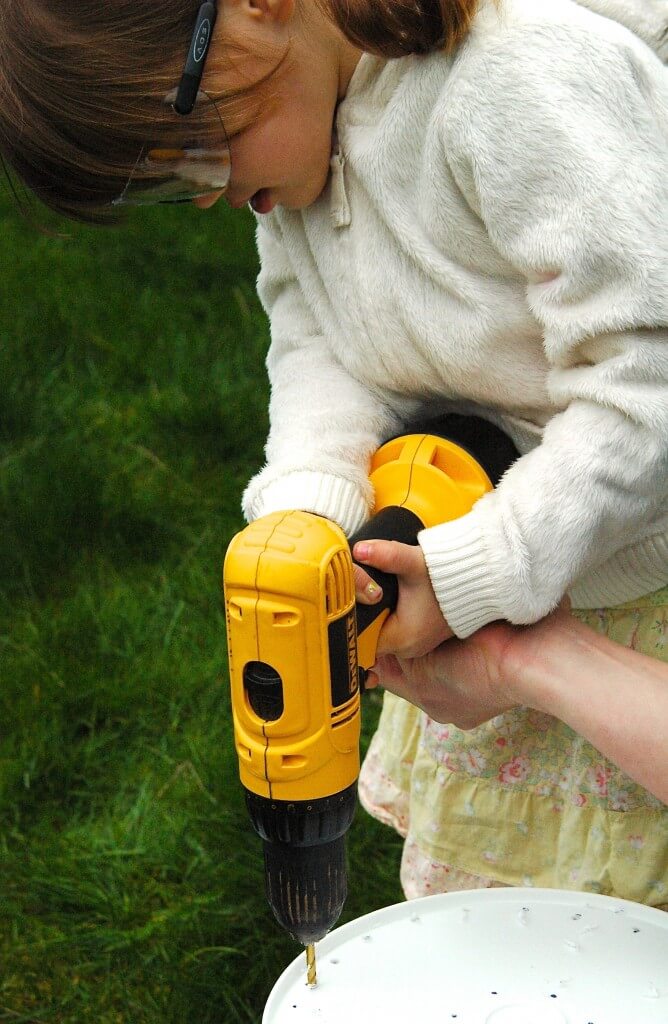
- Drill with a 3/8″ and 1/8″ bit
- Safety glasses {especially if a child will be drilling}
- 1/3 pound of red worms (available at some feed stores or online)
First, we took two of the buckets and drilled a bunch of 3/8 inch holes in the bottom, about an inch apart. My daughter, A, was a bit nervous about using a drill at first but then quickly learned how much fun power tools can be!
We DID NOT drill holes in the third bucket. This bucket will catch any moisture, known as compost tea, from the other buckets and prevent any damage to the cabinets. If you do get any compost tea, save it to use in your garden.
Next, we drilled a line of 1/8 inch holes near the top of each bucket and around the lid. These holes provide air flow to the worms and prevent the bins from becoming too wet. Keeping the holes on the small side helps keep pests like fruit flies from getting into your bin.

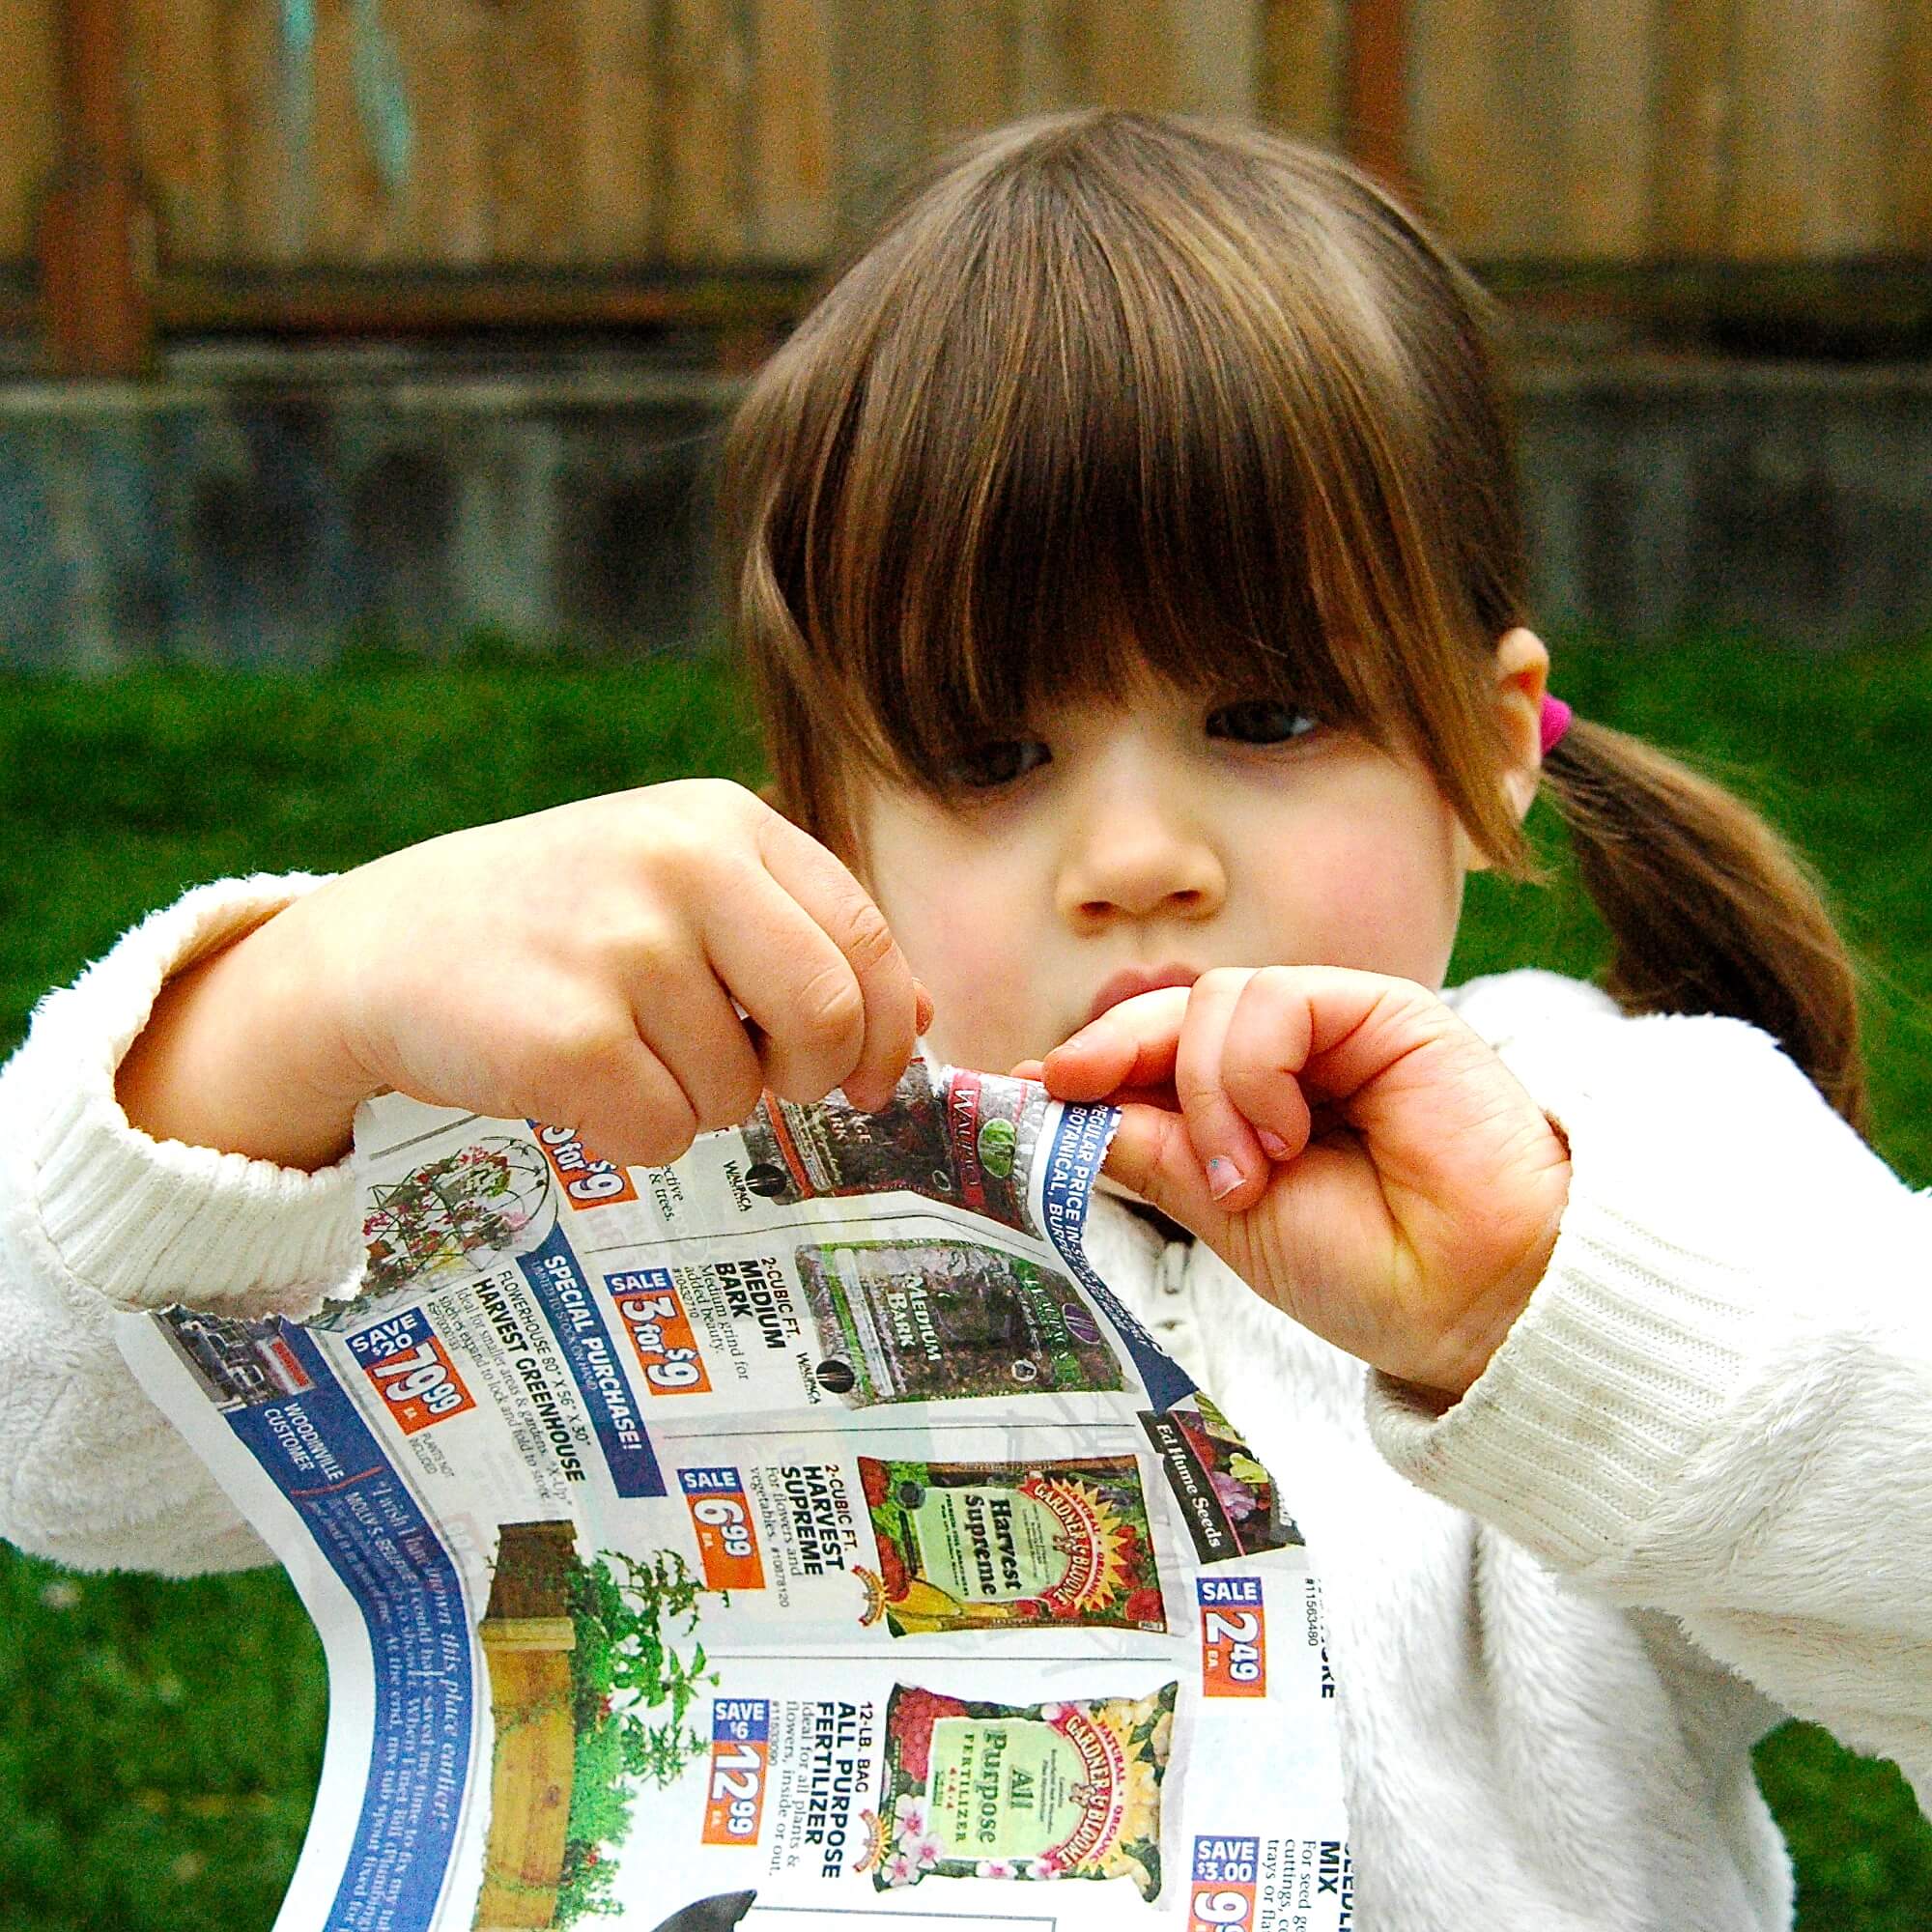
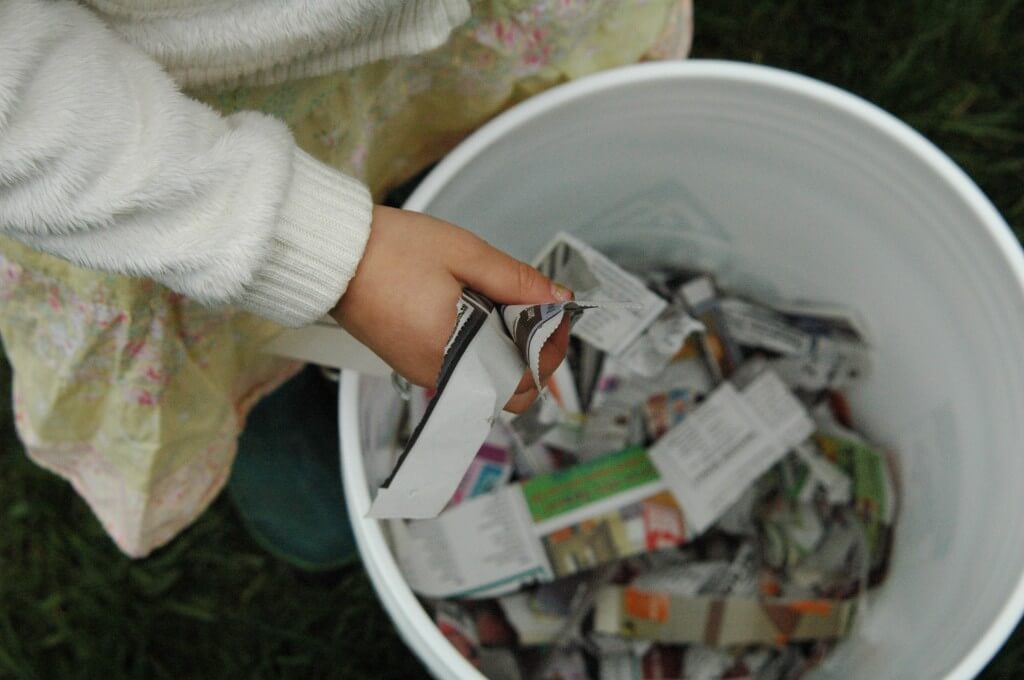
We stacked the buckets, making sure the one without holes was on the bottom and moved on to preparing the worms bedding. I grabbed a stack of newspaper and invited both kids over to help shred the paper into strips. Shredding paper is a great workout for the kids’ pincer grasp so I just let them shred till the entire stack was gone. The cardboard was a little tougher so I helped them shred the cardboard into 2-3 inch pieces.
While they shredded the paper, I took a piece of cardboard and traced a circle using the bucket as a guide. I cut it out and made sure it fit snugly in the bucket. This circle would be placed on top of the worms and the food scraps to help prevent flies or other pests from getting into our bin.
(In case you’re unsure about having worms under your sink, I should mention that we’ve had our bin for 2 months now and even though we have fruit flies in our fruit bowl we have had no pests or odor coming from our worm bin.)
Once the kids finished shredding, they added the newspaper to the bucket a few inches at a time, stopping to moisten the paper with the hose. The paper should be about as wet as a wrung out sponge. They repeated this until there was about 4 inches of moistened paper and cardboard bits.
“Can I add the food now?” A eagerly asked as she danced around with a bucket full of table scraps.

Worms can eat most food scraps but should never be fed meat, dairy or fatty foods. It’s been fun to peek in the bin to see what foods the worms prefer and thus break down quickly (non-citrus fruit, cucumbers, breads/pasta, coffee grinds, leafy greens) and what they don’t (potato skins, onion, avocado peel and citrus).
Finally, the fun part came, adding the worms. My kids were practically fighting over who got to dump the worms into the bucket. We got our worms from our local feed co-op and they came with a fair amount of the original bedding and vermicompost. You actually want this, as it can introduce baby worms and worm eggs, as well as other beneficial microorganisms that can help jump start the composting process.
After the kids watched the worms wiggle out of the light, we added another couple inches of moist bedding on top of the food and lowered the cardboard circle on top. (The extra layer of bedding on top of the food and worms helps prevent smells and pests.)
Finally, we added the lid and let the worms get to work.
Using the Worm Bin
Since this is a small scale worm bin, we didn’t want to add all of our kitchen scraps and overload the worms. We placed a small clean bucket on the dining table so the kids could put their food scraps in it after each meal. At the end of the day, we open the bin and gently push the top layer of bedding aside to add the food. We add the food just next to the previous day’s pile, usually getting about 4 days of scraps in a single layer before having to dump scraps on top of the older layer.
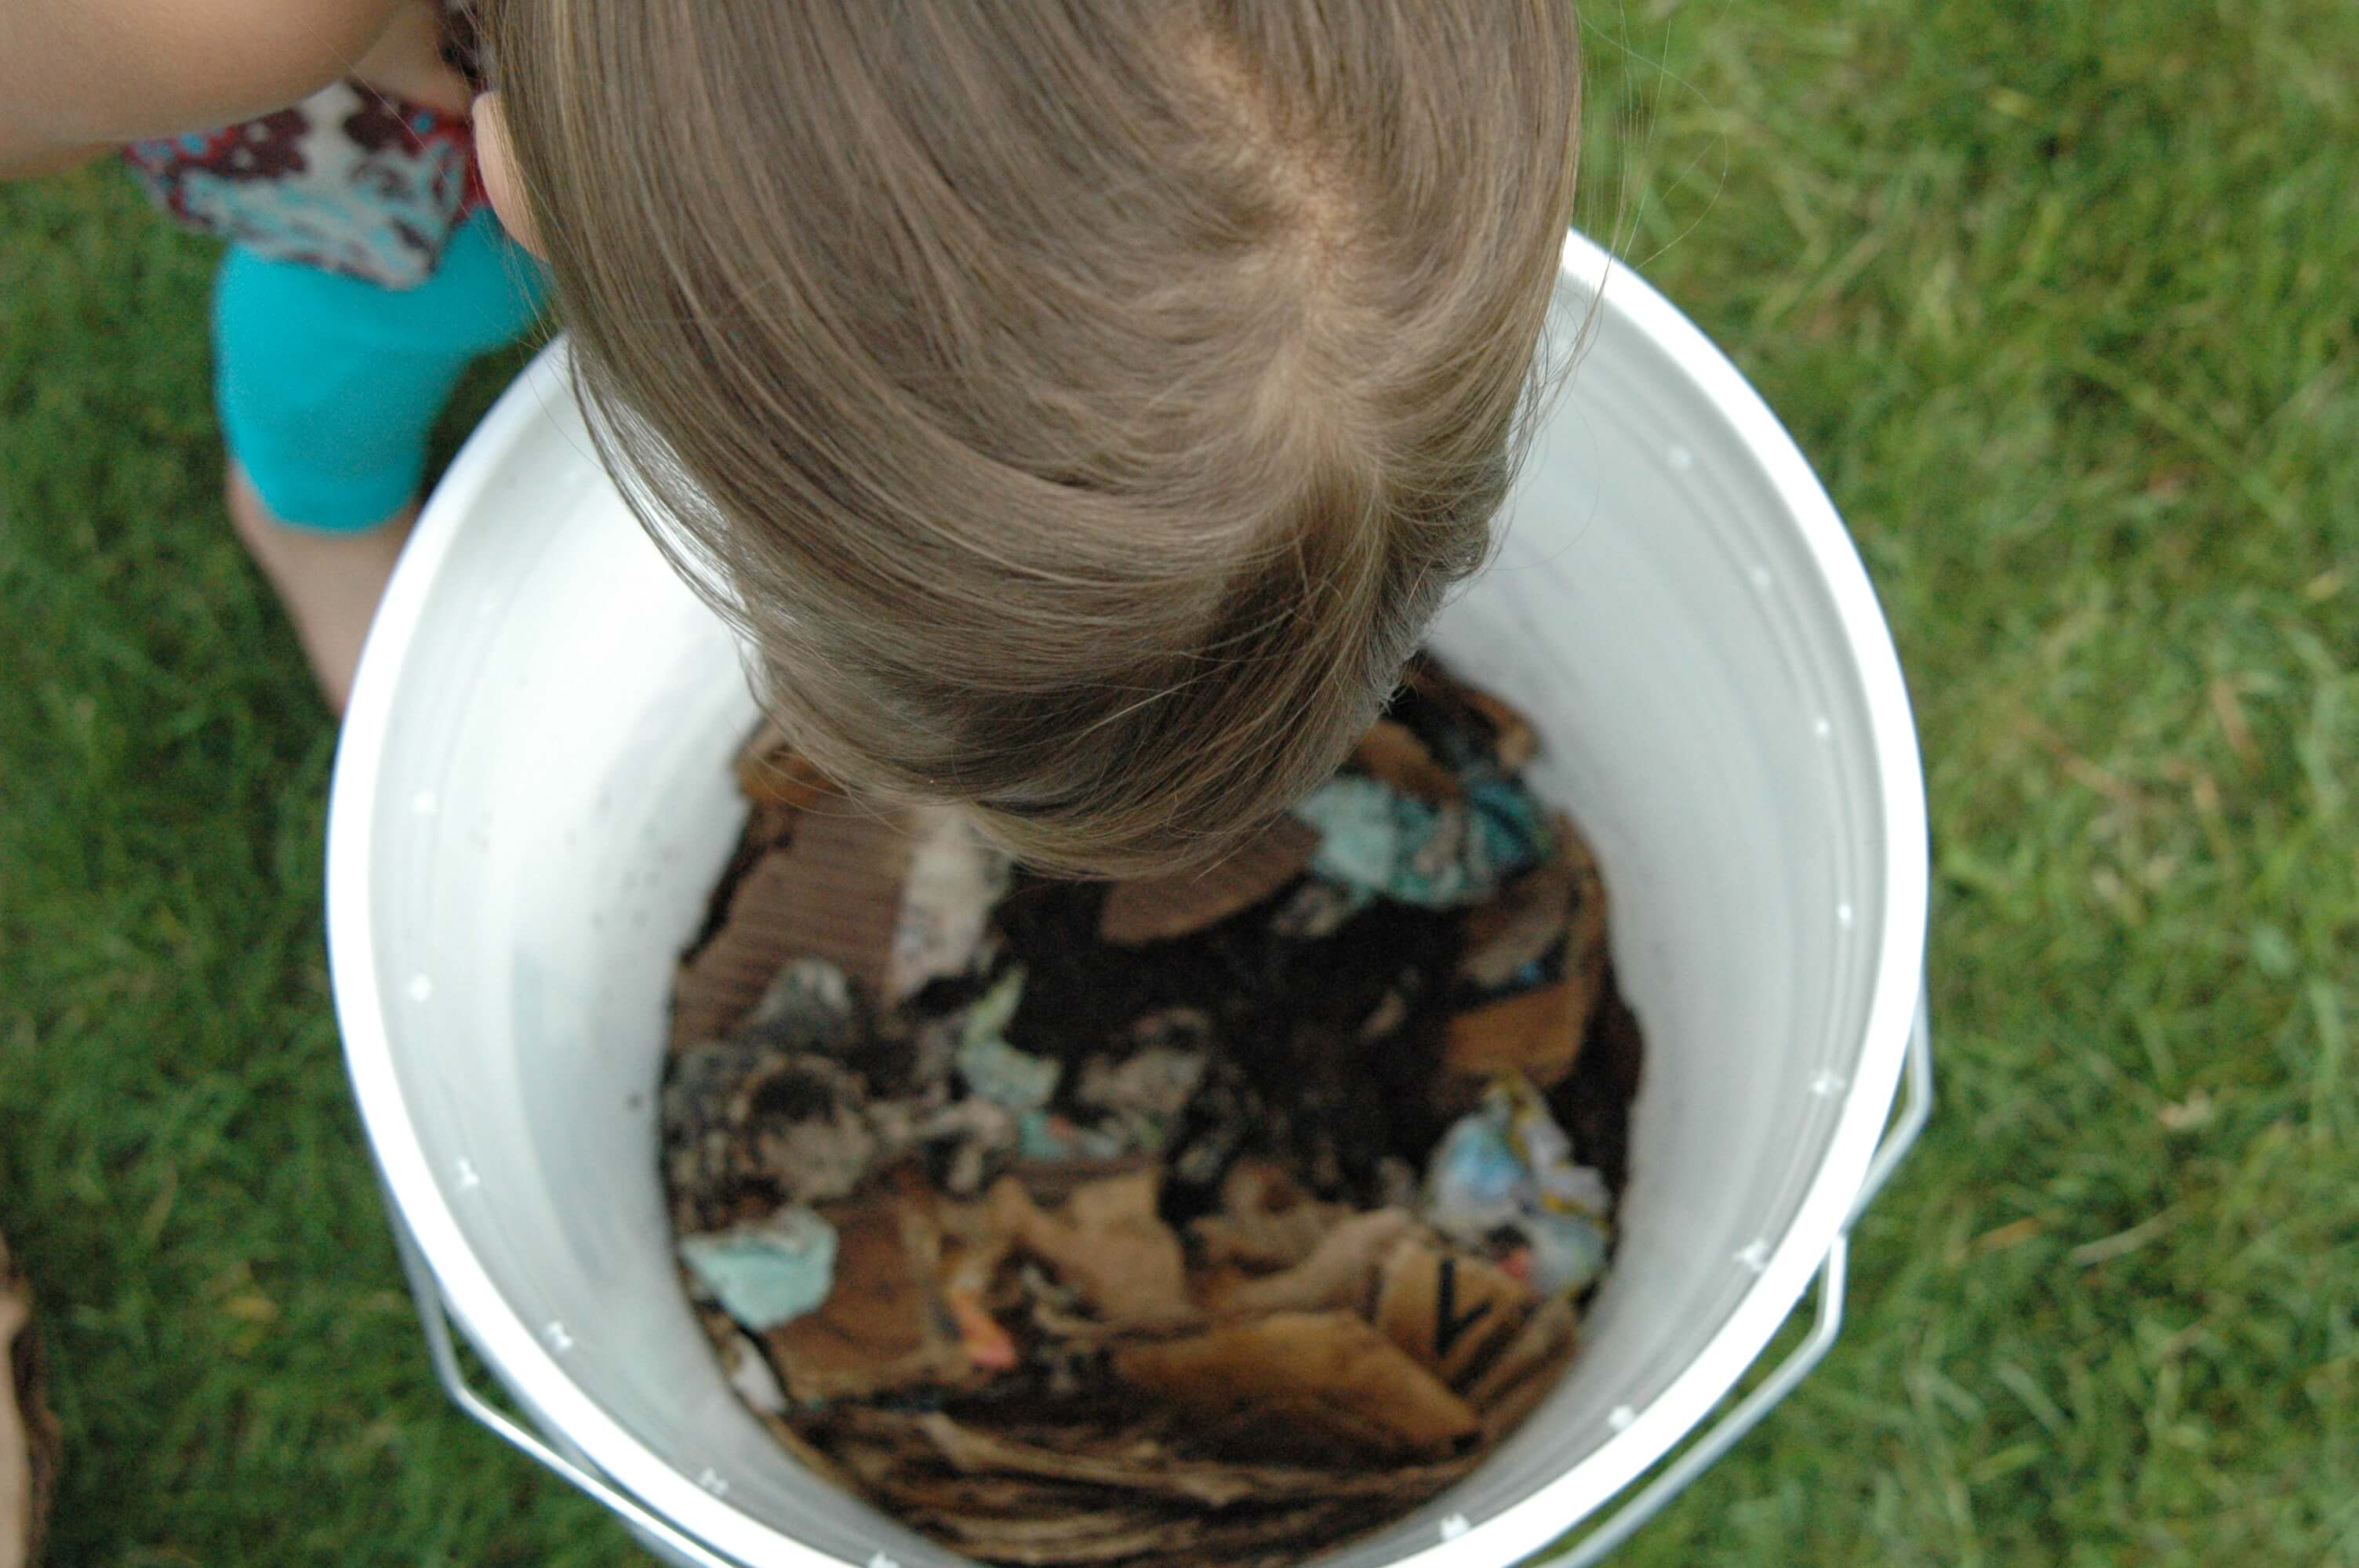
The kids both love checking on and feeding the worms. We noticed a small amount of vermicompost, or worm poop, in just a couple days. Other than misting the bedding every couple weeks so that the worms don’t dry out, the bin has been extremely low maintenance. After a month the whole bottom layer had become a mass of what we like to call “black gold”.

In addition to a ton of new worms, we had a lot of cocoons, each containing as many as 20 eggs!

Now that the contents of this first layer are pretty broken down, we will start adding fresh bedding and food to the second bucket and place it on top of the first bucket. The worms should start migrating up to the top bucket for fresh food. We’ll give the worms a few weeks to move to the new layer before harvesting the first layer for our garden.
The Science Behind It
The worms eat and digest organic matter. Organic matter is anything that is alive or was made from something that was alive (animal or plant). Apple cores, cotton socks, a wooden toy, hair clippings, egg shells are all organic matter and can all be digested by worms and microorganisms in the soil.
Organic matter in the soil begins to be broken down by a host of microorganisms. Worms then eat the decaying matter and soil. The soil and microorganisms mix together in the worms gut and further break down the organic matter, which is then excreted as castings or manure. The worm castings are held together in a sheath that holds the digested organic matter together and provides a slow release fertilizer that does wonders for plants!
Worm Books for Kids
The more we have learned about worms the more fascinating they have become. Some of our favorite books on the subject are:
Yucky Worms by Vivian French
Wiggling Worms by Wendy Pfeffer
Compost, By Gosh by Michelle Eva Portman
Compost Stew by Mary McKenna Siddals
There is also ton of info about vermicomposting with kids online if you are looking for additional information about worms, caring for your worms or troubleshooting. I hope this cheap and simple worm bin will inspire you to start your own mini worm farm in your home!
P.S.
For more hands-on science fun, check out some awesome science in our 30 Science Experiments – including a no prep journal to keep track of results!

What a terrific hands-on project for introducing kids to the fascinating work that worms do… and what a lovely surprise to find my COMPOST STEW listed among your favorite books on the subject! Thanks so much for including it, Malia, and Happy Worm Farming!
What about the chemicals in inks and in recycled paper?
That’s a great question! The newspaper publisher in our area uses soy based ink for both the black and colored ink so our newsprint is ok for the worms. Many US publishers now use soy based ink, but if you are unsure you can always call the publisher to double check. Otherwise, you can use plain cardboard, dried leaves, or or straw for bedding.
How about the recycles papers?
I believe that the liquid drainage from a worm bin is called leachate. It needs further processing to become worm tea. However, that further processing may just be allowing it to age. I am just now learning the terminology associated with vermicomposting. I really liked the instructions as well as the pictures that went along with the written words. It makes it so much easier to understand.
Hi Donna,
Thanks for the insight. So glad you enjoyed the post, and that the pictures helped!
Warmly,
Ashley // Happiness Ambassador
Do you have a picture of how to set the new bucket on the old one to get the worms to move up.
I’m very confused about adding the second bucket for them
To migrate..what
Exactly do you mean by that? How are They moving into the second bucket?
Love this fun project! How many worms did you start with in this set up?
How often can you add scraps?
Thanks so much
Hi Helena!
We started with 1/3 pound of worms from a local feed store. You can add the scraps daily if you’d like, but if you notice them building up you can take a few days off. I hope you have so much fun trying this out!
Warmly,
Sarah // Playdough to Plato Team