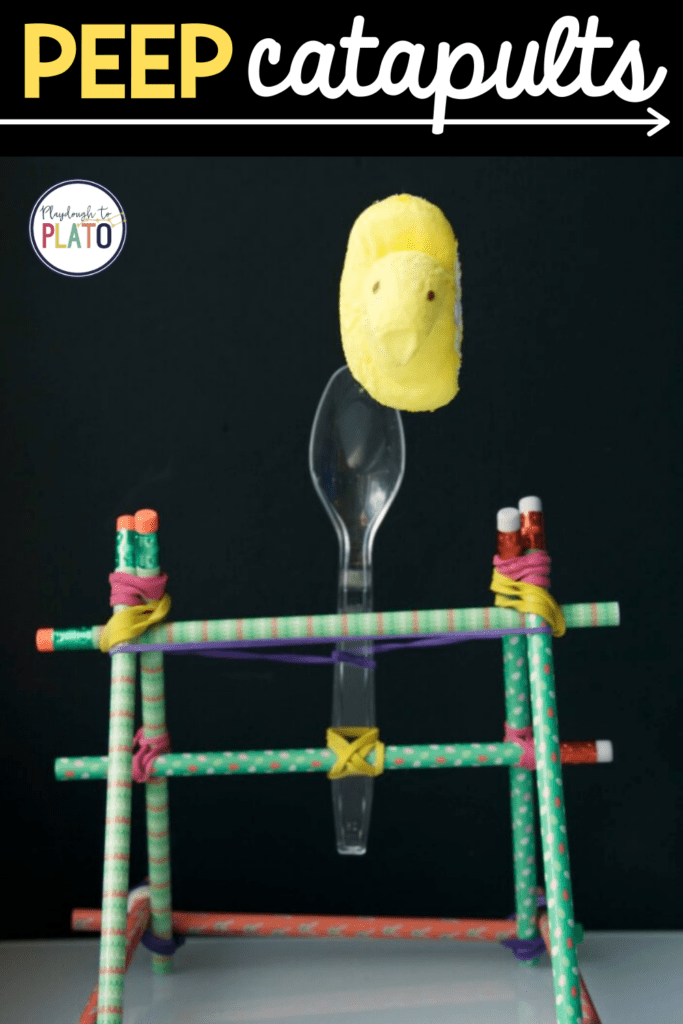
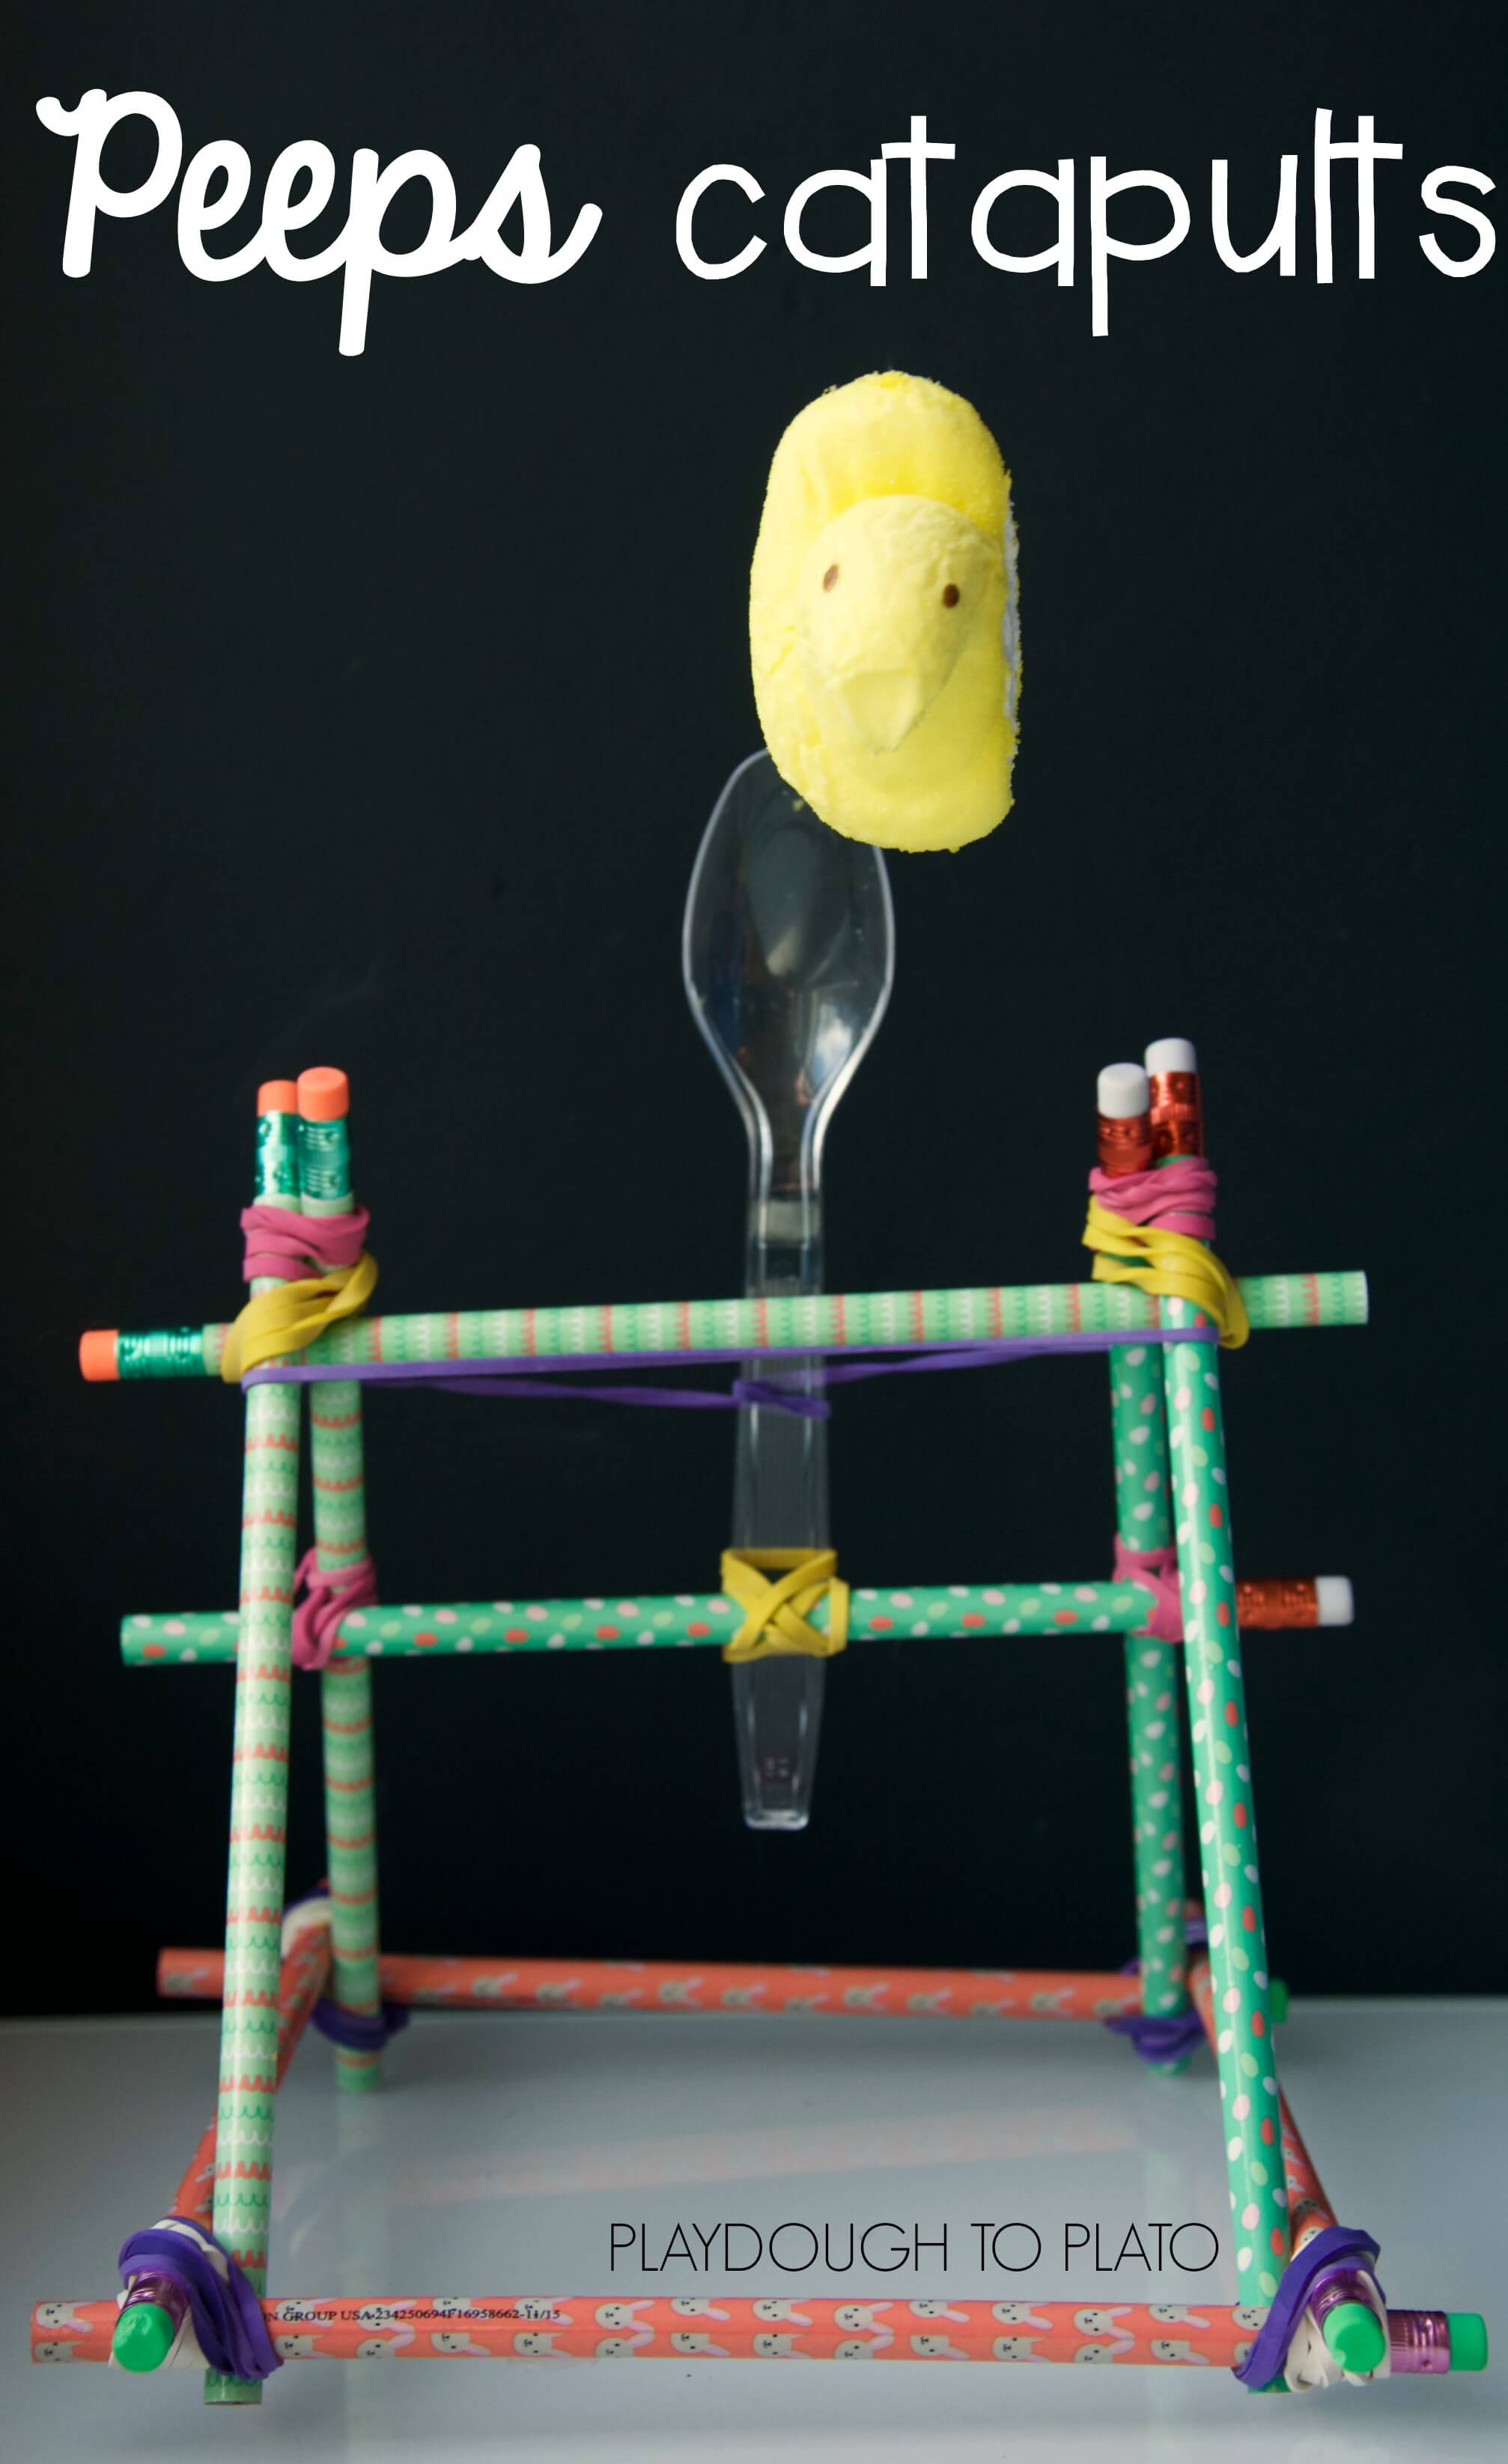
Get ready for some Peep catapults! My kiddos were so busy laughing at this STEM activity that they didn’t realize they were learning engineering, physics and math, too.
Follow the simple step-by-step below and then grab 30 more easy-to-follow science experiments kids will beg to repeat (plus a no prep science journal to keep track of their results!) in our shop!
Getting Ready
For this STEM activity, I gathered a few supplies we already had around the house:
- 10 pencils
- 16 rubber bands
- A spoon
- Peeps (any small item like jelly beans, gum drops or pennies will work too)
- Ruler or measuring tape {optional, used to measure how far the projectile launched)
STEM Activity: Building the Catapult
The type of catapult we made is called a mangonel and ours used tension from a stretched rubber band to hurl the Peeps across the room.
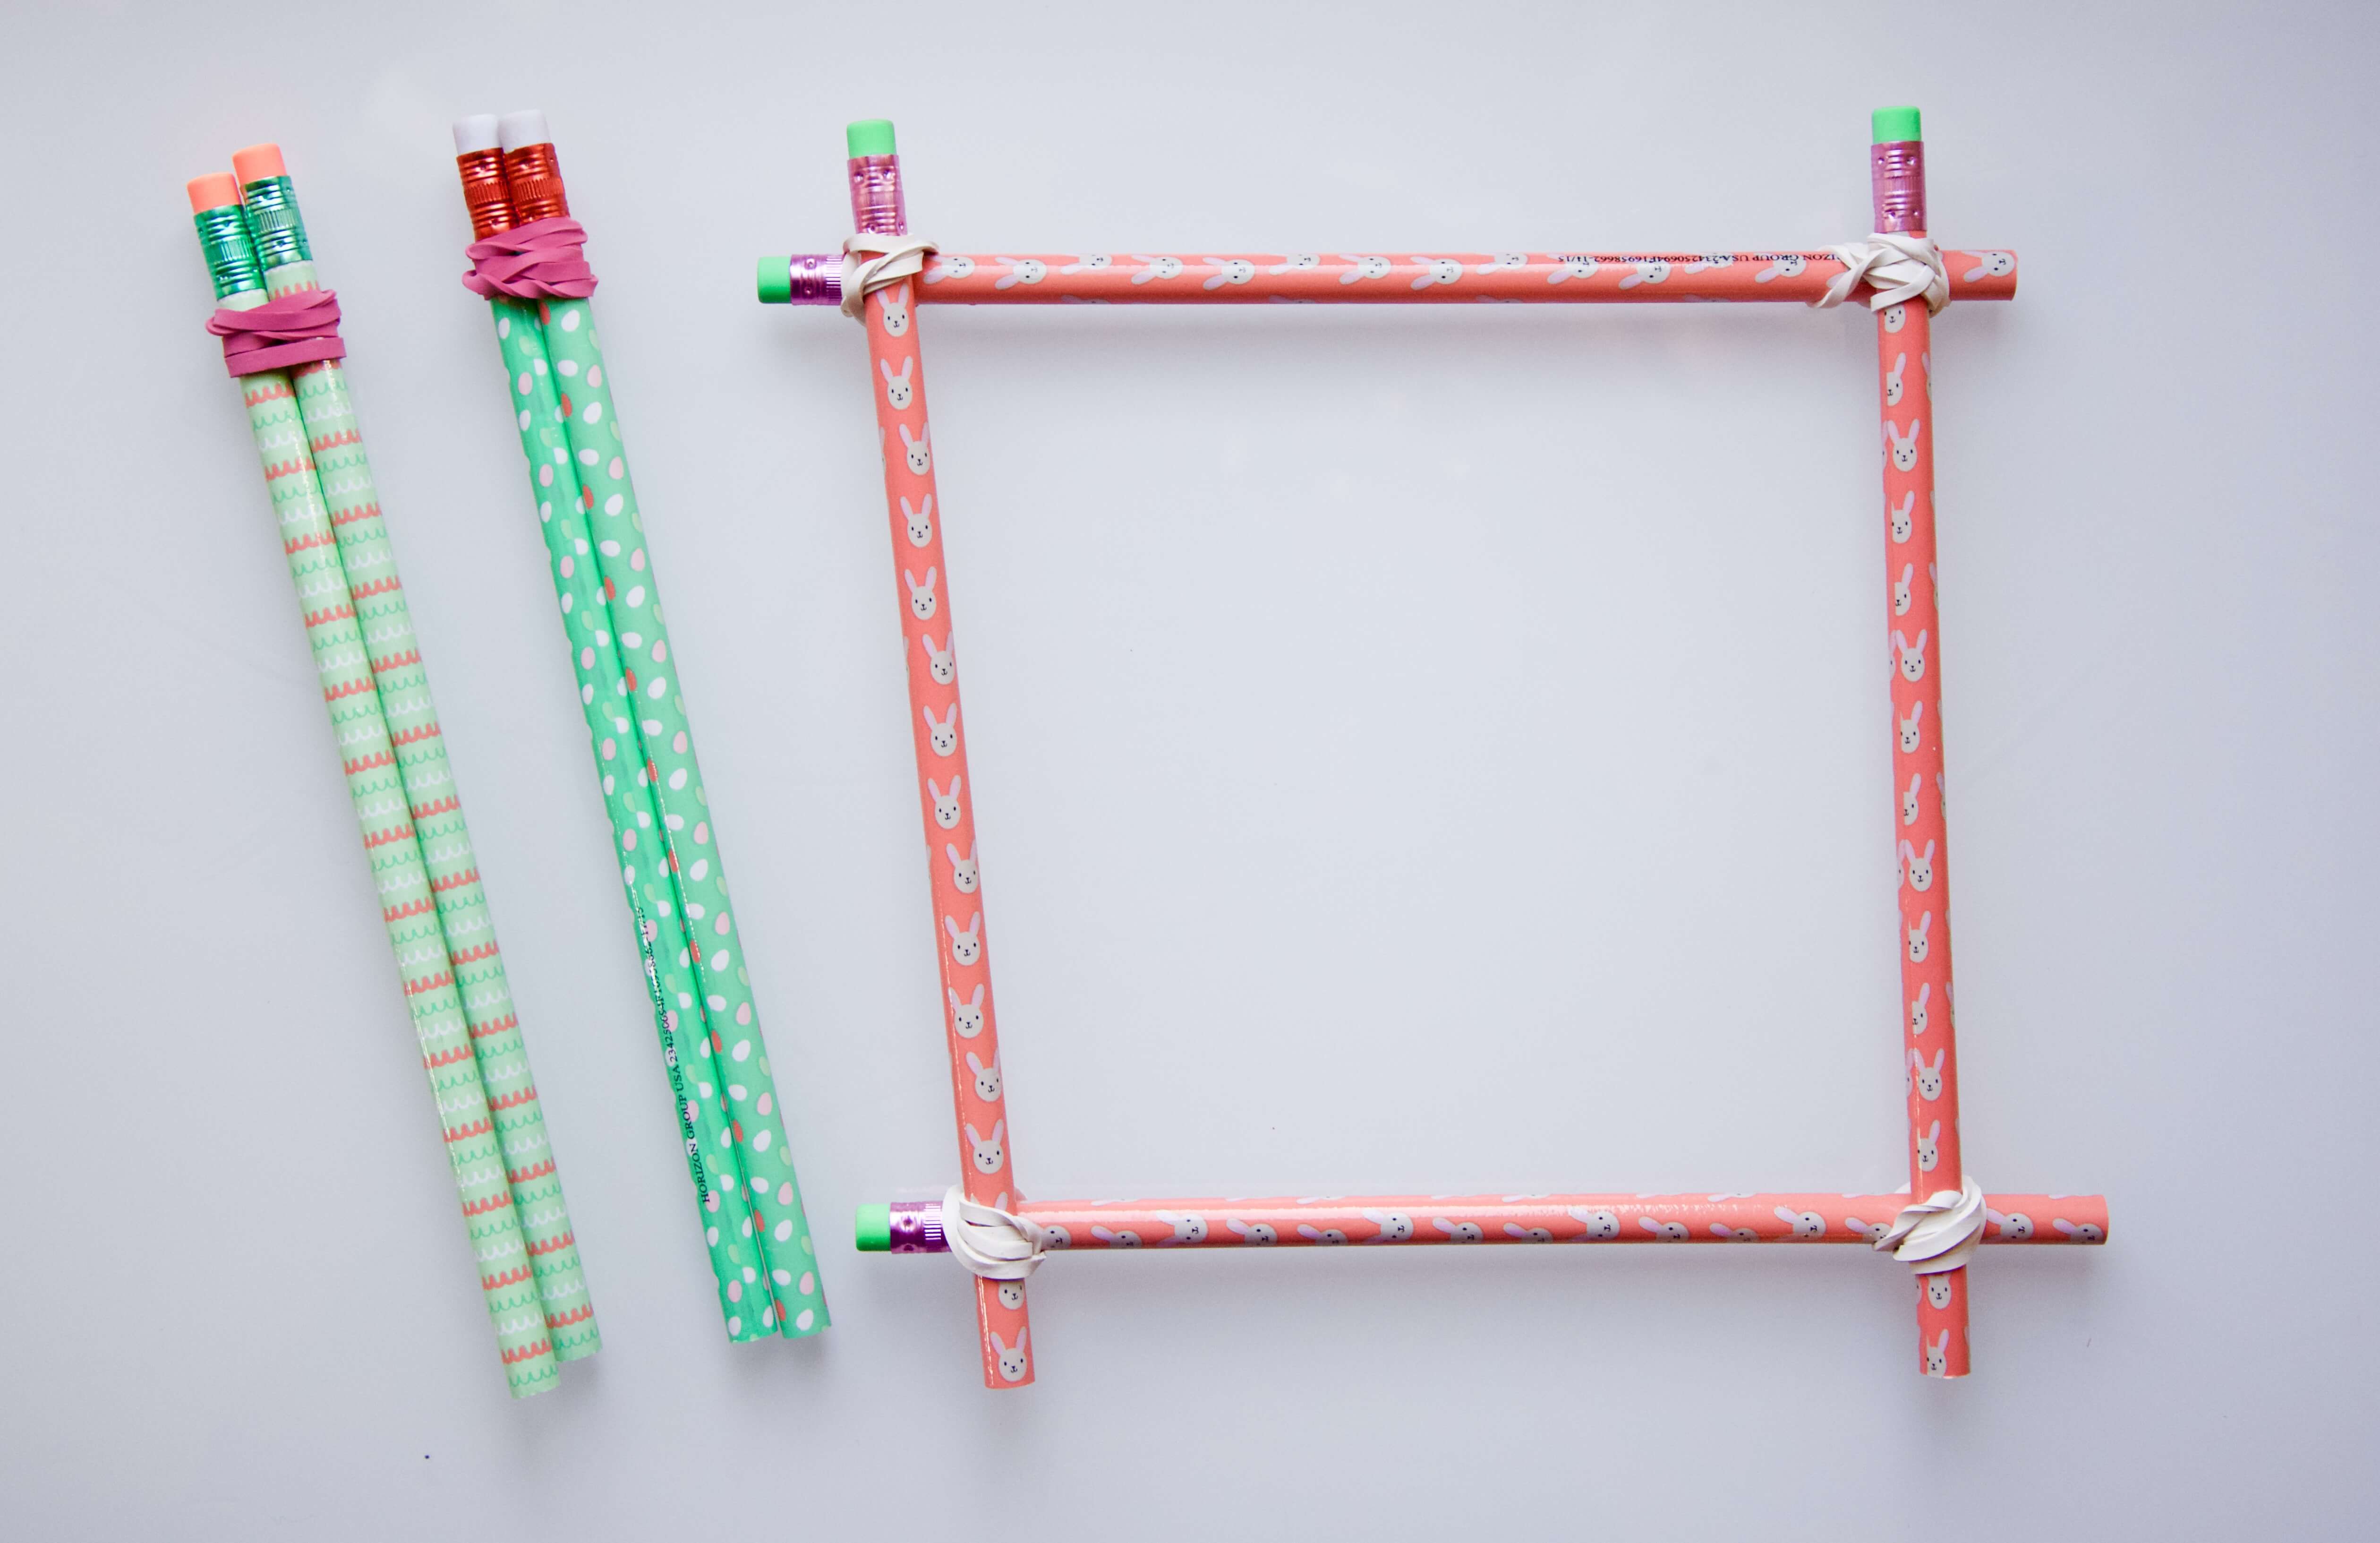
We began by building the base, which was simply a square made from pencils secured together with rubber bands. You’ll need your base to lay flat so make sure the parallel pencils are both in the same position. In the photo below, the left and right pencils are both above the top and bottom pencils.
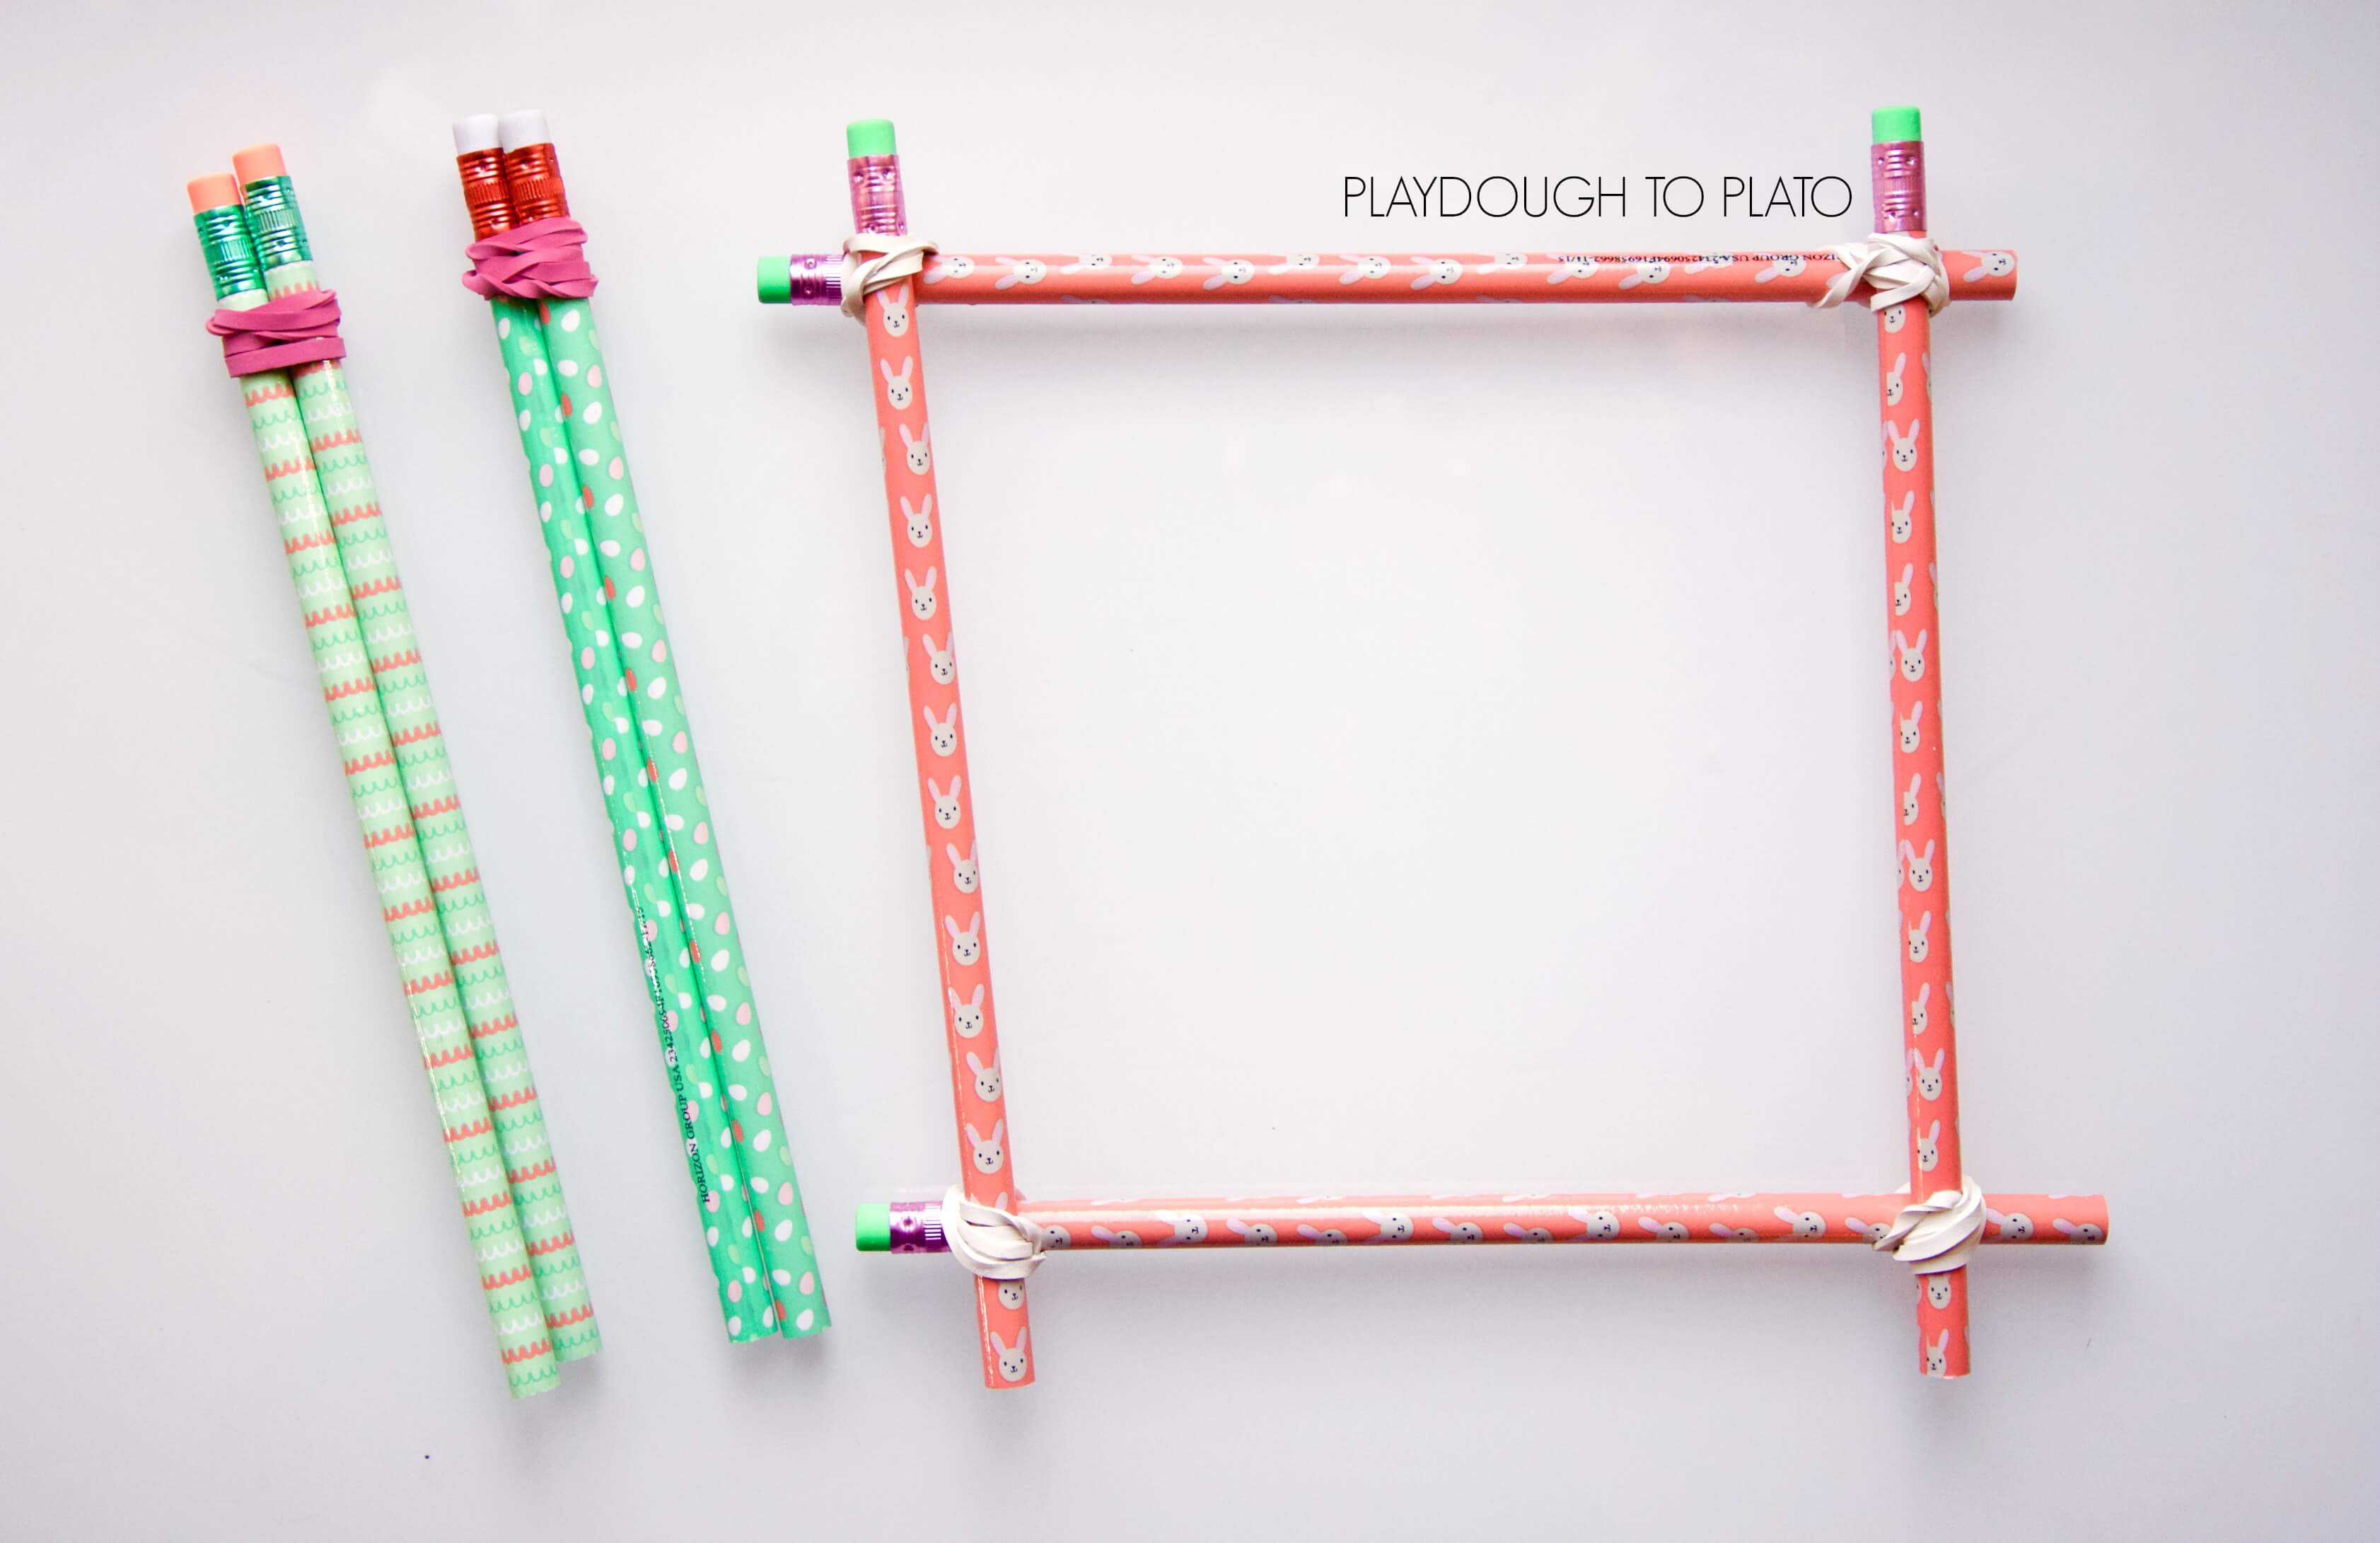
Next, we tackled the sides of the catapult. For this part, my 6 year-old, A, simply grabbed 2 pencils and bound them together on one end with a rubber band and repeated the steps for the other side.
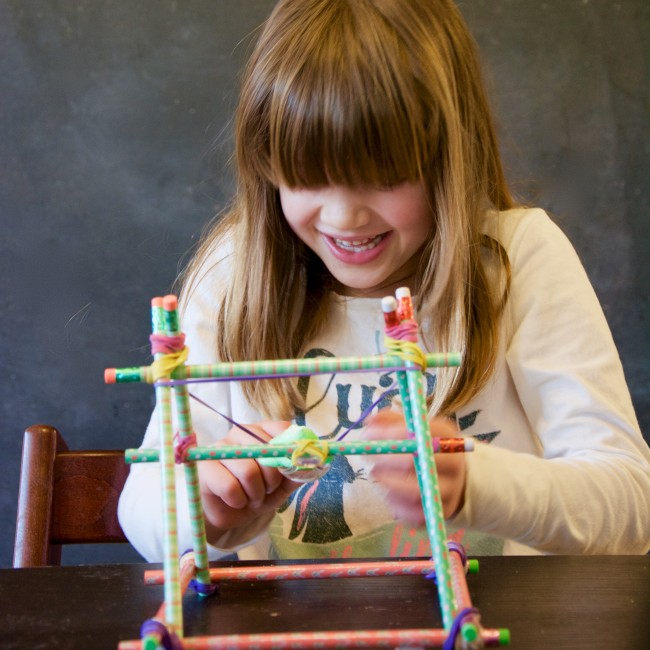
Twisting the rubber bands and turning the pencils to secure the pencils together proved to be quite the fine motor task for A. Can you sense the frustration!?

Attaching the sides (our light green pencils) to the base frame (the pink pencils) ended up being a two person job.
I took a pair of side pencils and spread them to form an upside down V-shape. Then, I placed one end in a corner of the base frame while A secured them with a purple rubber band. We repeated this process for the other end of the side pencil. We sure were earning this STEM activity!

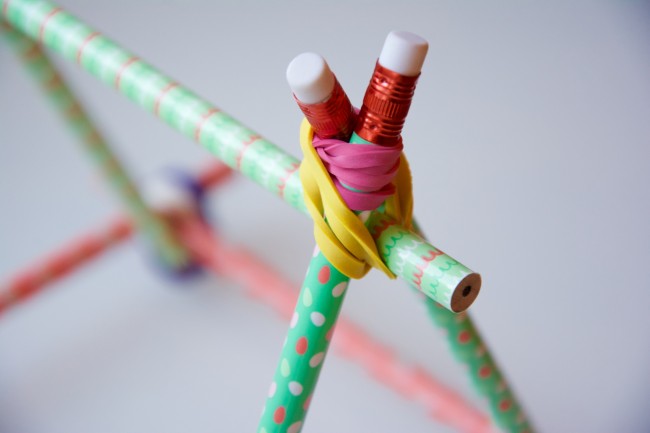
When both sides were attached, we added a pencil to the top to make the catapult more sturdy. To do this, we simply slid a pencil into the point of the upside-down V and secured it with a yellow rubber band. This pencil also acted as a crossbar to stop the lever arm and launch the projectile.
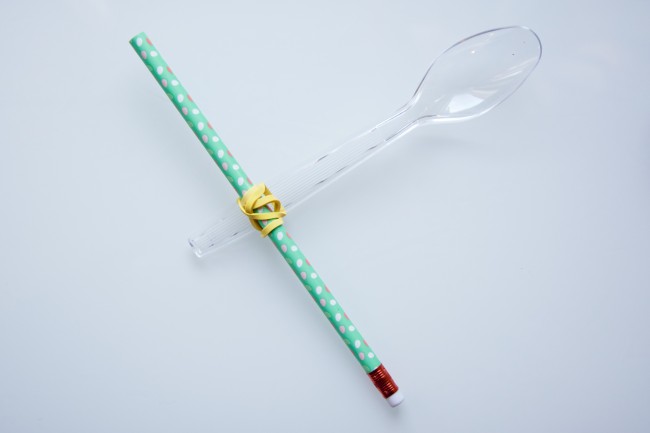
Finally, it came time to attach the part that makes a catapult work: the lever arm. The easiest way to do this was to attach the spoon (the lever arm) right in the middle of the last pencil using a rubber band.
This is the fulcrum, or anchor point, of the lever so make sure that rubber band is nice and tight.
Next, we attached the end of the pencil to the sides of the frame. We had to tweak where we secured the lever to make sure the bowl of the spoon cleared the top of the crossbar.

Finally, we added the last rubber band to provide the tension needed to move the lever arm. First, A twisted the purple rubber band around the spoon just under the bowl a couple times. Then, she stretched the rubber band over each point on the top of the frame.

STEM Activity: Launching the Peeps
Now we were ready to launch! My daughter loaded the bowl with the load, or Peep, pulled back on the rubber band and let that little chicky fly.
The first Peep landed right on my head as I was trying to get a shot of its flight. Surprisingly, this mangonel catapult was fairly accurate and I had my fair share of direct hits. Giggles galore!
After trying to catch a few Peeps in our mouths, A tried to see how far she could launch the Peep. This naturally lead her to test different objects to see which flew the furthest.
After testing a jelly bean, a pom pom and a penny she determined the small but heavy jelly bean and penny flew better than a light pom pom.
The Science Behind It
While the kiddos took turns launching various items and laughing about where they ended up, I asked them how they thought the catapult worked. My 6 year-old knew it all came down the the lever and the rubber band.
I explained that when the rubber band was pulled back, it had potential energy (stored energy) just waiting to be released. Once they let go of the spoon, the rubber band released the tension in the form of kinetic energy (the energy of motion).
Other than naming the parts of the catapult while building it, I pretty much let the kiddos have fun with this activity. Based on the amount of laughter coming from my kids, I think we’ll have many more opportunities to get into the nitty gritty science of catapults in the future. For now, we’ll just enjoy watching those puffy little Peeps fly!
More Jaw-Dropping Science
Make measurement and weight concepts exciting with these STEM Challenge Cards! They’re an easy, interactive way to get students thinking critically about balance, mass, and estimation.


I know it’s been a while since you posted this, but I just wanted to let you know that we just made the Peeps catapults as an after school engineering challenge (for 6 to 10 year olds) at our public library, and it was a HUGE success. I don’t think I’ve ever seen kids (and dads!) have more fun at the library.
Hello Becky,
Thank you so much for sharing this.
We LOVE to hear how the projects work schools and libraries.
I am so glad that your engineering challenge was a success!
Warmly,
Kimberleigh
Thanks sharing this article and help us information