Whether lines are straight, thin, dotted or thick, they are the beginning of fun shapes like circles, squares and rectangles. This art project is perfect for scissor cutting skills and combines literacy with art when paired with the book When A Line Bends… A Shape Begins by Rhonda Gowler Greene.
The simple step-by-step makes the activity easy enough for kids of all ages.
This post contains Amazon affiliate links.

Getting Ready
To get ready, I gathered supplies for each student:
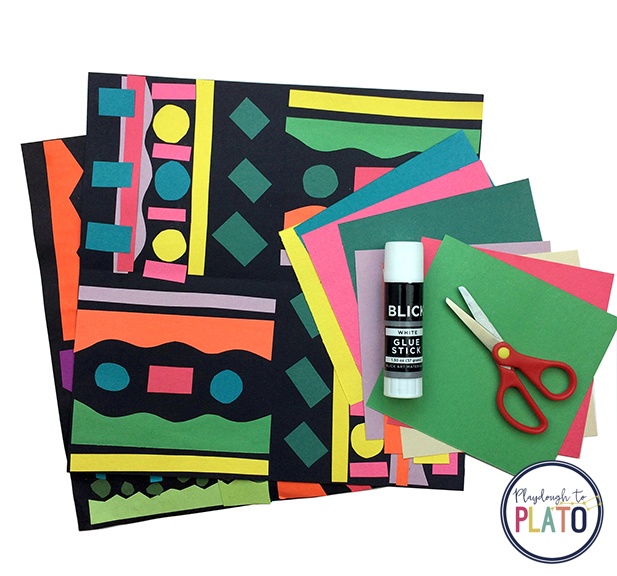
- One 12 x 12-inch piece of black construction paper for the background
- Various colors of 6 x 6-inch pieces of construction paper for lines.
- Scissors
- Glue Stick
- Optional: When A Line Bends…A Shape Begins by Rhonda Gowler Greene (Affiliate link)
Tip: I folded the construction paper in half horizontally, unfolded it, then in half again the other direction so the background paper would have 4 equal squares for the paper lines to be glued into.
Introducing Lines and Shapes
To start, I wanted to get the children thinking about various lines and shapes, so I decided to start the lesson by pulling out the adorable book When A Line Bends… A Shape Begins and reading it aloud.
It was a great way to talk about how lines make different shapes and get the kids’ creative juices going.
Then it was time to create our line and shape art!
Lines and Shapes Art
First, I had the children choose one piece of paper to start cutting.
Each student cut a straight line across their chosen piece of 6 x 6 colored construction paper, followed by a second line.
Once kids felt comfortable with the scissors, I encouraged them to create different lines such as straight, thin, thick, wavy, dotted, broken and zig-zag.
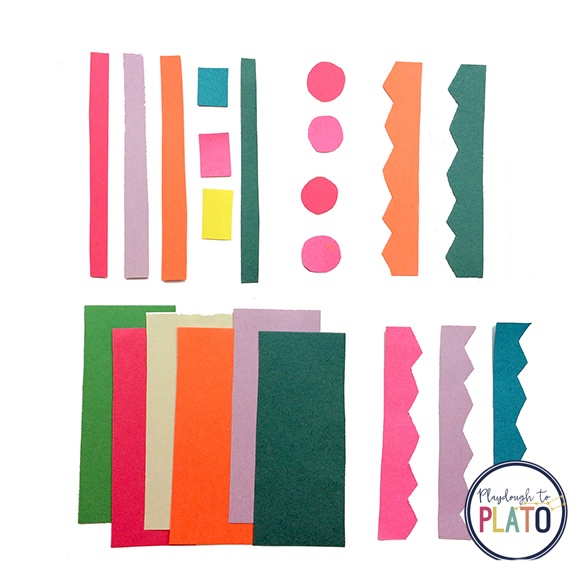
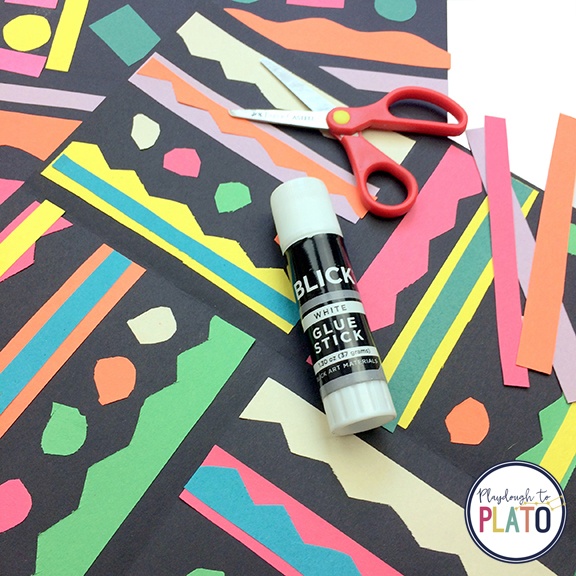
After various paper lines were cut, students created basic shapes out of the colored construction paper.
I challenged the kids to create circles, squares, triangles and rectangles, and to try to cut at least 5 different lines and 3 different shapes.
Once everyone had their shapes, they each picked out a colored 12 x 12 piece of construction paper for their background.
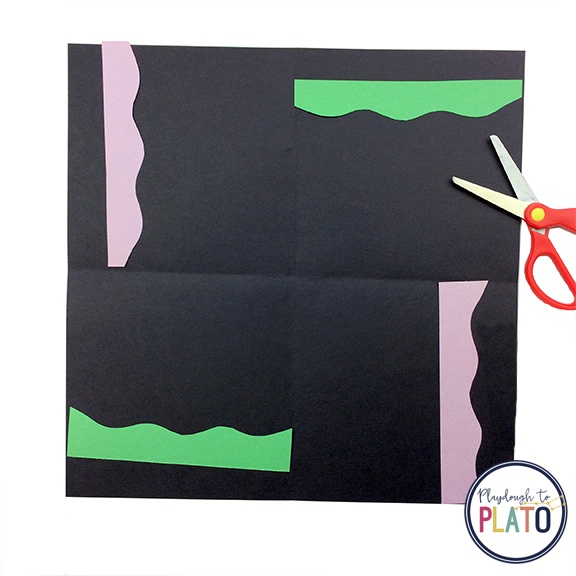
Then, students applied glue on the back of the cut strips and placed them on their background construction paper.
I suggested placing one line in the top left square and laying the duplicate line in the lower right square.
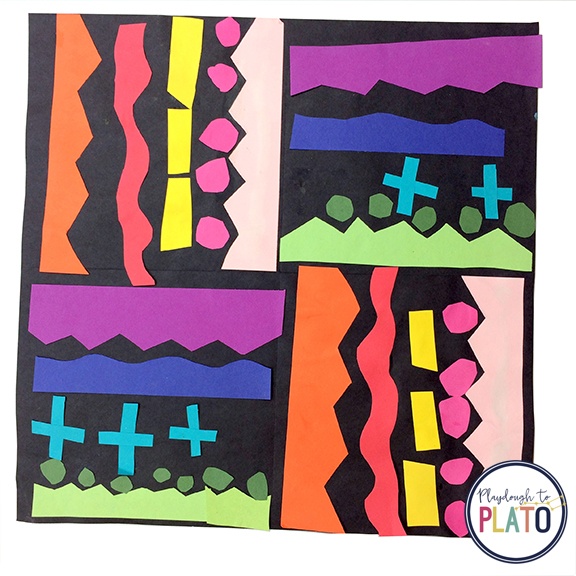
It was so fun to see all of the creative ideas the kids created.
The end result was visually stunning! 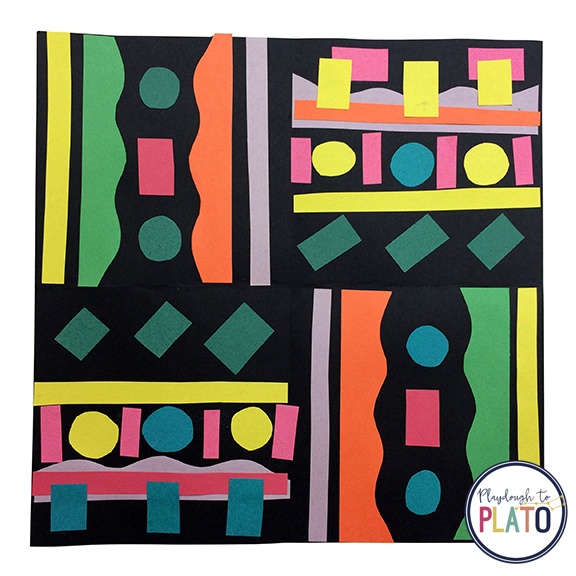
Teaching is tough, and some days it feels like there’s just too much on your plate. I’ve been there, and it’s exhausting. The Science of Reading Formula was made for teachers like you—ones who want to simplify reading instruction without sacrificing results. With easy-to-implement tools and a supportive community, you’ll feel re-energized and ready to take on the day. Let’s make this easier, together.


One Comment