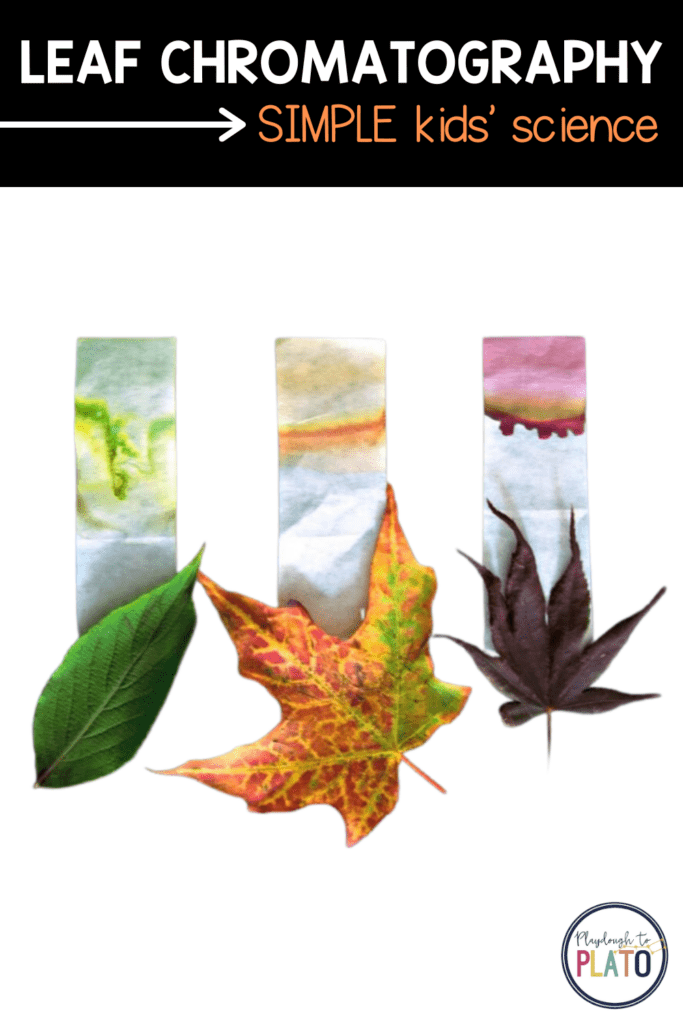
Have you ever wondered how green leaves can turn brilliant orange, yellow and red?! With this simple chromatography activity, you can see just what gives leaves their amazing fall colors. It’s a perfect kids’ science experiment for fall.
Follow the simple step-by-step below and then grab our 30 Science Experiments kids will beg to repeat (plus a no-prep science journal to keep track of their results!) in our shop!
Getting Ready
For this chromatography activity, I grabbed just a few common household supplies:
- Glasses or jars (one for each leaf color)
- Mortar and pestle (or a spoon)
- Isopropyl alcohol (rubbing alcohol)
- White coffee filters
- Leaves
My kids and I grabbed a couple leaves that had already changed color as well as a few green leaves. My 5 year-old really wanted to test all the various colors of leaves so we decided to collect red, orange, yellow, green and purple.
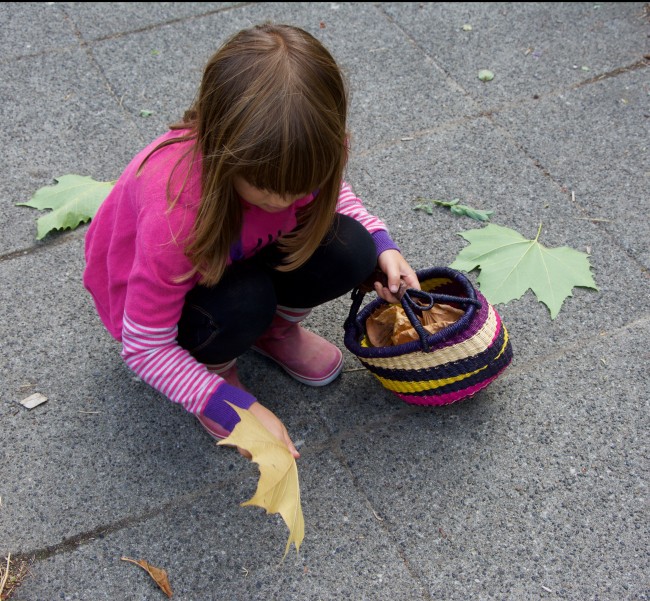
Once she had a basket full she sorted them by color and chose the best leaf from each group to test. I couldn’t resist a shot of all the leaves sorted, simply gorgeous!

Leaf Chromatography
We decided to start with the green leaf. My daughter, A, tore up the leaf, placed it into a mortar, and crushed the bits up to release their juices with a pestle. (If you don’t have a mortar and pestle place your leaf bits into a glass and crush them with the back of a spoon.)
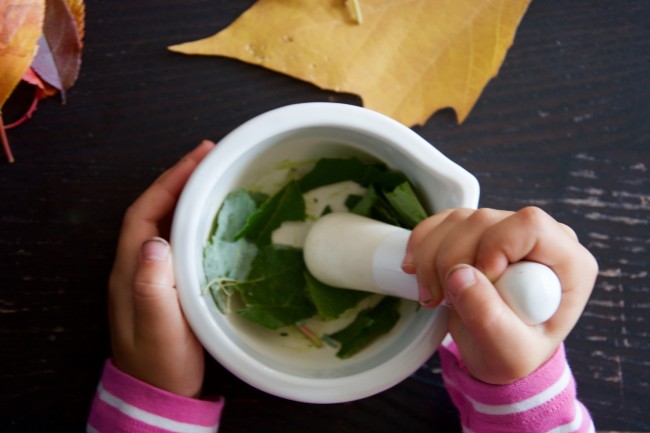
Once she was done crushing the leaf bits, A placed them into a glass and repeated the process with all the other colored leaves.
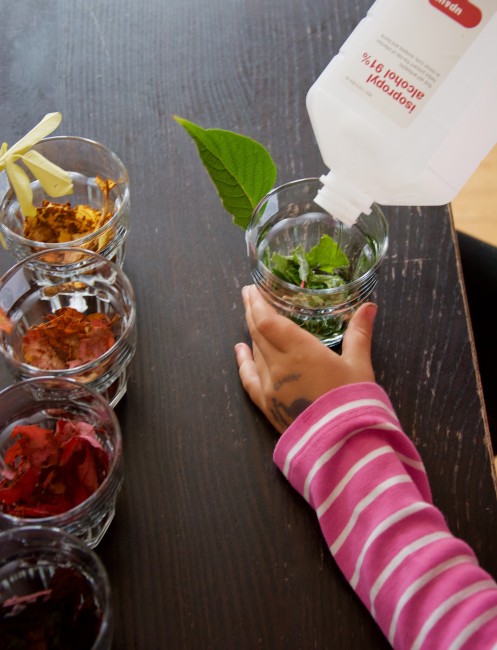
As A finished smashing bits of the various colored leaves, I labeled each glass by taping on a matching leaf to the back of the glass so we could remember what it looked like.
Now came the stinky part of the chromatography activity! A carefully poured a couple tablespoons of rubbing alcohol into each glass until the crushed leaf bits were covered.
Next, I placed the glasses in Pyrex dishes and poured boiling water around (not in!) the glasses to warm up the alcohol. By warming the rubbing alcohol, we sped up the process of drawing the pigments out of the leaves. You can also cover the glasses with plastic wrap and wait overnight for the pigments to dissolve in the alcohol.
After about 30 minutes, we could see the leaves’ pigments had colored the alcohol.
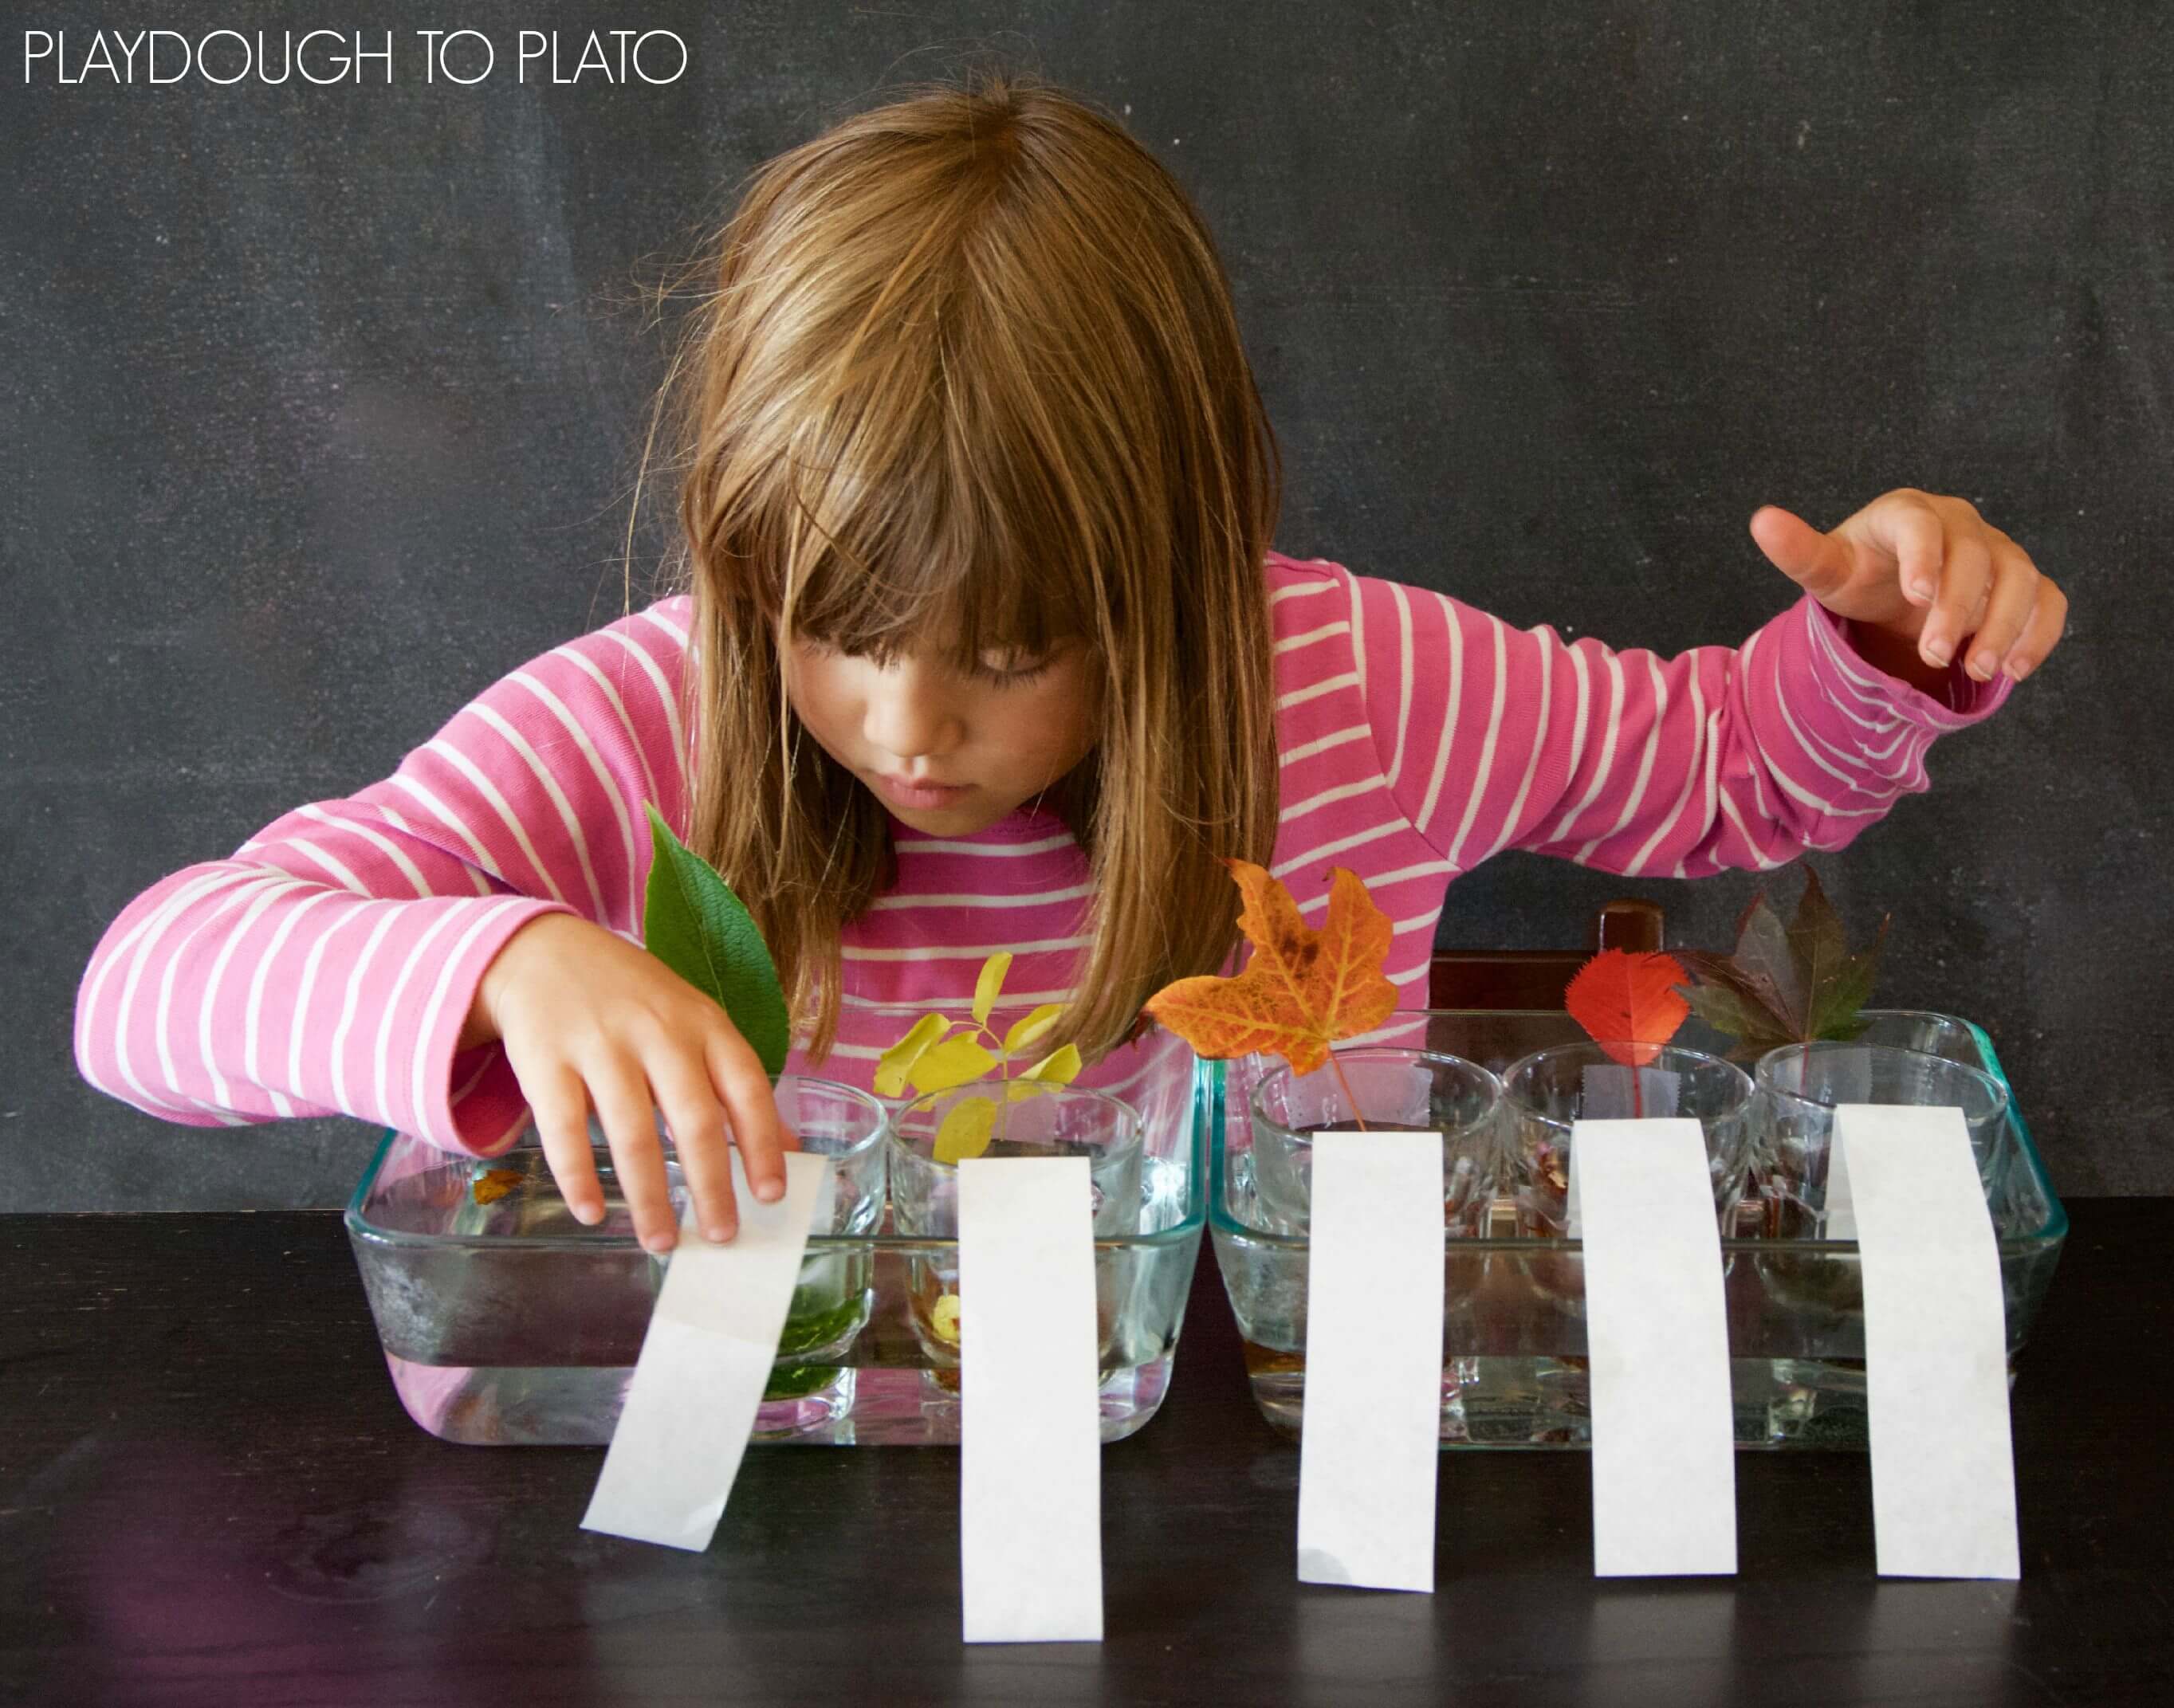
I cut 1 inch by 5 inch strips from white coffee filters to use as our chromatography paper and showed A how to place one end in the solvent (alcohol) and drape the other over the edge of the Pyrex.
After A placed one strip in each glass, all we had to do was wait. We ended up starting this chromatography activity in the afternoon so we just left it overnight, but an hour or two is usually enough time.
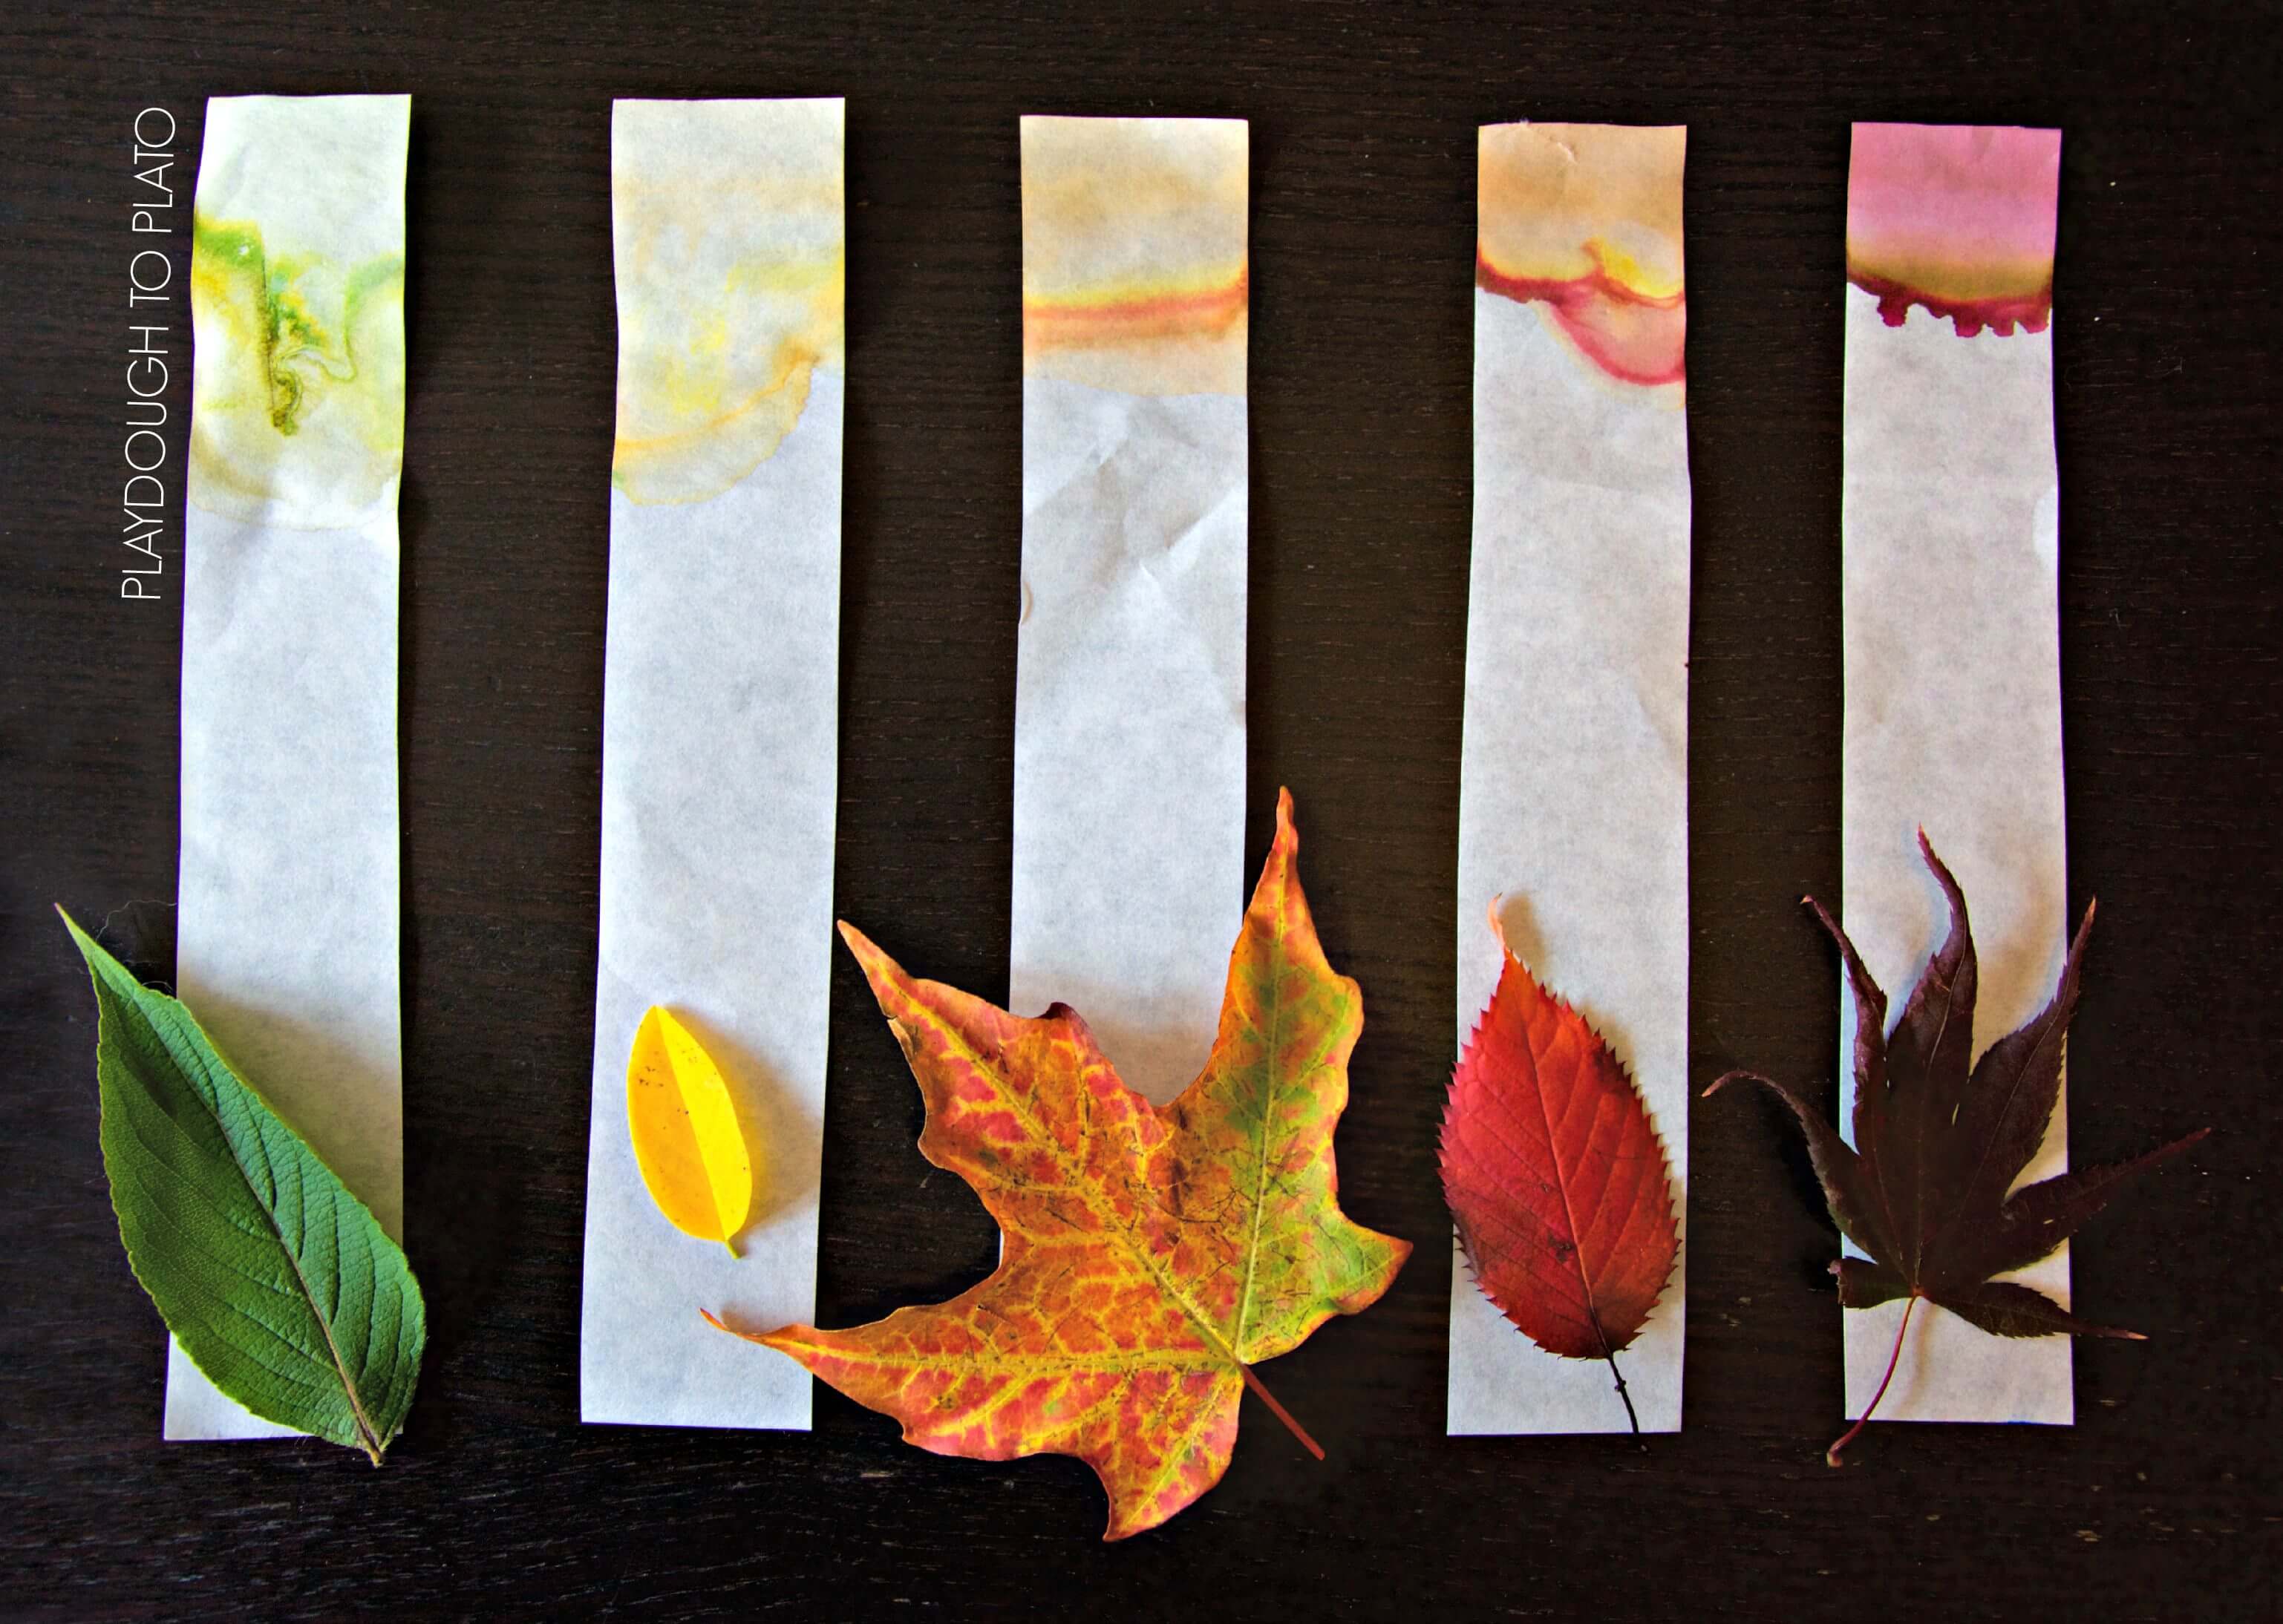
In the morning, we pulled out the filter strips to see what had happened.
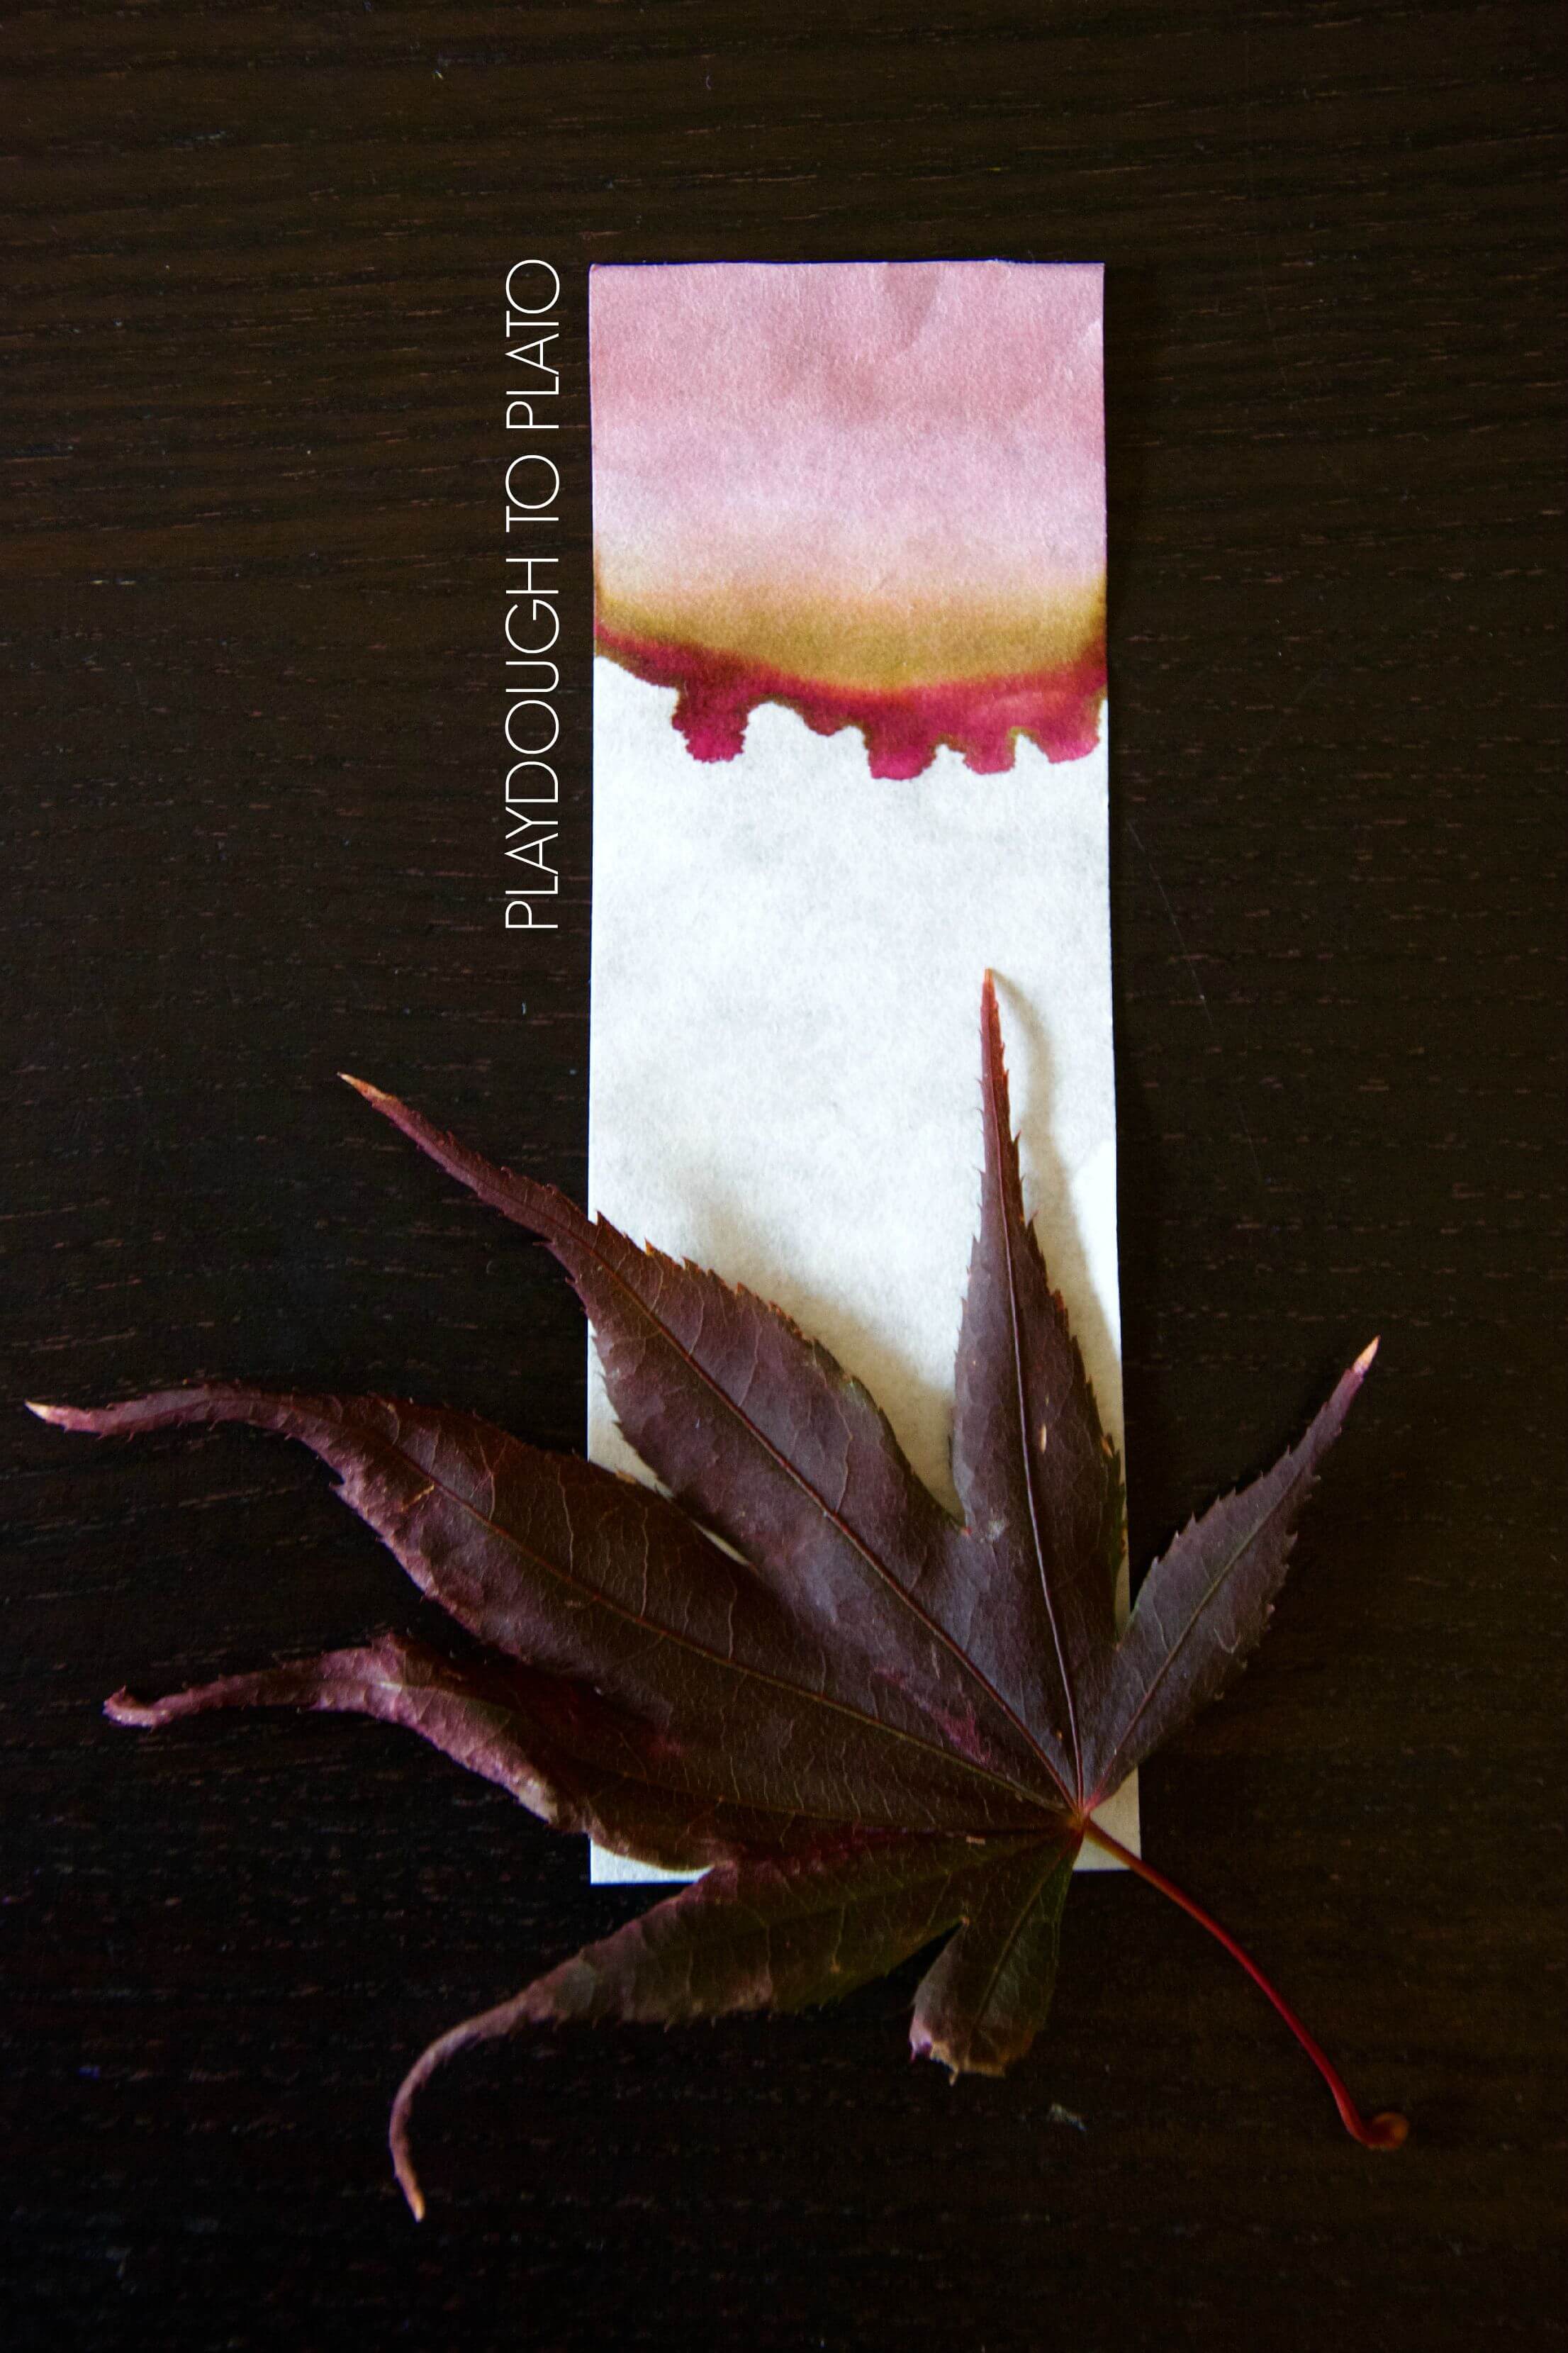
The alcohol had carried the pigments from the leaves up the paper and separated them into bands. The purple and orange had the most dramatic bands. You could even see the two different kinds of chlorophyll on the paper from the green leaf.
This experiment was so much fun we plan to do it again using a single leaf with multiple colors to see what pigments we can separate.
The Science Behind It
Photosynthesis is the process in which plants convert light energy from the sun to chemical food energy. To absorb the light, leaves use brightly colored pigments with chlorophyll being the most important one.
There are two main types of chlorophyll: chlorophyll A which is bluish-green, and chlorophyll B, which is yellowish-green. During most of the growing season, leaves contain more chlorophyll than any other pigment, making them appear green.
In the fall, chlorophyll begins to break down, and the other pigments, which have been there all along, are finally revealed. Yellow leaves have pigments called xanthophyll, orange leaves have a pigment called carotenoids. Anthocyanins give leaves their intense red and purple pigments.
These pigments, however, aren’t present in the leaves during the summer and are only made toward the end of summer.
Chromatography is the separation of a dissolved mixture by passing a through filter paper through which different parts of the mixture will move at different rates. The pigments that were more soluble in the solvent (alcohol) moved further up the paper than the less soluble pigments. Using the green leaf as an example, the blueish-green chlorophyll A was less soluble than the yellowish green chlorophyll B and thus it didn’t move as far up the paper.
Jaw-Dropping Science
Want a classroom experiment that’s both engaging and educational? This Glowing Bouncy Egg activity lets students explore osmosis and chemical reactions in a hands-on way!


active reader 🙂
This is amazing! I love the experiment and process an finally seeing the leaf colors!
Whereas you will get the instruments individually, it is best to
get the total suite of tools.
We did this last year and it was really neat!
Beautiful photography and excellent simplified method for extracting the color from leaves! i’m planning to do this experiment with my preschooler’s class.
Love this~ thanks for sharing~I plan on doing this with my Kindergarten
class 🙂
Thank you for such a great and detailed project! I’ve added your project/link to my Facebook page “Girls Love STEAM” today as a great fall project to learn some science. Have a happy fall day!
Excellent activity and well explained. There is one error, however. The orange and yellow pigments (carotenoids) are in the leaf year round, but masked by the green. They show up as the chlorophyll fades in the fall. The brilliant reds, the anthocyanins, are the ones that are formed in the cell vacuoles in the fall. If you do the same chromatography on fresh green spinach leaves, you can see the carotenoids are there as well as the chlorophyll. I learned all this as a graduate student in botany! Nobody’s too old or young to learn science!
Hi Joan,
It looks like my explanation needed a few more well placed words! You are correct it’s only the anthocyanins that are made in the fall and I tried to explain that but it didn’t come through. Thanks for pointing that out. I’ll have to edit that. Good catch!
this experiment sound really great. I’m planning on trying it with my daughter.
This experiment sounds really great and i would really like to try it. we however live in a tropical climate, not sure we can find leaves of so many different colors.
Hi Roza,
I hope that you’re able to try it. Maybe you’ll be able to find some different plants that naturally have different colored leaves.
We’d love to hear how it goes!
Warmly,
Ashley // Happiness Ambassador
Quick question…saw on another site mix hot water with alcohol in glass jar toegether? Have you tried both ways and conclude this way work better? Want to try TOMORROW with a mixed age group of 13 and 1 adult. Not sure to put boiling water in jars or pan of water seems more dangerous and have more children want to touch hot water. Just wondering?
Hi Stacey,
I have not done chromatography with alcohol and hot water mixed together. The alcohol is the solvent that helps dissolve the pigments so they separate, allowing you to see them. Water isn’t a good solvent for the pigments so if you mix water with alcohol it will most likely slow the process. You can see this when yang 95% vs 70% isopropyl alcohol as your solvent. They both work but the 70% alcohol is noticeably slower. Perhaps placing the cups with the pigment/alcohol mix in a crock pot of hot water would help keep little hands out and provide a buffer against the heat? I probably would have done this too if not for needing a clear photo of what we were doing. Hope this helps!
Can you use vinegar or something other than rubbing alcohol?
Hi Clair,
We have not tried this with vinegar, but we do believe rubbing alcohol will give you the best results.
Let me know if I can be of any further help!
Warmly,
Ashley // Happiness Ambassador
Can you use this process to show how other plant matter, eg walnuts, black beans, stinging nettles and beetroot produces different colors? We are going to use these to dye wool, and I was wondering if the chromatography process will illustrate which dye colors these will produce.
Hi Anndi,
That’s a great question!
We have not tried those materials, but we would love to hear how it goes if you end up trying it!
Hope it’s wonderful!
Warmly,
Ashley // Happiness Ambassador
Rubbing alcohol is hard to find right now. Any ideas for alternates?
You can use acetone or nail polish remover.
I cannot use glass at preschool. Will this experiment work with leaves in plastic jars?
Yes! It will work with plastic cups! For sure! The funnest part is collecting and destroying the leaves, I just did this with my 4 year old. So fun!
Hi There,
Fun activity! Do you know how far in advance you can prepare the leaf/alcohol mixture before doing the chromatography portion?