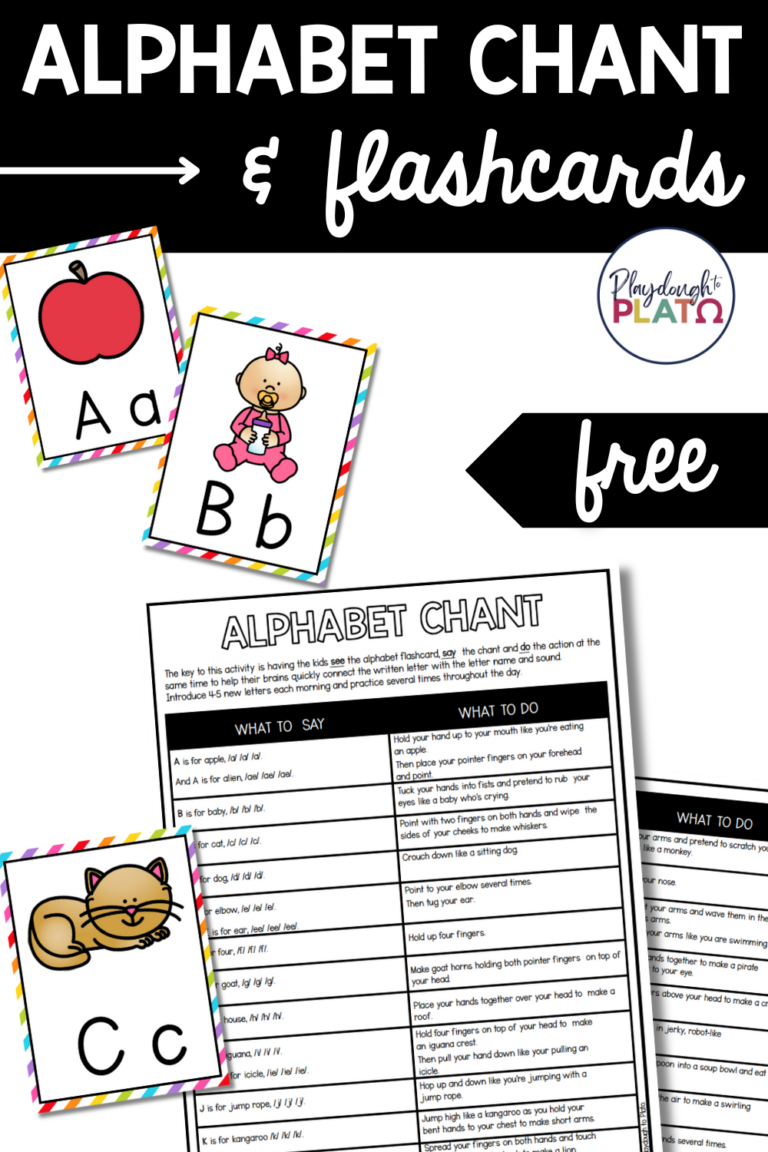
What do you get when you combine a few simple chemical reactions with glitter, neon paint and a black light? A Glowing Magic Potion Station that kids will ask for over and over again! Watching the reactions under the glow of a black light takes a simple kids’ science experiment from fascinating to fabulous.
For more jaw-dropping science, hop on over to our shop and grab our 30 Science Experiments (complete with no prep science journal to record results!) that are perfect for kids!
This post contains Amazon affiliate links.
Getting Ready
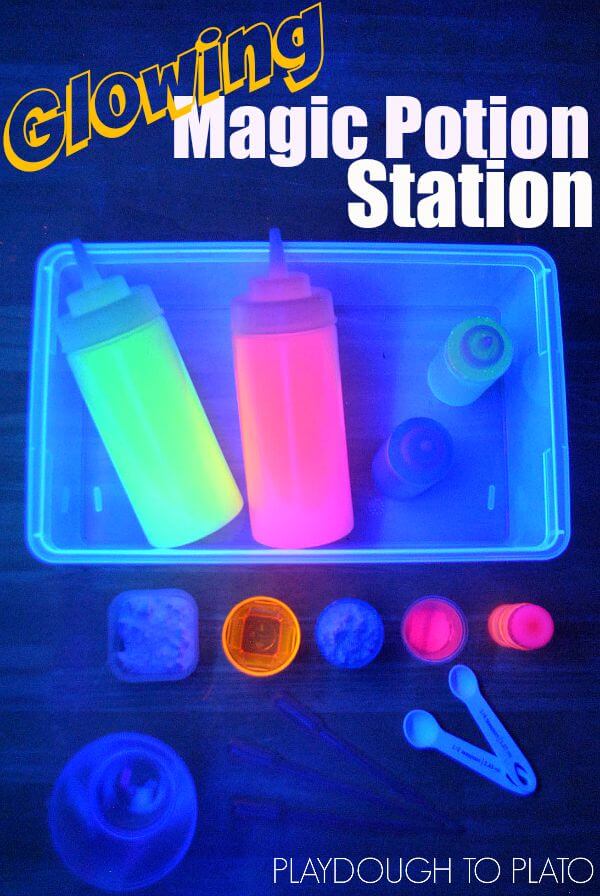
To prep, I first gathered a few supplies:
- Various cups, jars or containers
- Pipettes or droppers
- Squeeze bottles or small pitchers
- Small spoons, teaspoons or tablespoons
- Baking Soda
- Vinegar
- Cornstarch
- Water
- Dish soap
- Neon glitter
- Neon or Glow-in-the-dark paint
- Fluorescent black light
After gathering our materials, I spent about ten minutes to get the ingredients ready for the experiment. I filled one or two squeeze bottles (or pitchers) with 8-10 oz. of water and then added 1/2 tsp of paint. I used pink, yellow, blue and green but you could pick anything.
I repeat the same process with vinegar in place of the water.
Then I placed a few tablespoons of baking soda in a small jar and placed cornstarch, glitter and dish soap in their own containers too.
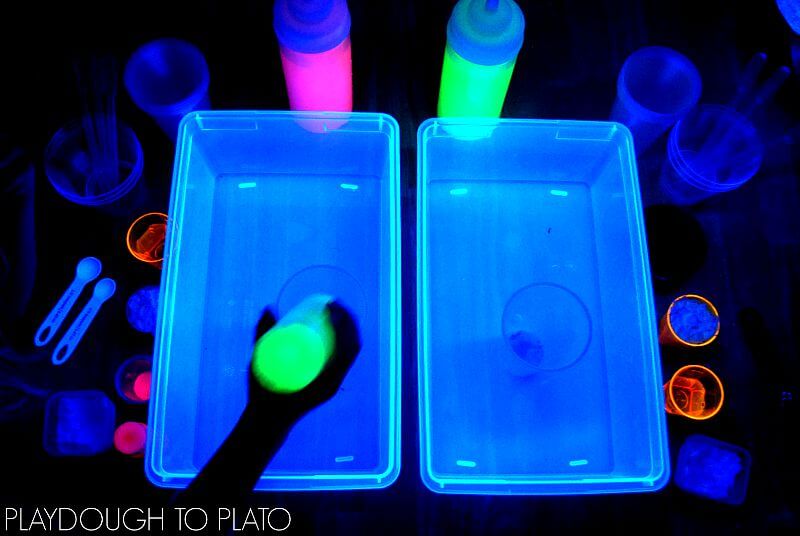
I wanted the magic potion station to be accessible to my kids later so, in addition to the ingredients, I also included several plastic cups to serve as beakers for the experiments and used a plastic storage container for each child to contain and catch any spills.
I set up the black light so that it wouldn’t interfere with the experiment, but would still shine brightly on the materials.
Glowing Magic Potions
We did this experiment at night before bedtime to get the full effect of the black light, however, it can be set up in any room that can be darkened.
When we were ready, I turned off the normal light and turned on the black light.
At this point, you can present the experiment to the kids and say “Go to it!” OR you can encourage them to try a few chemical reactions before they begin mixing, pouring and making magic potions on their own.
My kids were super excited when they came into the kitchen and discovered the experiment. They were ready to jump right in, but I explained that we were going to try a few experiments and then they could explore all of the ingredients.
Baking Soda and Vinegar Reaction
We started with the classic baking soda and vinegar reaction. I pointed out the baking soda and encouraged the kids to put a few spoonfuls in their cup (beaker).
Then, I showed them which squeeze bottle had vinegar and said “Let’s see what happens when you squeeze this vinegar into the baking soda.” Both kids were delighted as their cups overflowed with the bubbly concoction. The neon yellow paint left little specs in the bubbles that looked really neat under the black light.
Color Mixing
After they’d used up all the baking soda, we moved on to color mixing. I encouraged them to pour the yellow and pink water into a cup to see what would happen. They tried blue and yellow and then blue and pink next.
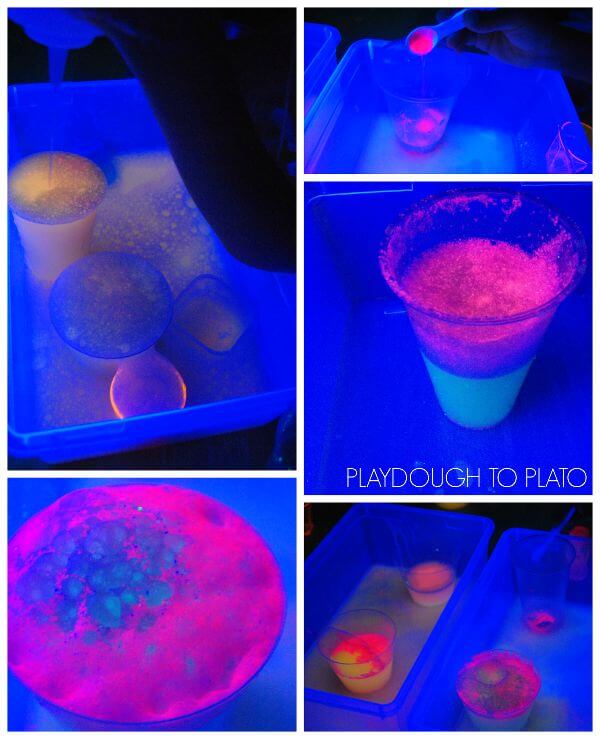
The glitter was a big hit – it sat on top of the potions and had the best effect under the black light. My daughter poured colored water through bubbles with glitter on top and the potion separated into three different colors, which surprised us all. Both kids loved squirting water into dish soap and watching the potion bubble over the top.
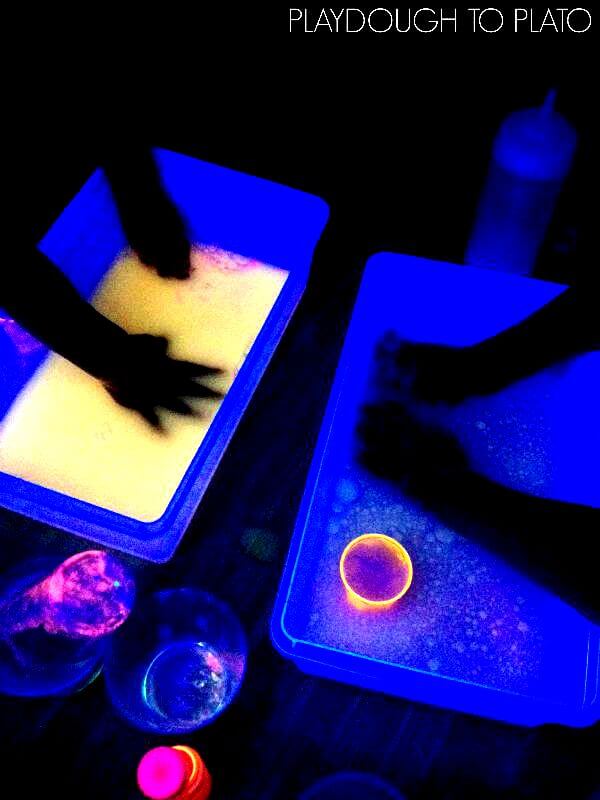
Water and Cornstarch Goo
I saved the final chemical reaction for the end of the potion station since I figured it would work best once they’d used up all the ingredients and had a good amount of water in their plastic containers.
Since the kids had about a cup of water in their containers once their cups had overflowed several times, they only needed to add corn starch. When they mixed it together, the chemical change produced a substance that could be poured like a liquid, but acted as a solid when force was applied. My kids could have played in the goo for hours and weren’t happy to hear it was bedtime.
Further Exploration
Don’t have a black light? Try using glow-in-the-dark paint for a similar effect or simply set up the potion station with the light on for hours of fun.
Ask your kids if there are any substances they’d like to test or try in the potion station. Consider items that appeal to the senses (smell, touch, taste).
For older children, have them measure the amount of each ingredient before creating a potion and examine the outcomes.
More Experimenting
Want a simple, low-prep science experiment that wows students? The Walking Water Rainbow is a colorful way to explore capillary action and color mixing!


What kind of affordable black light should i purchase? I was thinking Amazon because they have everything but just didn’t know how big of a black light it had to be?
Hi Karen,
Yes, I think Amazon would be a great place to look.
The black light does not need to be huge, but it is most effective when it can really give off a good amount of light in the room.
Warmly,
Ashley // Happiness Ambassador