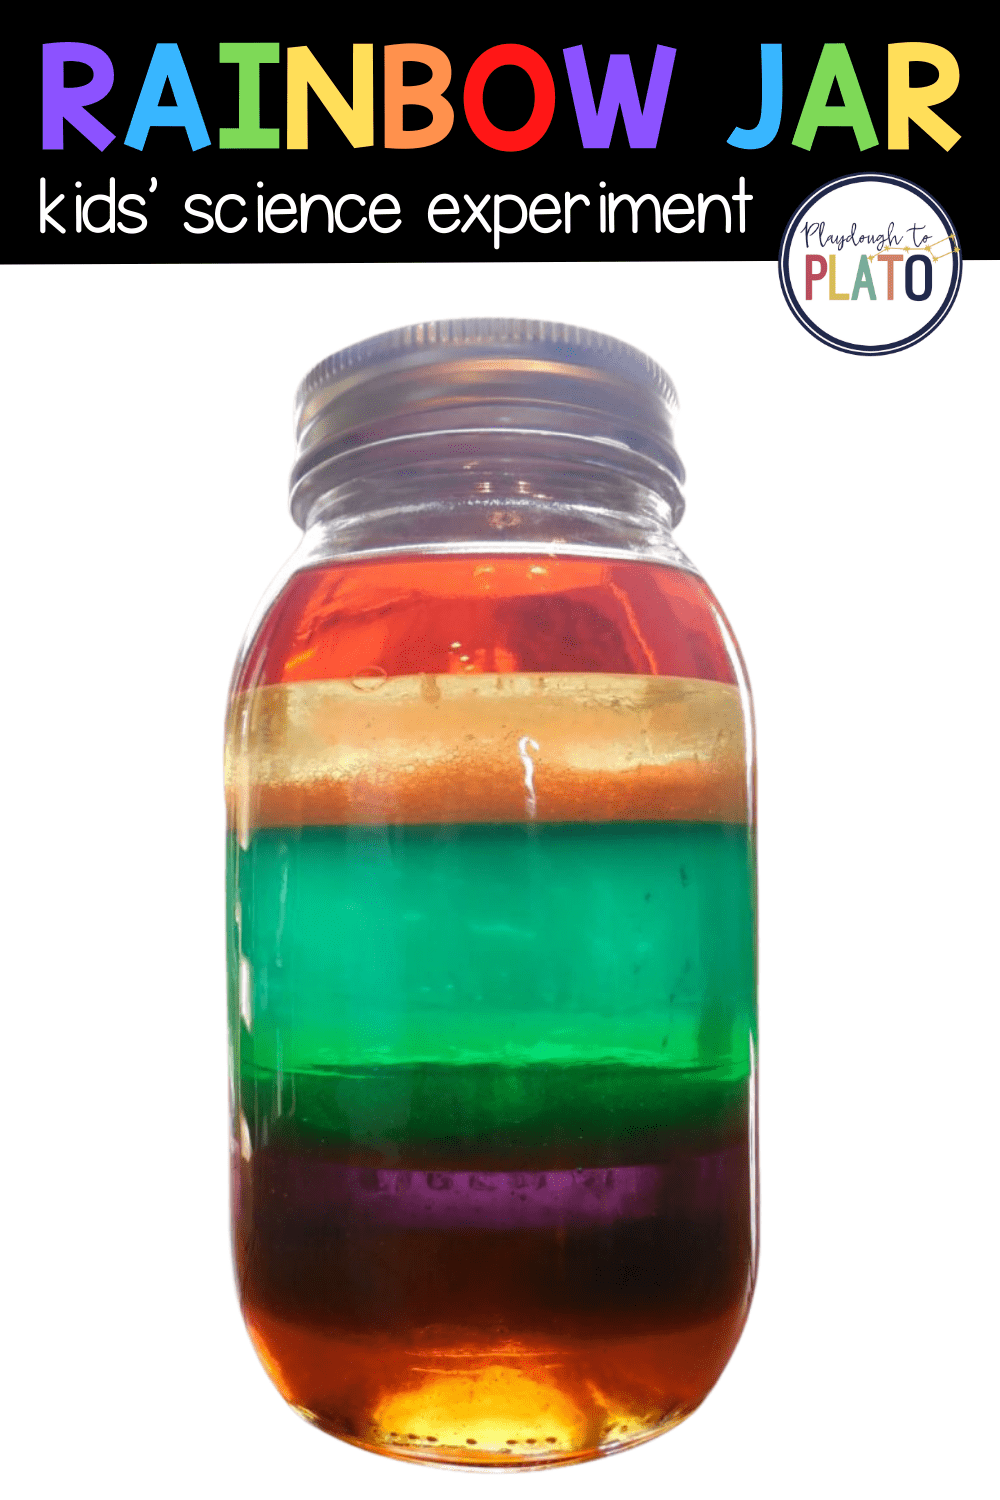
We love fun kids’ science and this easy rainbow jar activity is one of our all-time FAVORITES! With just a few common household ingredients like dish soap and honey, little scientists can actually pour a rainbow in a jar. There’s no need for any magic – just 100% kid-friendly science.
Follow the simple step-by-step below and then grab 30 more easy-to-follow science experiments kids will beg to repeat (plus a no prep science journal to keep track of their results!) in our shop!
Getting Ready
This project requires quite a few supplies, but most of them are probably things you already have in your pantry.
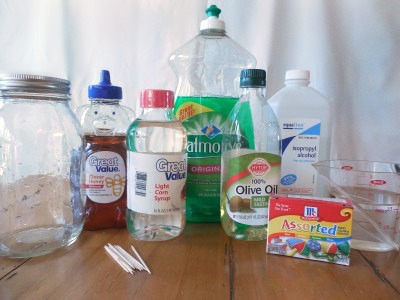
To get ready for the science activity, I grabbed my materials:
- A tall, see-through container (I used a clean mason jar.)
- Honey
- Light corn syrup
- Dish soap (either blue like Dawn or green like Palmolive)
- Olive oil
- Rubbing alcohol
- Water
- Food coloring
- A dropper
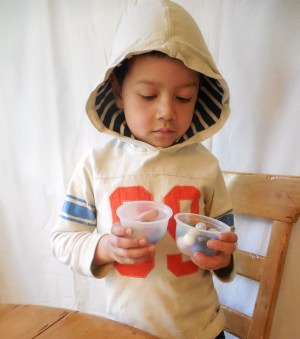
I also grabbed two identical containers and some marbles so that I could give my son a brief explanation about density.
The Science Behind It
As always, my son was really excited when I told him we were going to do some kids’ science with a rainbow jar! Before we jumped into the project though, I wanted him to understand what was about to happen, so I decided to introduce him to the concept of density first.
I explained that different liquids have different weights.
“Everything is made up of teeny tiny things called molecules,” I said. “Some of these liquids have a lot of molecules in them and some of them have only a few.”
I showed him two containers that were the same size. One had a bunch of marbles in it, one only had six.

I had my son hold the two containers and asked him which one was heavier.
“The one with more marbles,” he said. I explained that it was the same with our liquids — the ones with more “marbles” (molecules) were heavier and would stay at the bottom of the jar.
Pour a Rainbow in a Jar
Now it was time to make our rainbow jar! First, my son poured in the honey, being sure to pour it into the middle of our container. He was careful not to let it touch the sides.
Next, he poured in the corn syrup. (We’d colored it purple using the food coloring.) Again, my son poured it into the middle of the container, not touching the sides.
The dish soap came next.
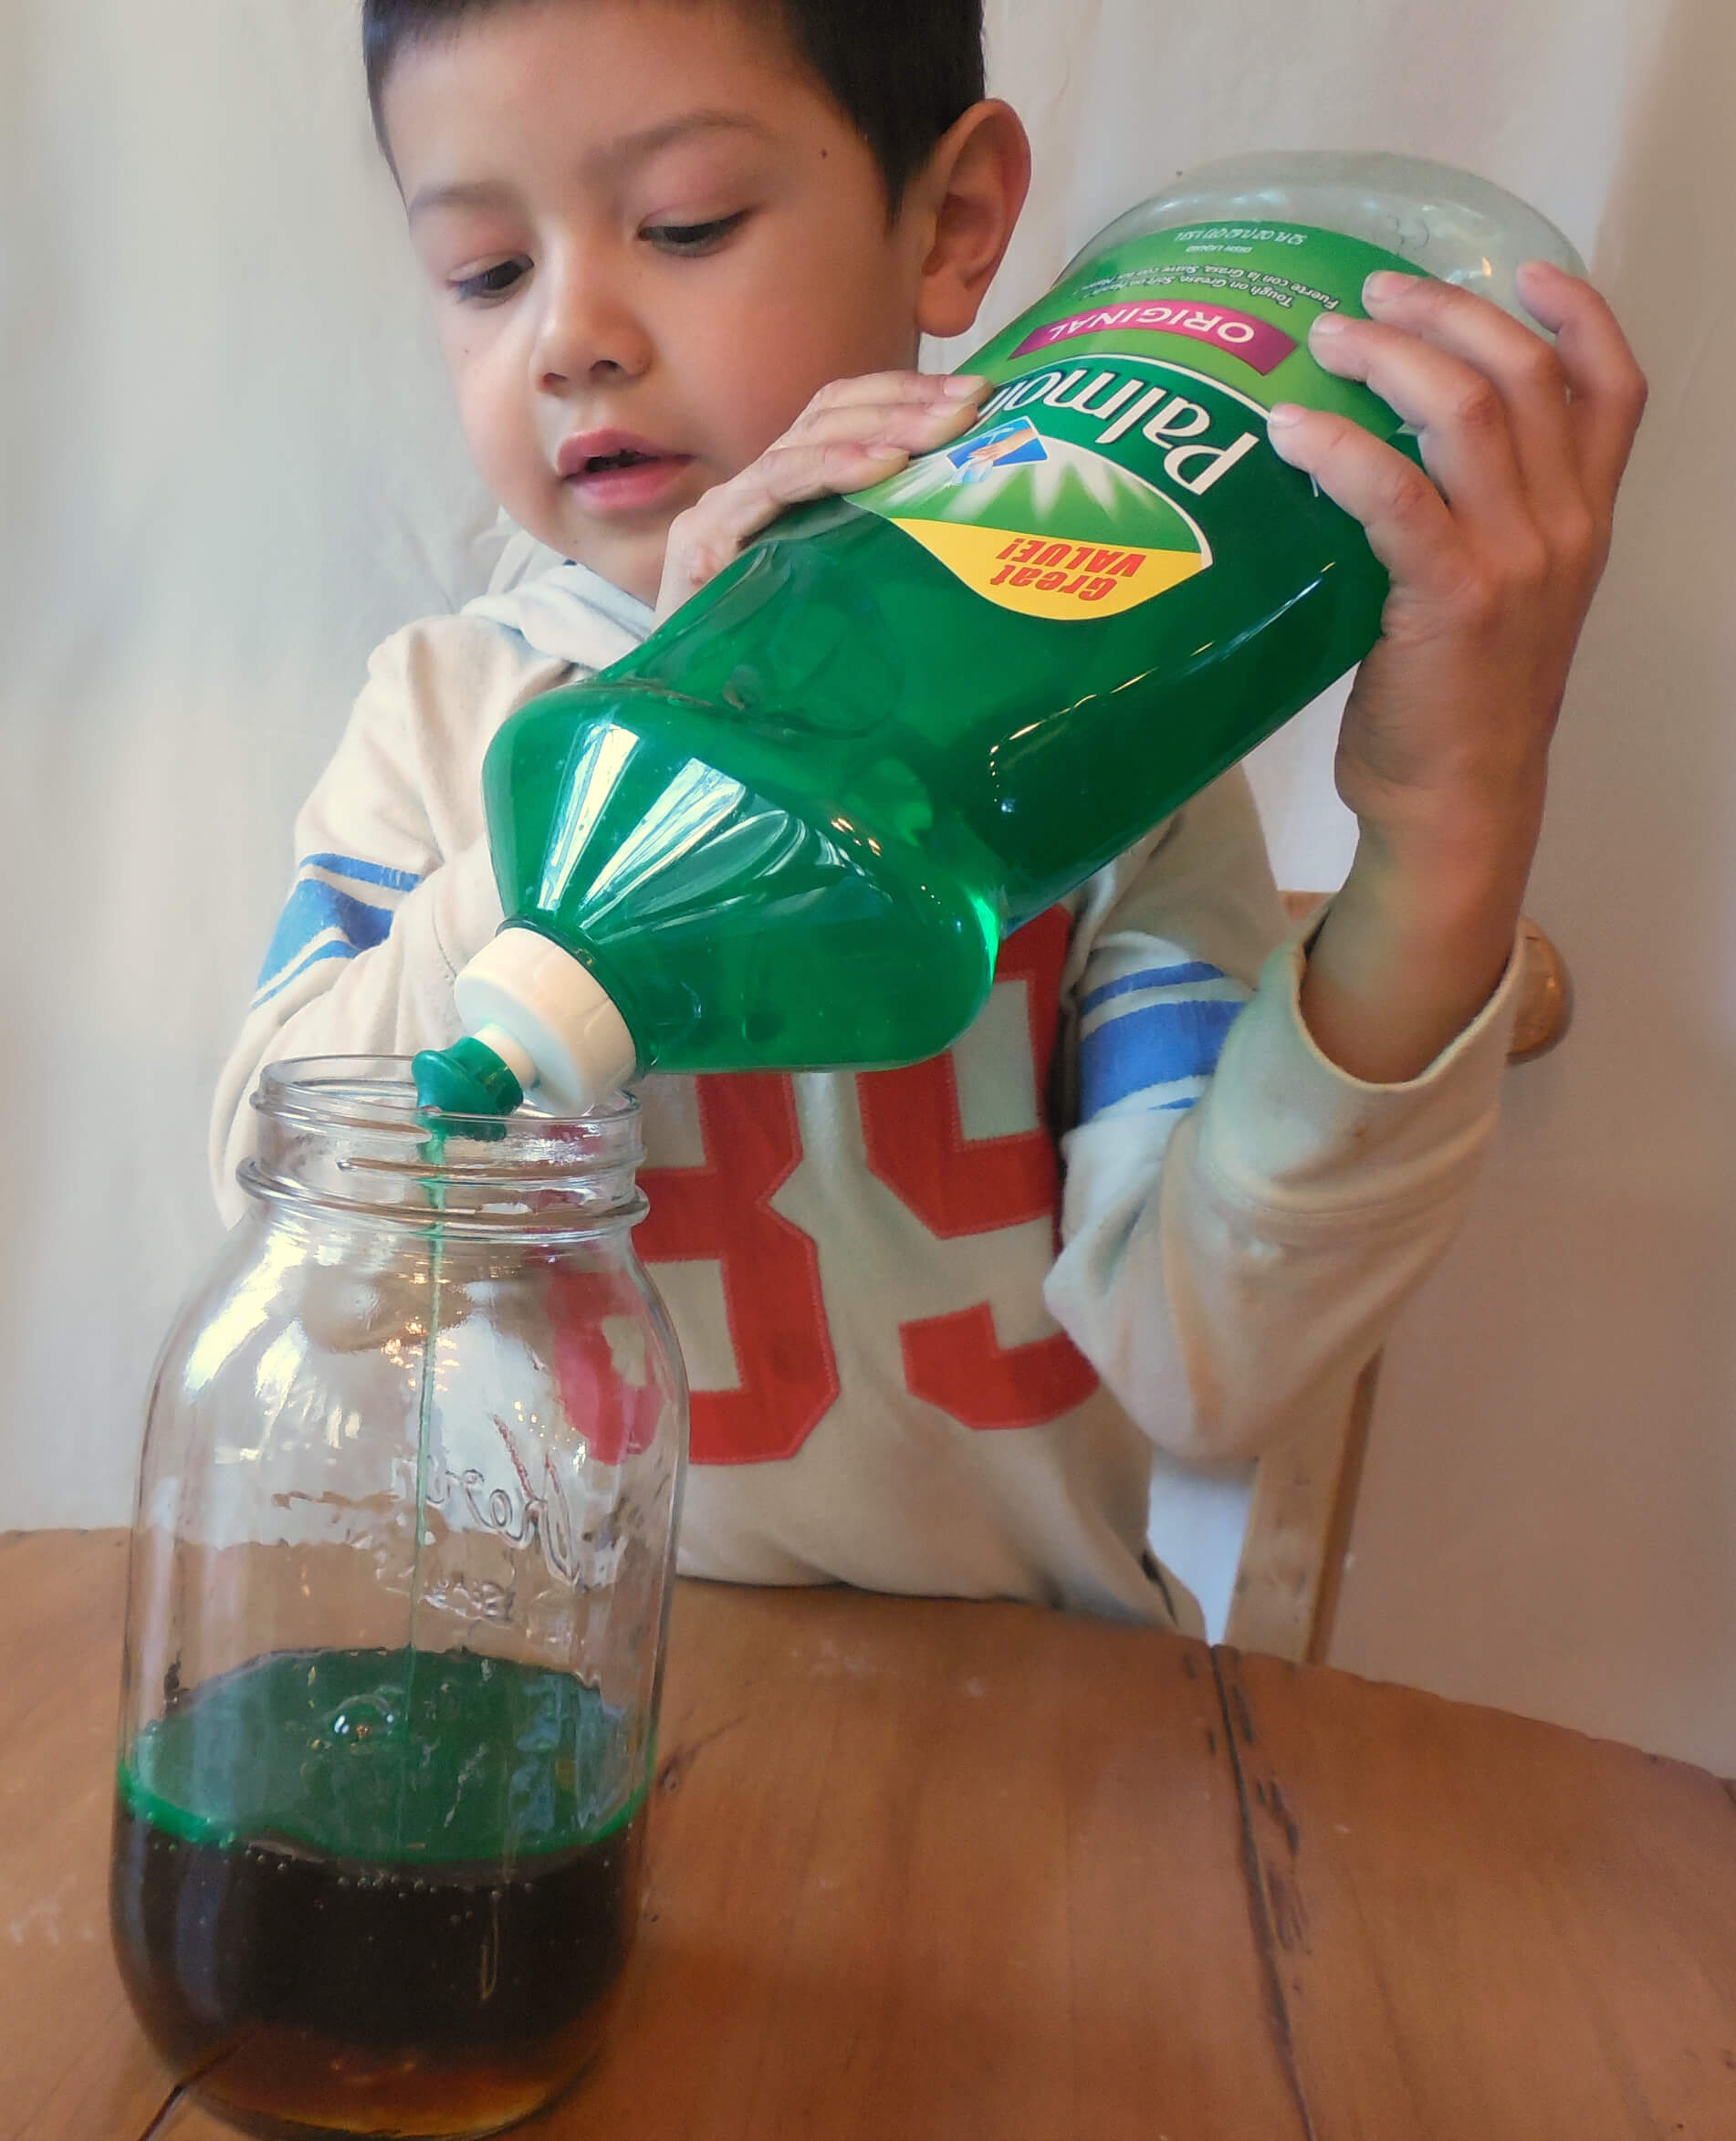
We poured in regular water that we colored blue. (If you’re using blue dish soap, obviously color your water something different. Again, in the middle, in the middle!)
The olive oil went in the rainbow jar next. Do you know what I’m going to say? That’s right, we poured it in the middle! Also, I recommend pouring a fairly thick layer of oil – it will come in handy for the next step.
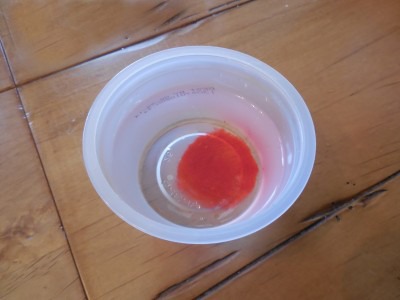
Last but not least was the rubbing alcohol. We colored it red – that in itself is a cool peek at different densities because the food coloring just sits at the bottom of the alcohol when you first drop it in. BUT WAIT! DON’T POUR IT IN THE MIDDLE!
This is where the dropper comes in. If you pour the alcohol straight in, it’ll probably pick up the blue food coloring you used in the water and your rainbow will be ruined.
We found the best way to add it was dropping the alcohol along the side of the container using a dropper. The key was not “breaking through” the oil layer into the blue water layer beneath it – that’s why I suggested putting a thick layer of oil.
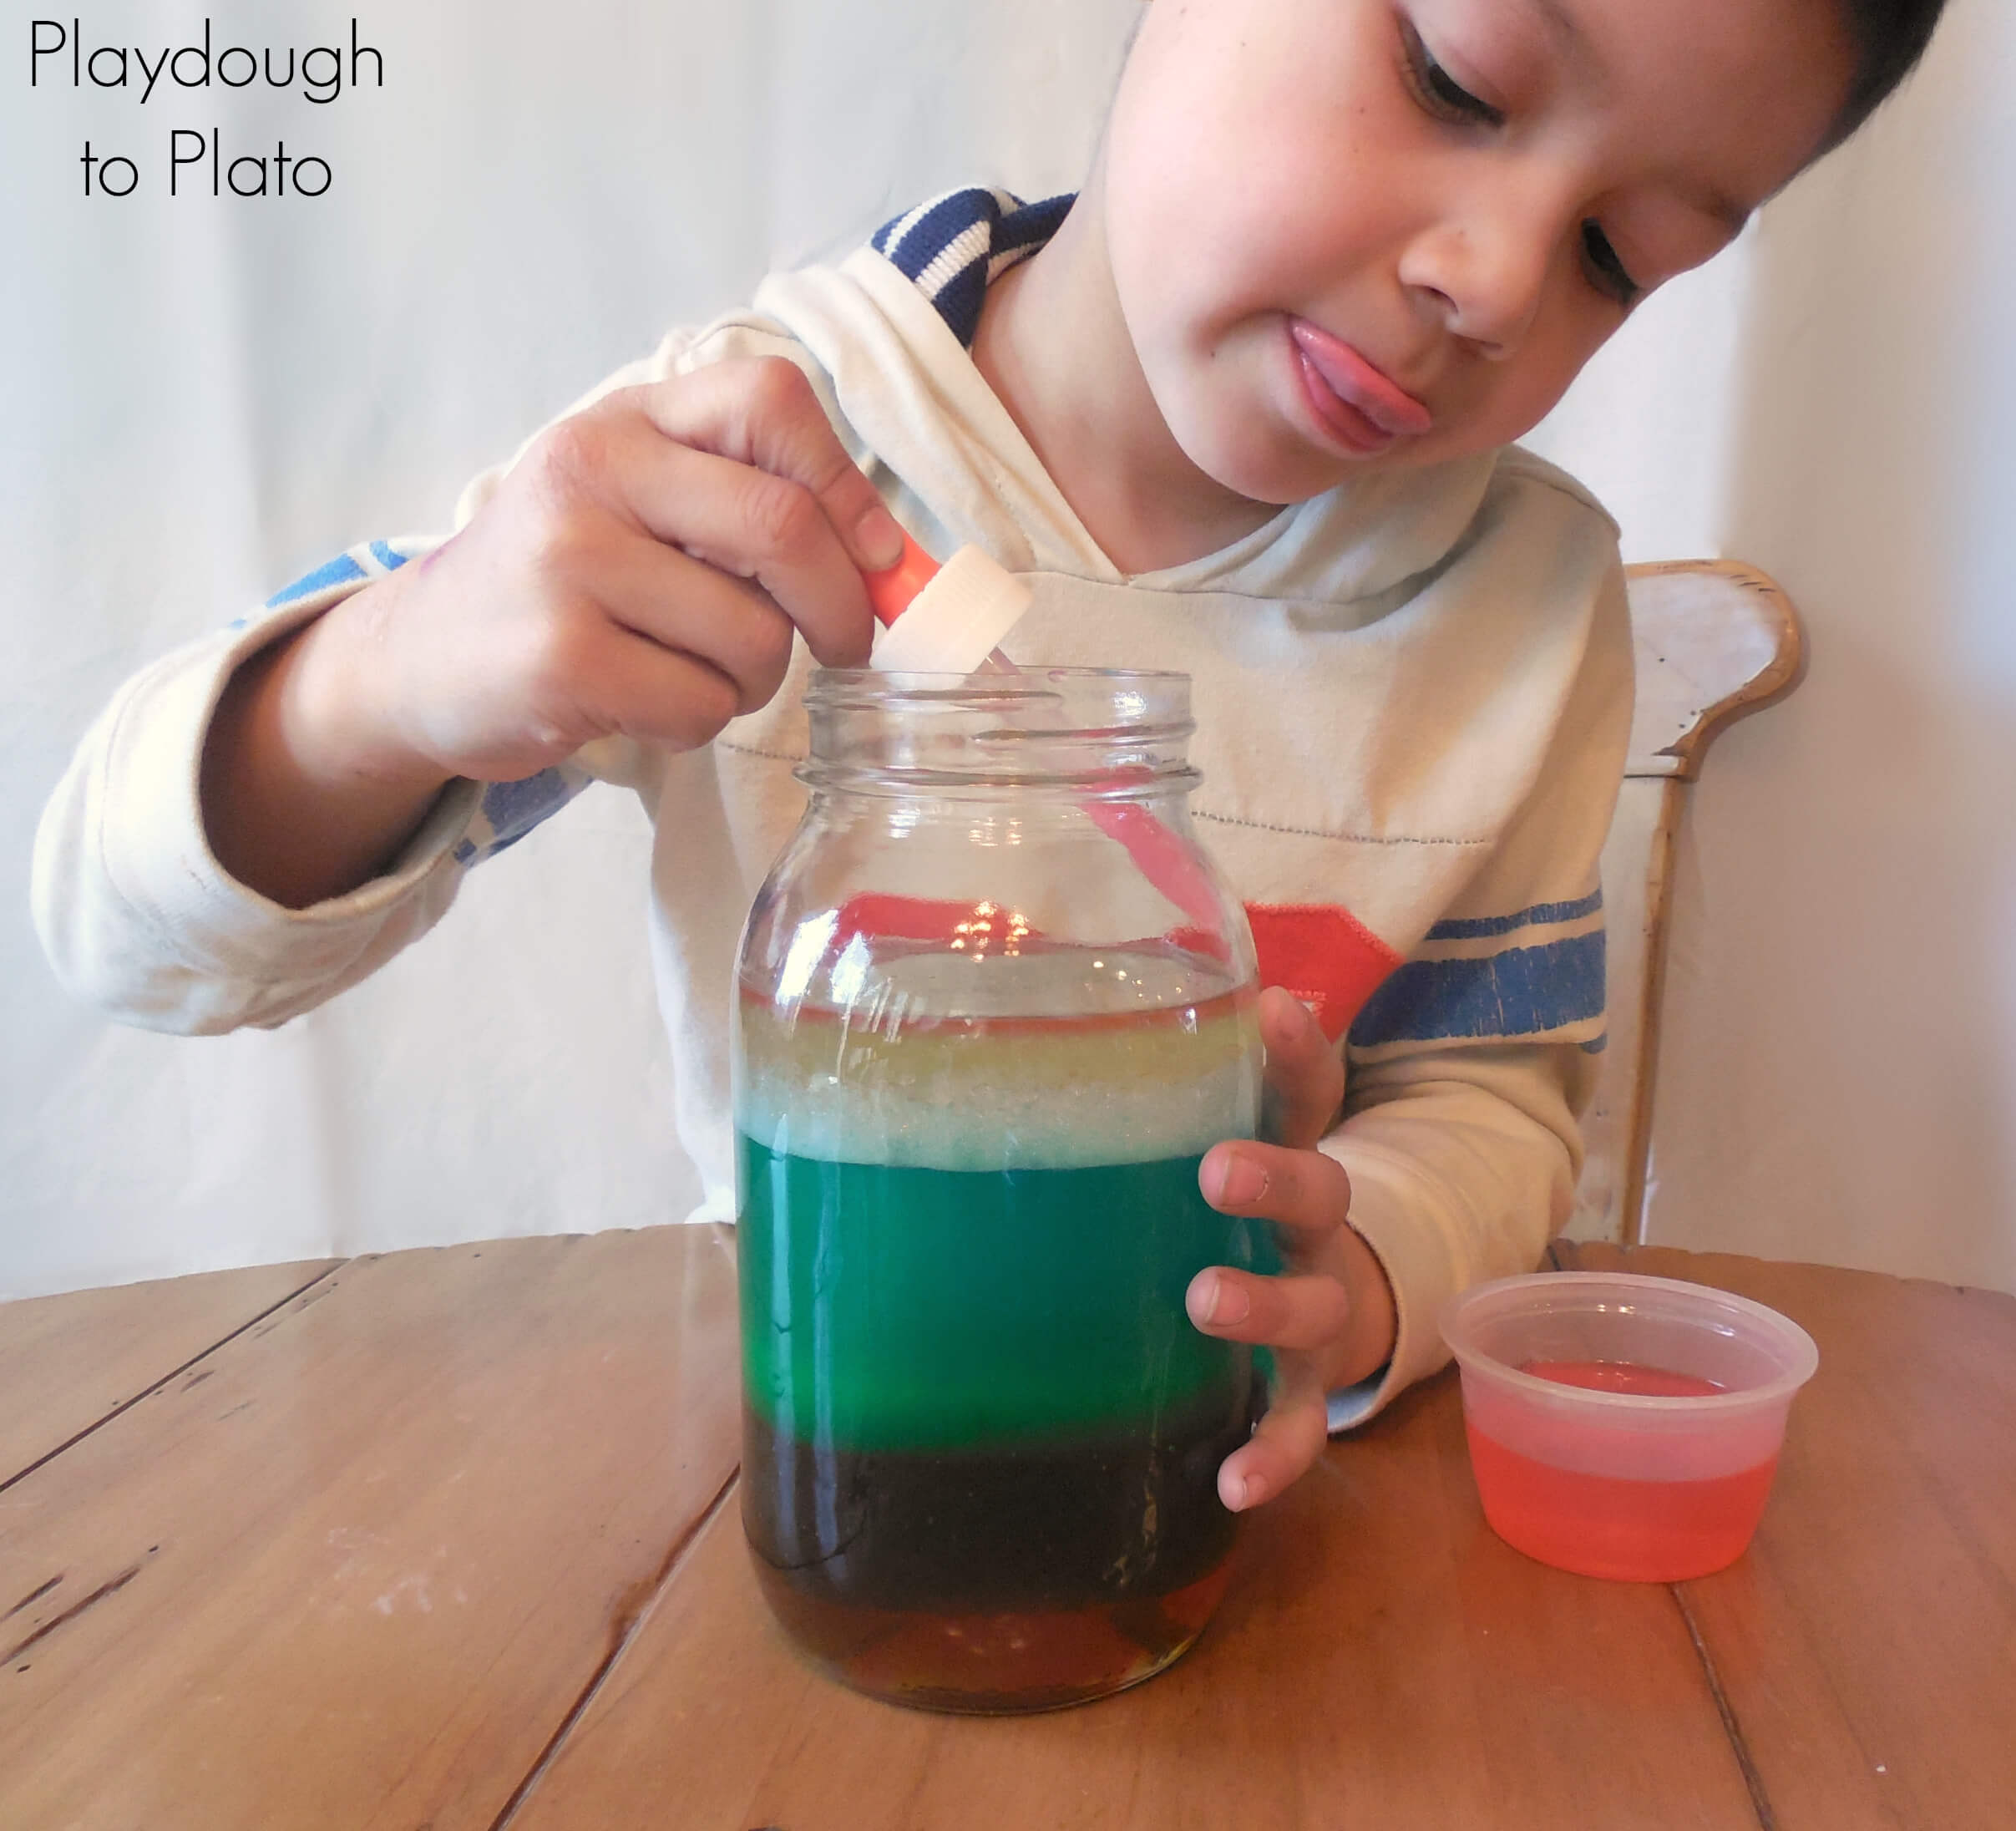
Our rainbow was done! We held it up carefully to the light, making sure not to shake it, and admired our beautiful creation.

More Simple Science Kids Will Love
Inspire kids to LOVE science with 30 more jaw-dropping experiments they’ll beg to repeat!
Grab 30 easy-to-follow science experiments kids will beg to repeat (plus a no prep science journal to keep track of their results!) in our shop!
The experiment sounds great but how much of each ingredient is needed?
Hi!
Great question! There’s not a specific amount required for each ingredient. You just want to have enough to see the different layers. The key is pouring each ingredient into the middle of the jar, not letting it slide down the sides. Hope your kids love it!
Warmly,
Ashley // Happiness Ambassador
Can you use vinegar or hydrogen peroxide instead of rubbing alcohol?
Hi Alyssa,
You can try one of those materials, but since it all has to do with the density of materials, I’m not sure if it will work. You may just want to omit that layer.
Hope it turns out well!
Warmly,
Ashley // Happiness Ambassador
Does it have to be olive oil or will any oil work?
Hi Rosemary,
Other oils should work, but it really depends on the density of the oil.
We’ve found success with olive oil, but would love to hear if you used other oil as well.
Warmly,
Ashley // Happiness Ambassador
We used both olive oils and vegetable just to increase our oil layer. It worked well for us. The children loved it. Thank you.
Love it! Thanks for sharing, Candy!
Warmly,
Ashley // Happiness Ambassador
I noticed that you used a clear cup to add the rubbing alcohol with the red food coloring, is this the only item you used a clear cup to add the item in the jar or clear container? I’m assuming because of the use of the honey, corn syrup and dish soap you would just pour straight in, is that correct?
HI Luis,
Great question! The other items do not need to be added using a clear cup, but it is important that they are poured into the middle of the container, rather than the sides.
The rubbing alcohol with the red food coloring was mixed in the clear cup and then added using a dropped along the sides of the cup so as not to break the layer of oil.
Hope it turns out great!
Warmly,
Ashley // Happiness Ambassador