Whether you find mummies creepy or mysterious, you have to admit, they are pretty fascinating. The processes of making a mummy fish is quite simple and with this easy kids’ science experiment, any little mad scientist can try her hand at making a real mummy!
Get ready for this fun and unique science experiment! And for more addictive kids’ science, check out our 30 Science Experiments in our shop!

Getting Ready
To make a mummy fish, I simply took a quick trip to the store and grabbed a few items:
- 1 whole fish (we used a trout, with its guts removed, and descaled)
- 2 lbs. or more of baking soda
- A container with a lid to store your fish while mummifying
- Gloves (optional)
Making a Mummy Fish
My 5 year-old, A, has been fascinated with mummies for a while and had to know just how ancient Egyptians made them.
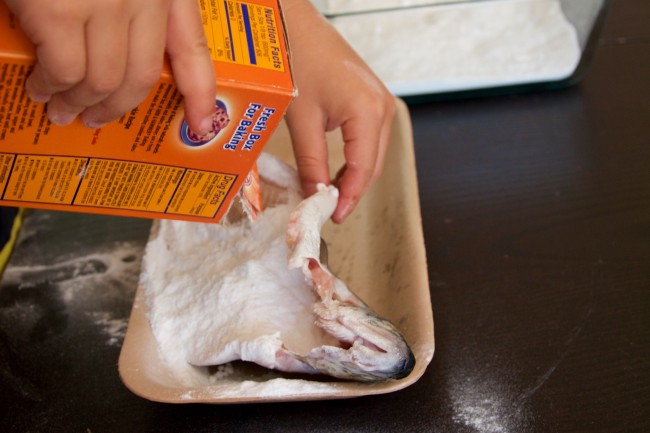
First, we started with the dead body. We chose a fish. If you want to make the experience more authentic, you could gut the fish at home to remove its internal organs. Since I have a 3 year-old that tends to put his fingers in his mouth, I chose to buy a pre-gutted fish.
I quickly descaled the fish by scraping a sharp knife down its side against the directions of the scales.
Before making the mummy, I had my kids examine the fish. They noticed it was very slippery and a little stinky, its body was squishy and floppy and its eye was watery.
Next, they covered the bottom of a glass dish with about 2 inches of baking soda.
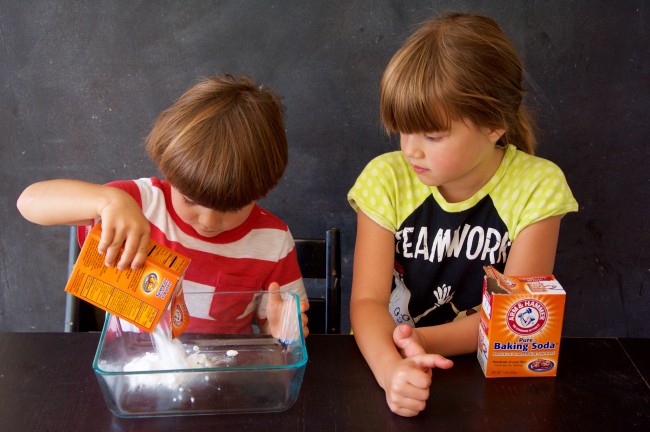
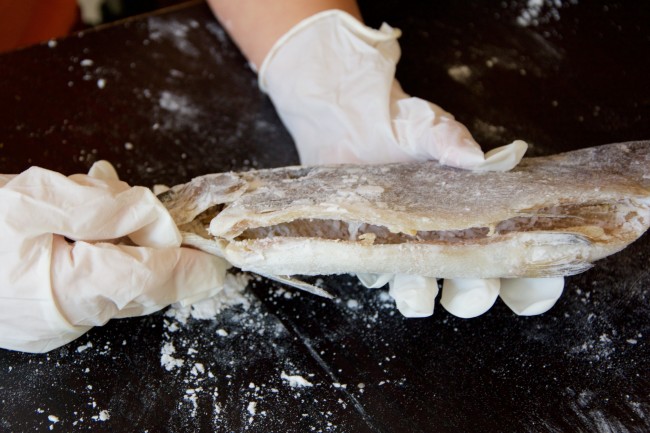
I then helped them hold open the fish to stuff the insides with more baking soda. Make sure to really fill the body cavity, including the head. You may want to wear gloves for this, though we found the gloves didn’t fit my kids’ little hands well and made handling the fish harder.
Once the body cavity was full, we placed the fish in the glass dish and covered it with more baking soda. We made sure all of its body parts had at least an inch of baking soda covering it.
Then, next part was the hardest part of the mummy fish experiment: waiting. We covered the glass with a tight-fitting lid (to minimize smell) and put it in a cool but dry part of our basement. I was tempted to place it in the fridge, but that’s not how real mummies were made, so we opted to leave it out.
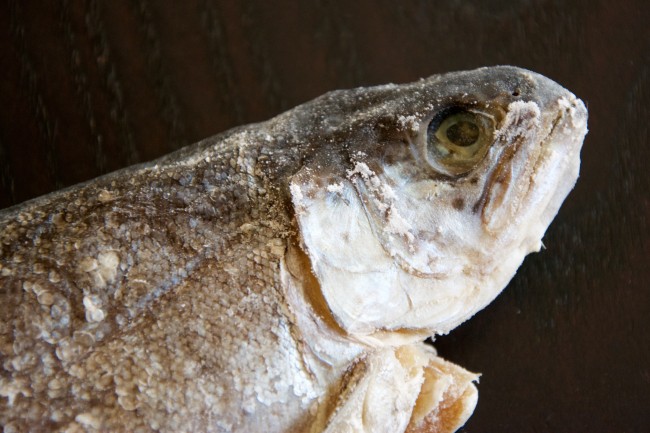
After a week, we checked on our mummy fish to see how it was coming along. I didn’t know what to expect, so I had the kids wear gloves when examining the fish this time. They noticed the body had gotten harder and no longer flopped around. Also, the baking soda was damp.
In the picture below, you can see the fish had become stiff by how its tail stayed curved upward.
They were also surprised that the fish didn’t smell! Obviously my kids aren’t afraid to really dive into science. This mummy fish was no exception!
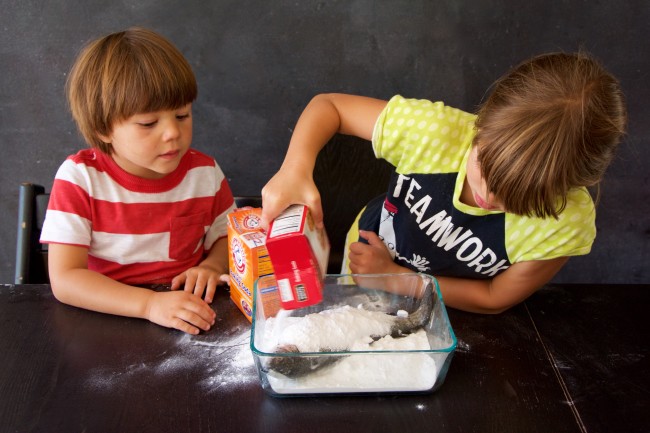
We removed the damp baking soda from the fish’s belly and packed it full of fresh baking soda. Again, we filled the dish with baking soda, added the fish and covered it with more baking soda. This time life got busy and we forgot about our mummy fish until 12 days had gone by.
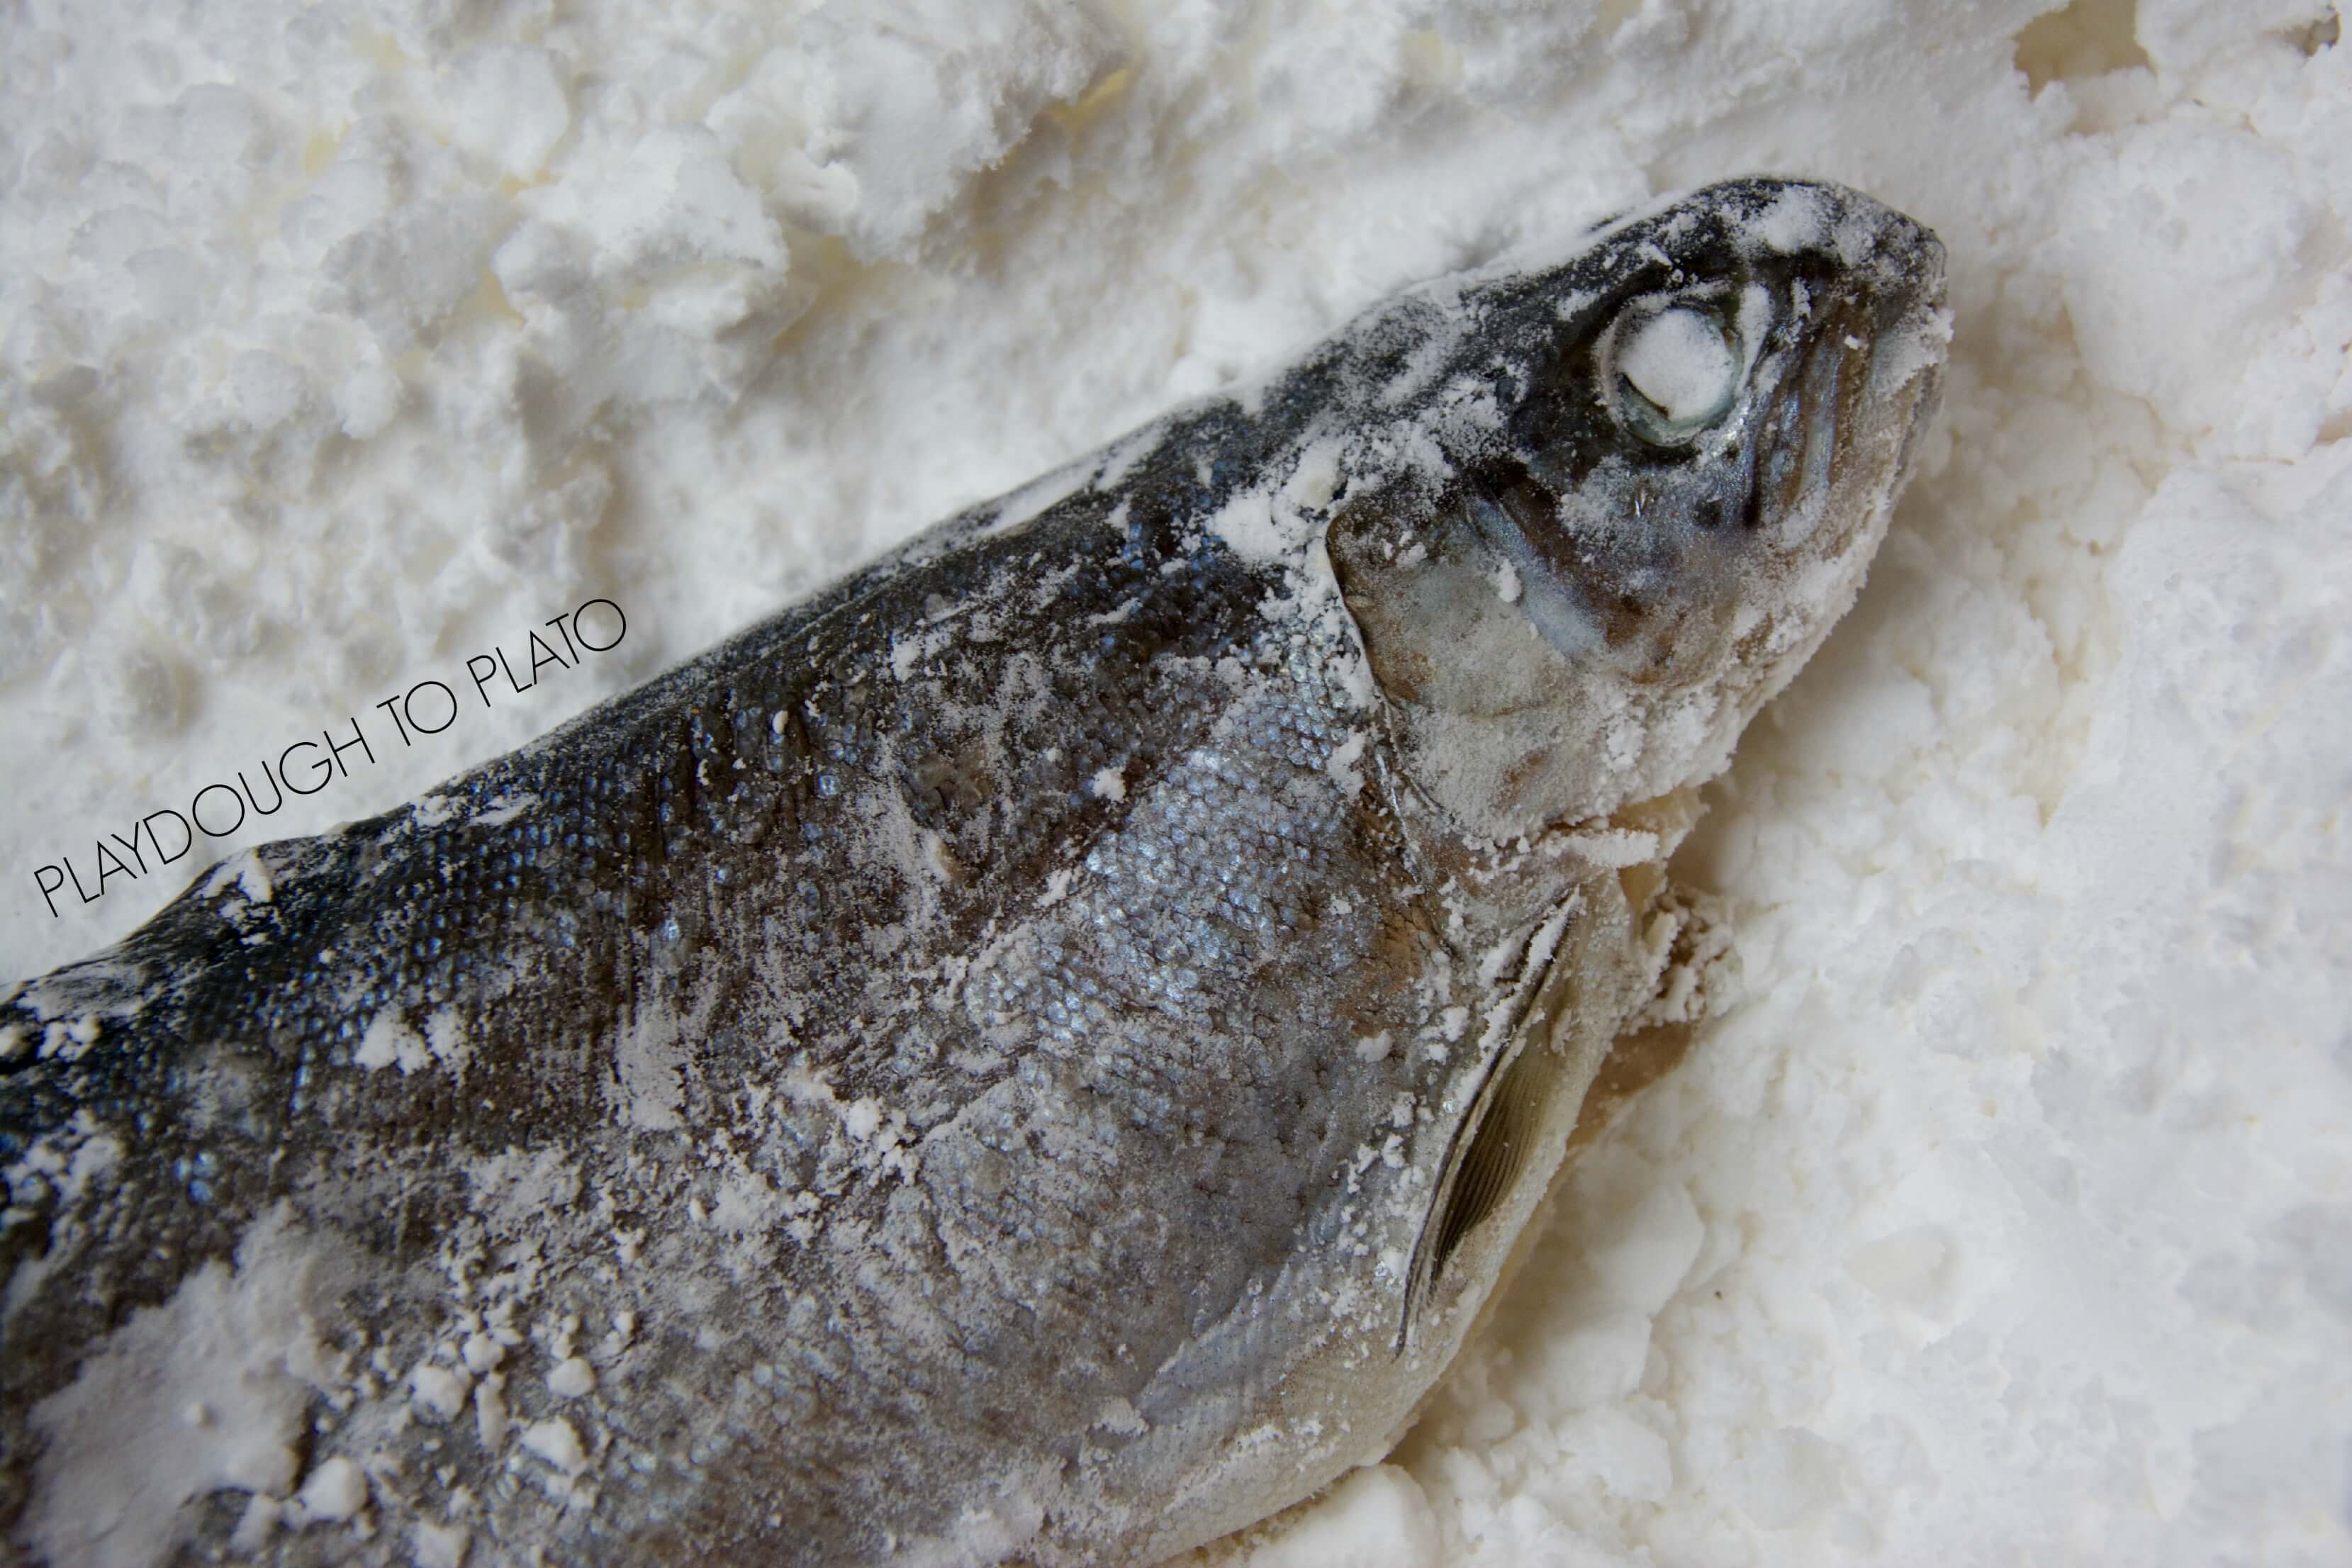
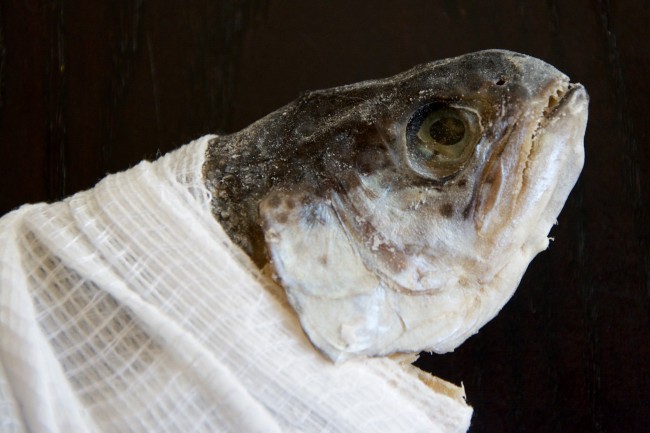
When we removed the fish, it was significantly more firm. You can see it in the picture below. The body cavity stayed open without help!
It had been almost 3 weeks since this fish died and it still didn’t really smell bad. The kids couldn’t believe that this mummy fish wasn’t rotting.
In fact, other than the fish becoming firm and stiff, the only other change we noticed was the slightly sucked in appearance around the fish’s head.
 I had planned on packing the fish in fresh baking soda for a third time, but the kids had other plans. They wanted their mummy fish fully wrapped like a real mummy! Since we pretty much saw the process through which mummies were made, I let them go at it.

The Science Behind It
Ancient Egyptians preserved the bodies of dead for the afterlife by removing most of the organs and treating the body with a naturally-occurring salt called natron, a mixture of soda, ash and baking soda.
In our activity, we started with a fish that had its organs already removed. Bodies decay from the inside out starting with the soft, moisture-rich organs. By removing the organs and surrounding the body with a desiccant, we were able to preserve our dead fish just like the Egyptians.
Next, the Egyptians rinsed the body with wine to kill any remaining bacteria and stuffed the inside with either natron or stuffing (to keep the body’s shape). The whole body was then covered in natron.
Salt is a desiccant, which means it helps draw out water from things, including human bodies. Remember how the previously dry baking soda felt wet after the fish sat in it for a week? Without moisture, the bacteria and fungus that cause the body to rot cannot grow. That’s why the fish hardly smelled after 3 weeks.
After the bodies had desiccated for 40 days, the Egyptians would wash and repack the bodies with spices and more natron. Then, the bodies were carefully bound with strips of linen to help keep the body parts together. The whole process took 70 days to complete. Our version took just 19.
Mummy Fish Extensions
Try different kids of salt (table salt, baking soda, Epsom salt) to see which salt acts as a better desiccant and preservative.
While mummifying your fish with the above method, allow another fish to decay normally. Compare the two.
Try mummifying a fish with its organs and one without. Similarly, try mummifying a fish with scales and one without. Are there any differences?
Before refrigeration, one way to preserve food was by salting. Can you think of any food today that is made this way? How does its texture compare to your fish?
More Fun for Little Mad Scientists
Try out 30 more kid-approved science experiments in our 30 Science Experiments kit!!

I’ve done it with a whole chicken, and had a fellow teacher do it with chicken legs. With those, if things aren’t just right, they do begin to smell funky! Thanks for introducing a new way to do this!
This was so excellently done and described! Thank you! You get an ‘A’! : )
Hooray! I am so glad that you enjoyed it Heather!