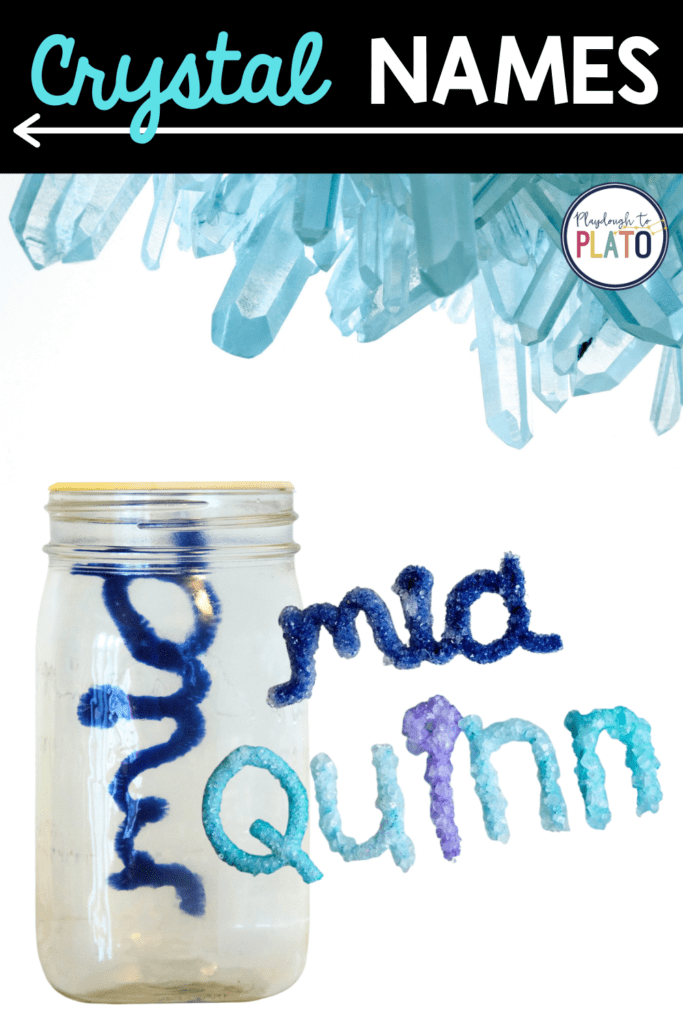
This easy-peasy, low-cost kids’ science experiment uses borax to grow crystal names. All kiddos will love seeing their name shimmer and sparkle in the sunlight!
Crystal names are one of our favorite science experiments EVER.
Follow the simple step-by-step below and then grab 30 more easy-to-follow science experiments kids will beg to repeat (plus a no prep science journal to keep track of their results!) in our shop!
Even though my 5 year-old can easily write her name, she never tires of seeing it, especially when it sparkles and glistens.
We decided to use the same technique used to make crystal snowflakes using borax, a common household laundry product, to make crystal names. The results were gorgeous and soon everyone in the family wanted their names in crystal too!
Getting Ready
To prep for this science activity, I gathered a few supplies:
- Pipe cleaners
- Fishing line (twine or yarn will work too_
- Pencils or wooden skewers
- Scissors
- Glasses or plastic container {one for each color}
- A container large enough to hold your name (if doing your name as a single piece written in cursive)
- Borax
- Food coloring (optional, if you want colored letters you can dye the borax solution or use colored pipe cleaners)
- Liquid measuring cup
- Tablespoon
- Heat safe mixing bowl
Shaping the Crystal Names
Once I gathered all my supplies, I called my daughter, A, over and explained that we were going to make the letters of her name and then grow crystals on them.
I had her take white pipe cleaners and use them to form the letters of her name.
I showed her the plastic container we were going to use to suspend the pipe cleaner letter in and explained that the letter had to fit in the container without touching any sides.
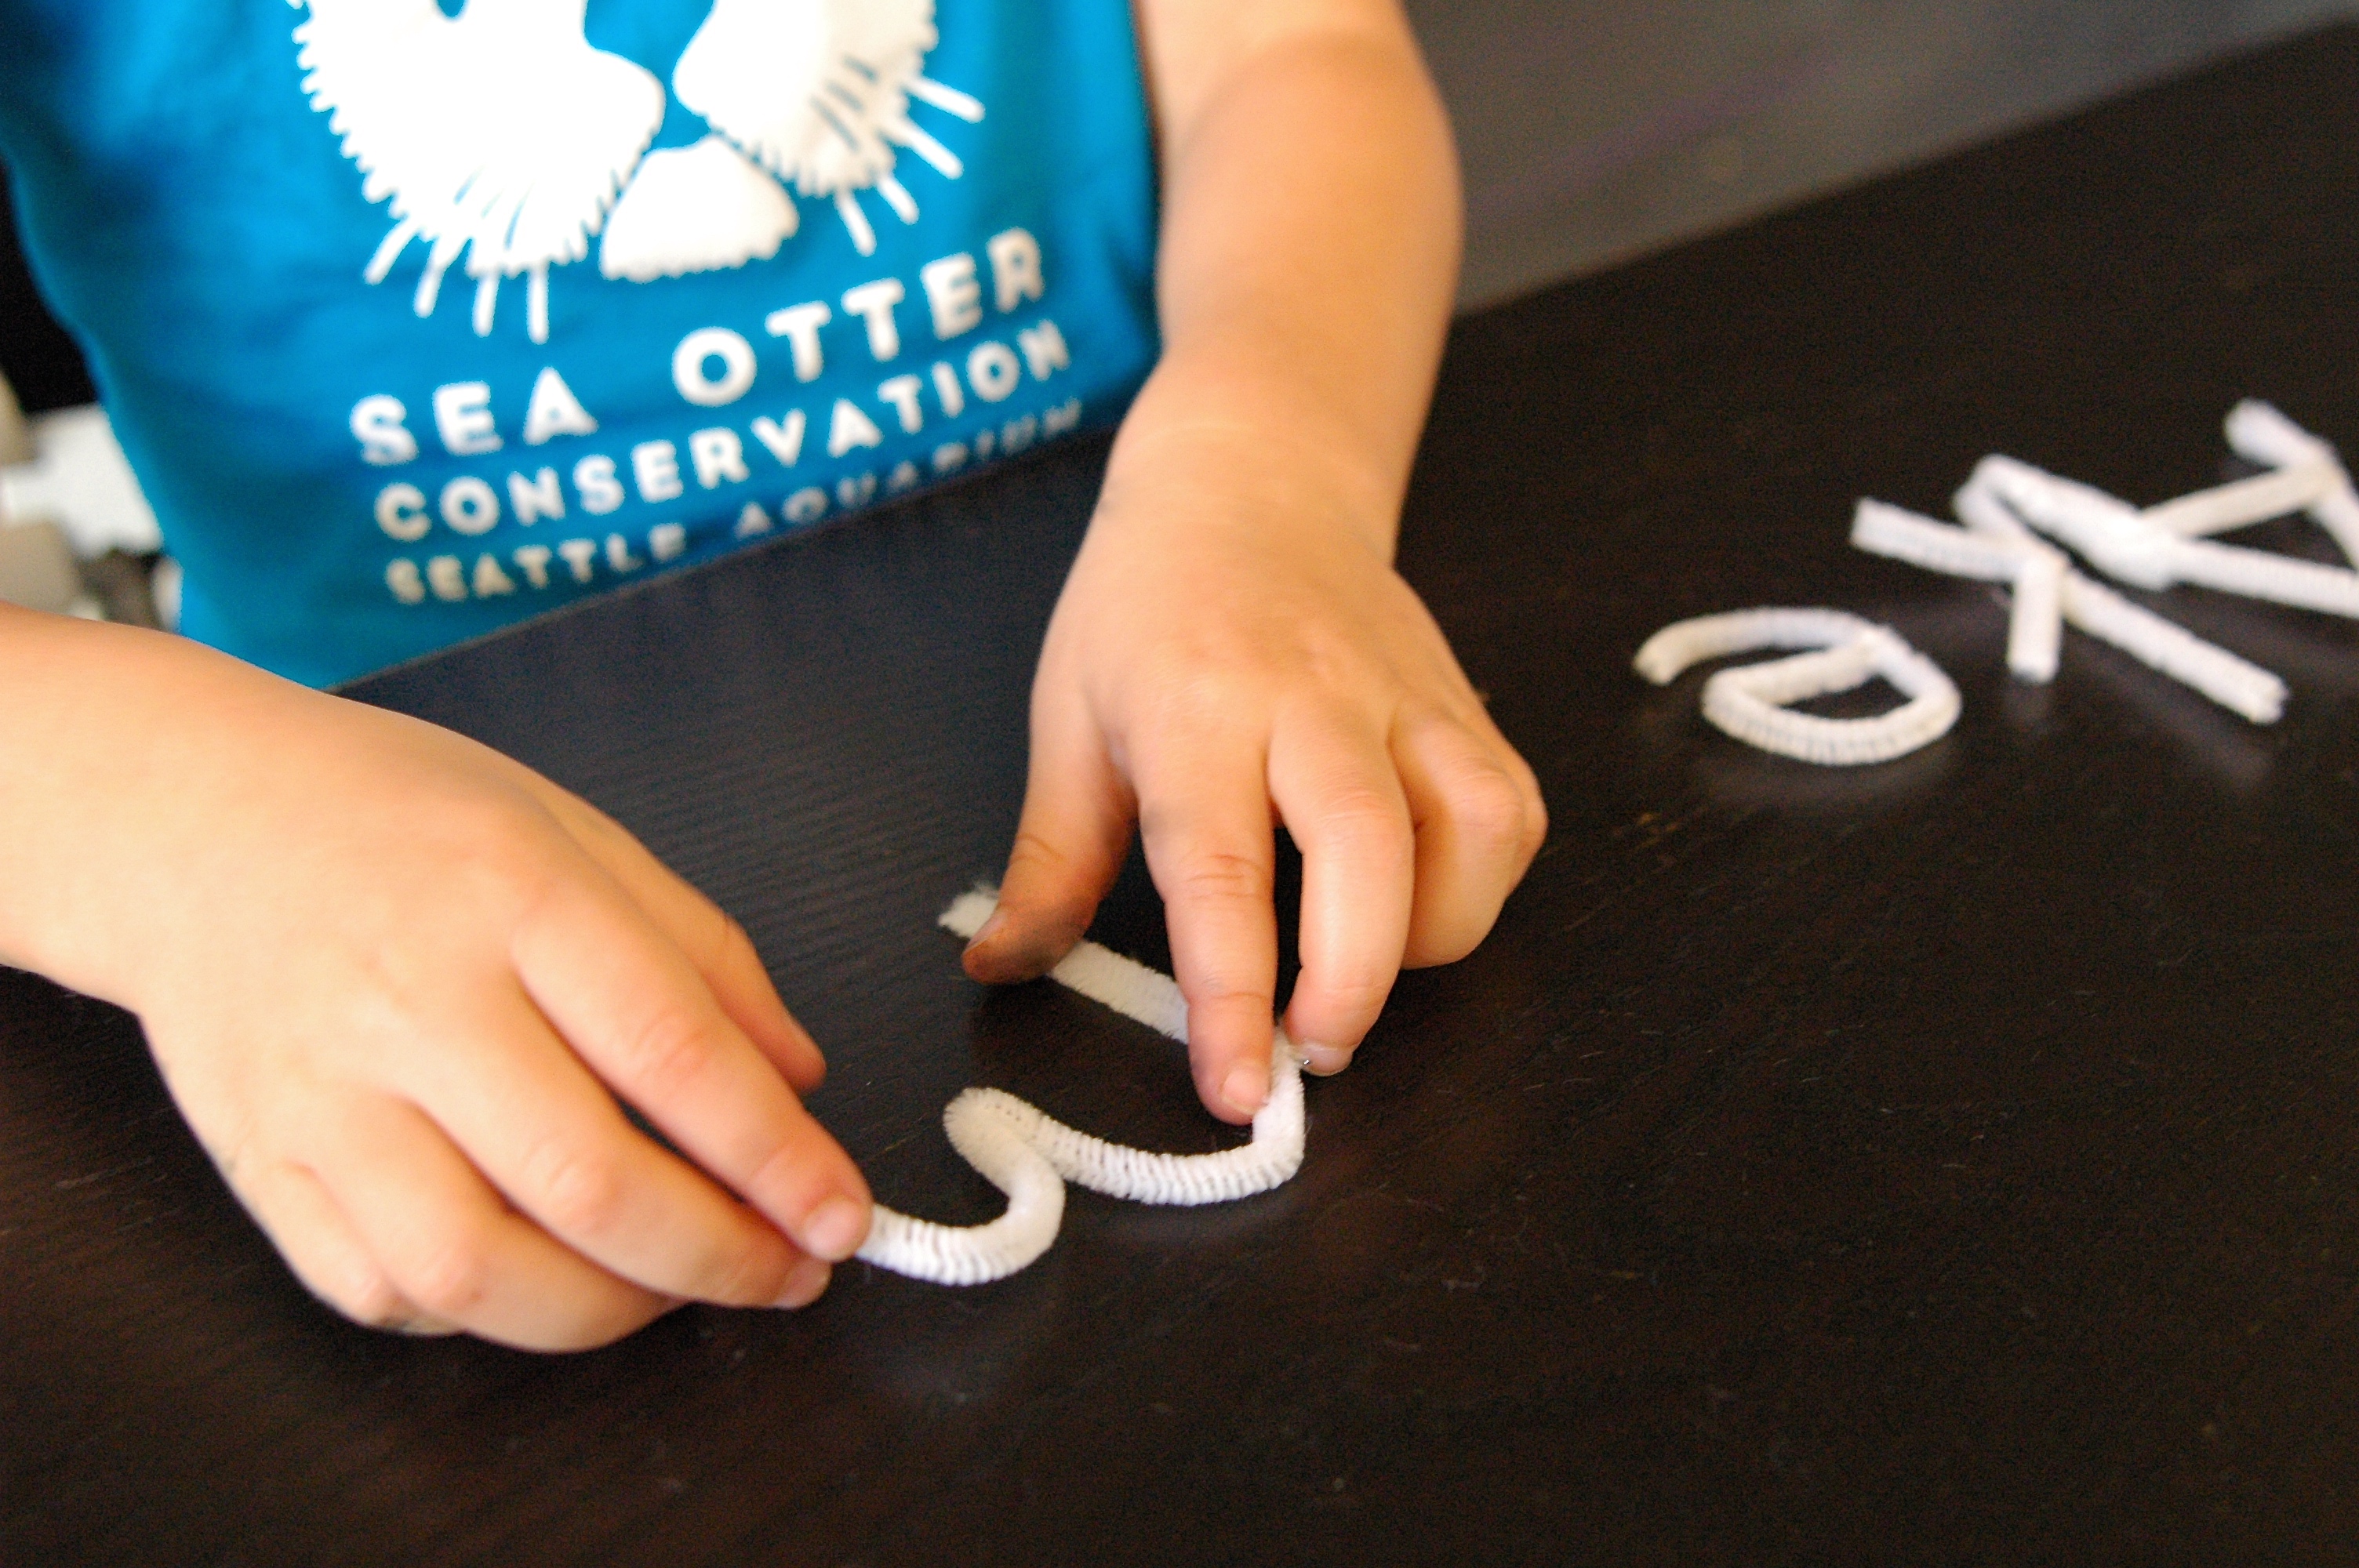
I wanted A to work on noticing what lines and curves made up each individual letter, so I intentionally had her form the letters one by one.
(Older children could connect a few pipe cleaners to form their name in cursive, making this activity even easier.)
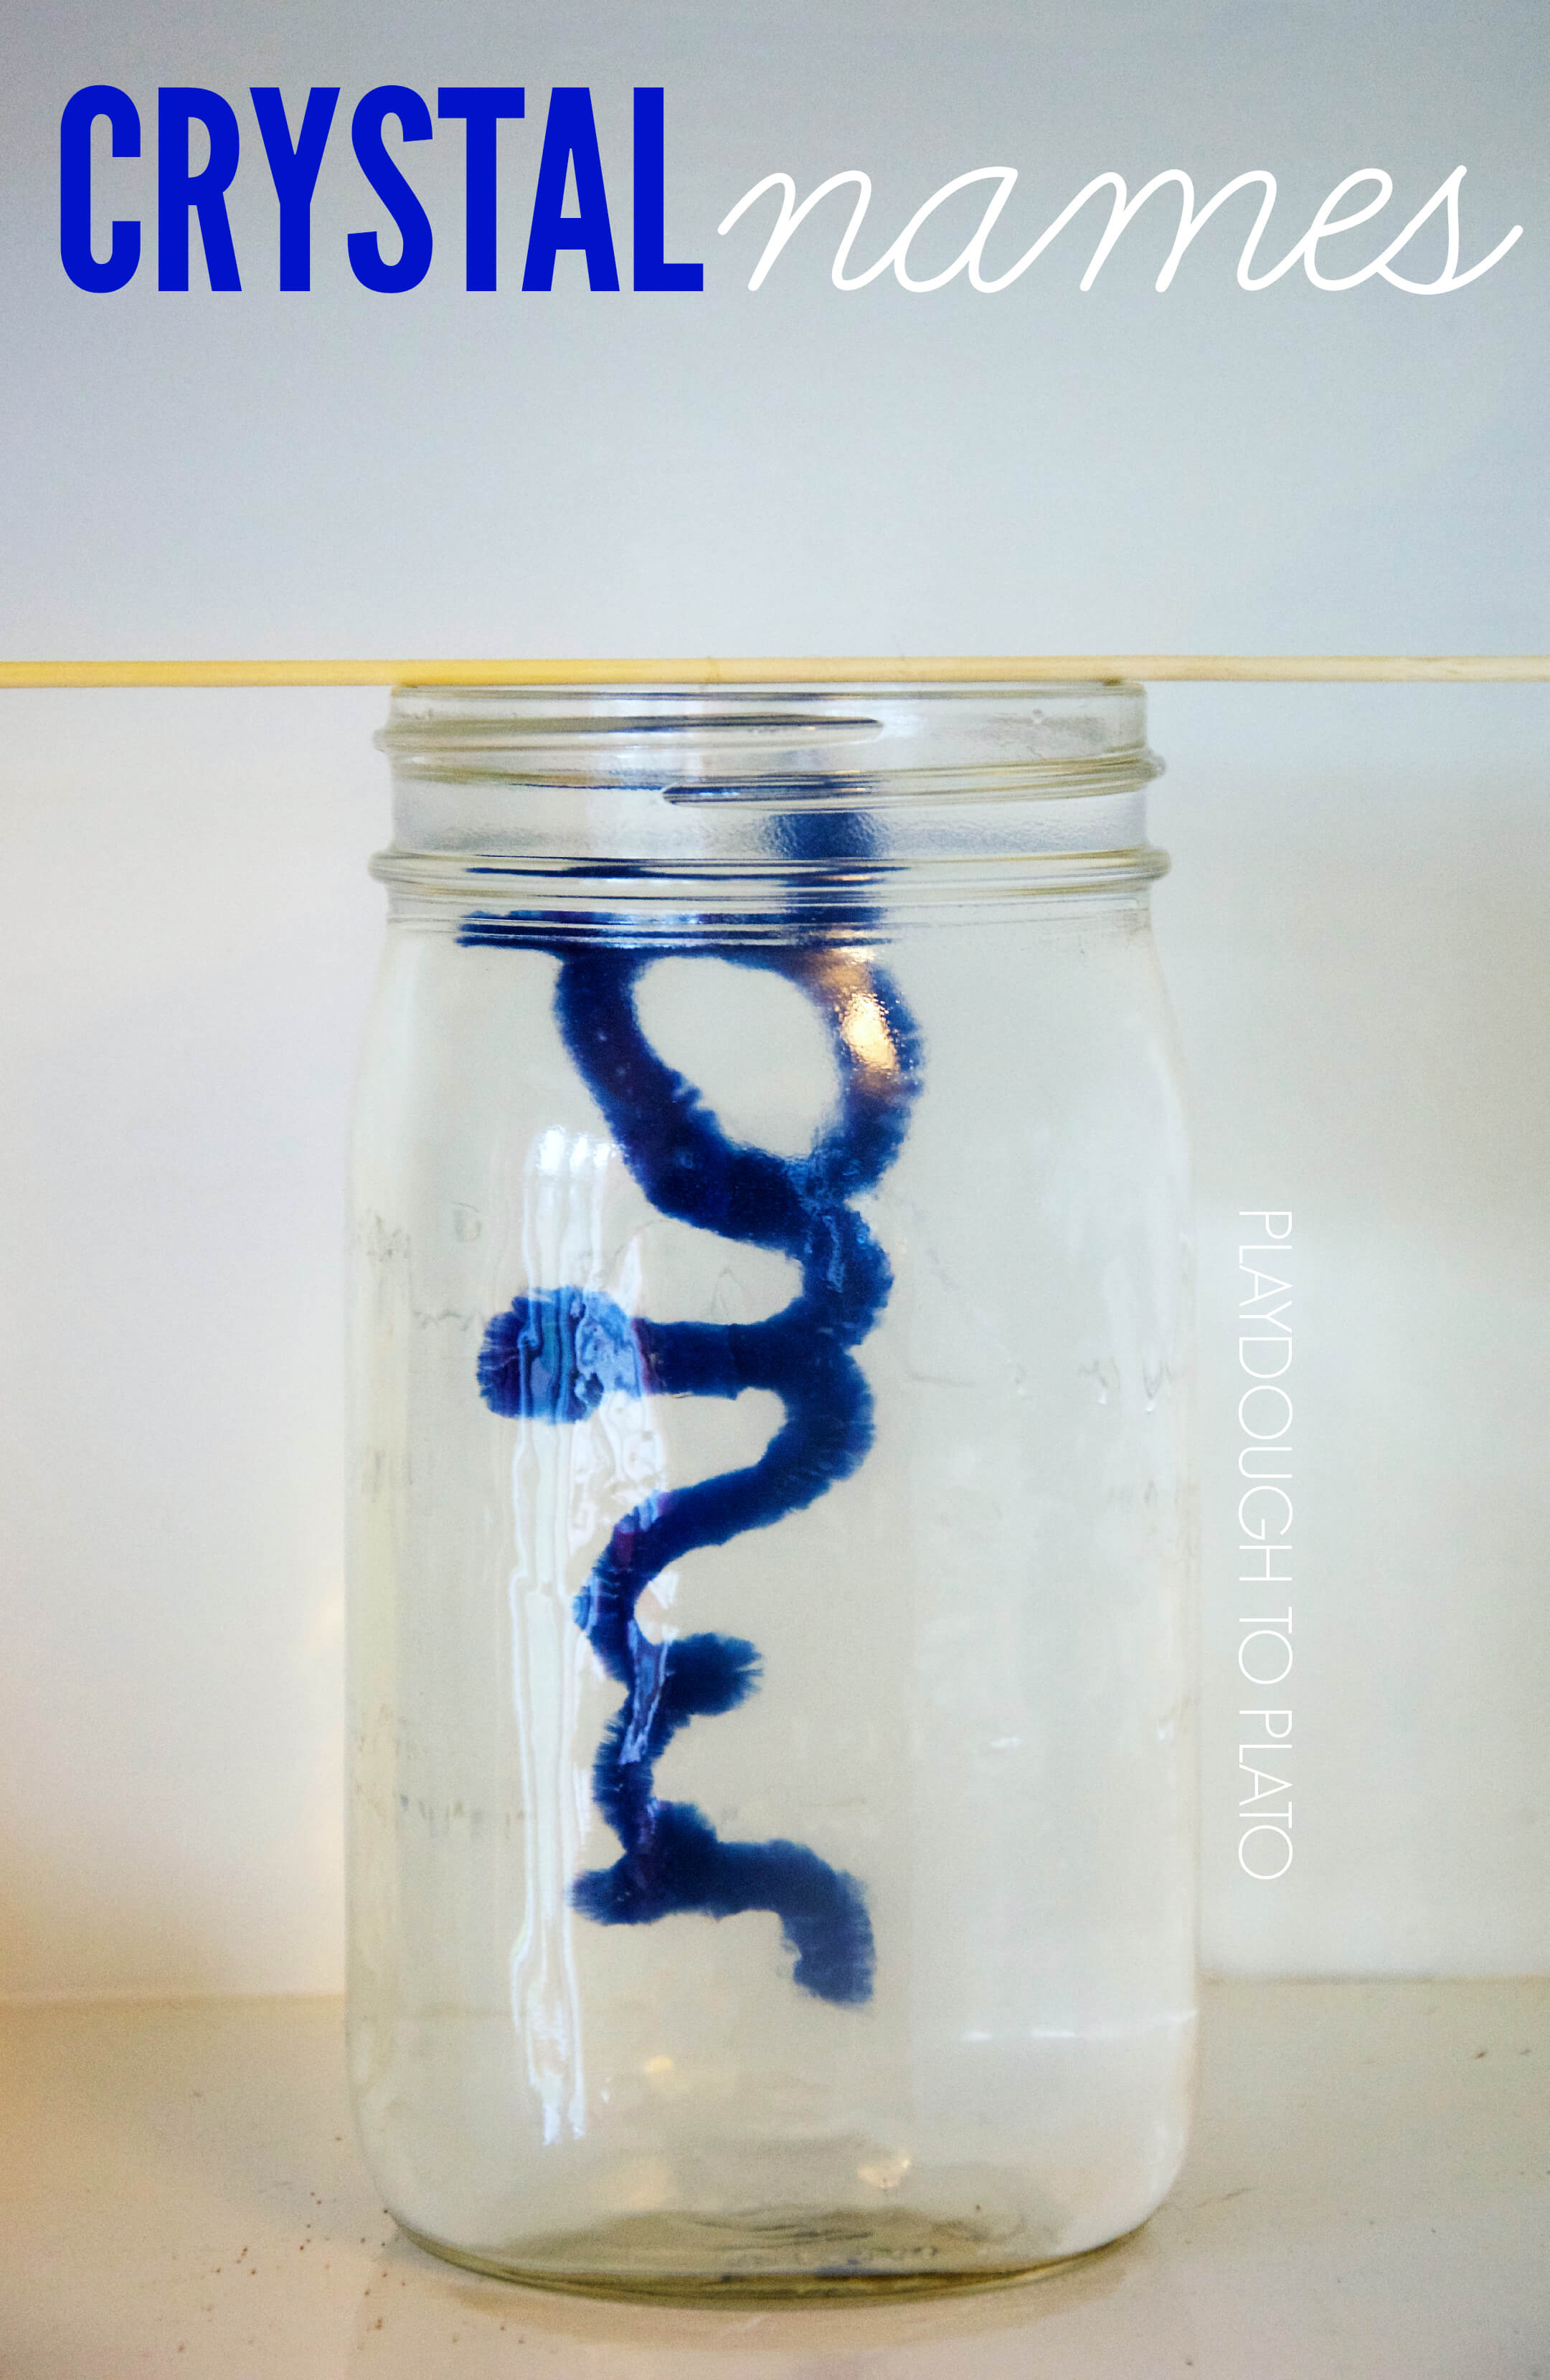
Once formed, we used fishing line to suspend each letter a few inches from wooden skewers.
Making the Solution
While A finished making her letters, I began heating a large pot of water.
I knew my 5 year-old would want to do the measuring and mixing, so I made sure the water was as hot as possible to help dissolve the borax quickly, without being hot enough to scald her.
A decided she wanted to make each letter a different color, so I set out 5 quart sized plastic containers and had A measure out 3 tablespoons of borax per cup of hot water (we used 9 tablespoons per container).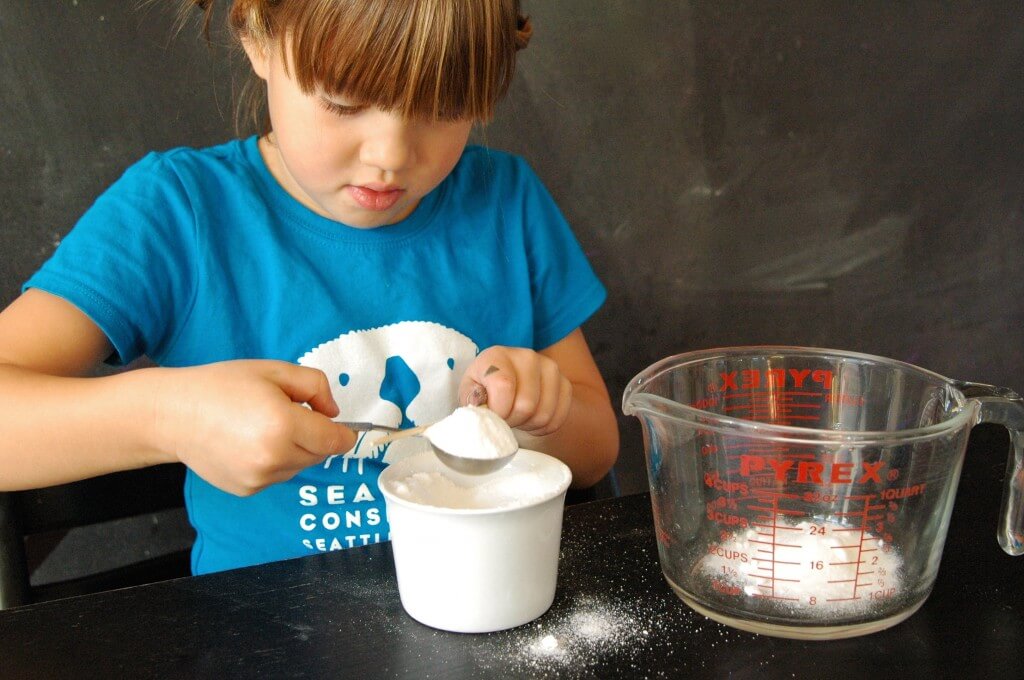
Once all the borax was measured, I poured 3 cups of almost boiling water into each of the 5 containers.
A, armed with a long wooden spoon, mixed each container until the borax dissolved. She felt like a real scientist in this kids’ science experiment!
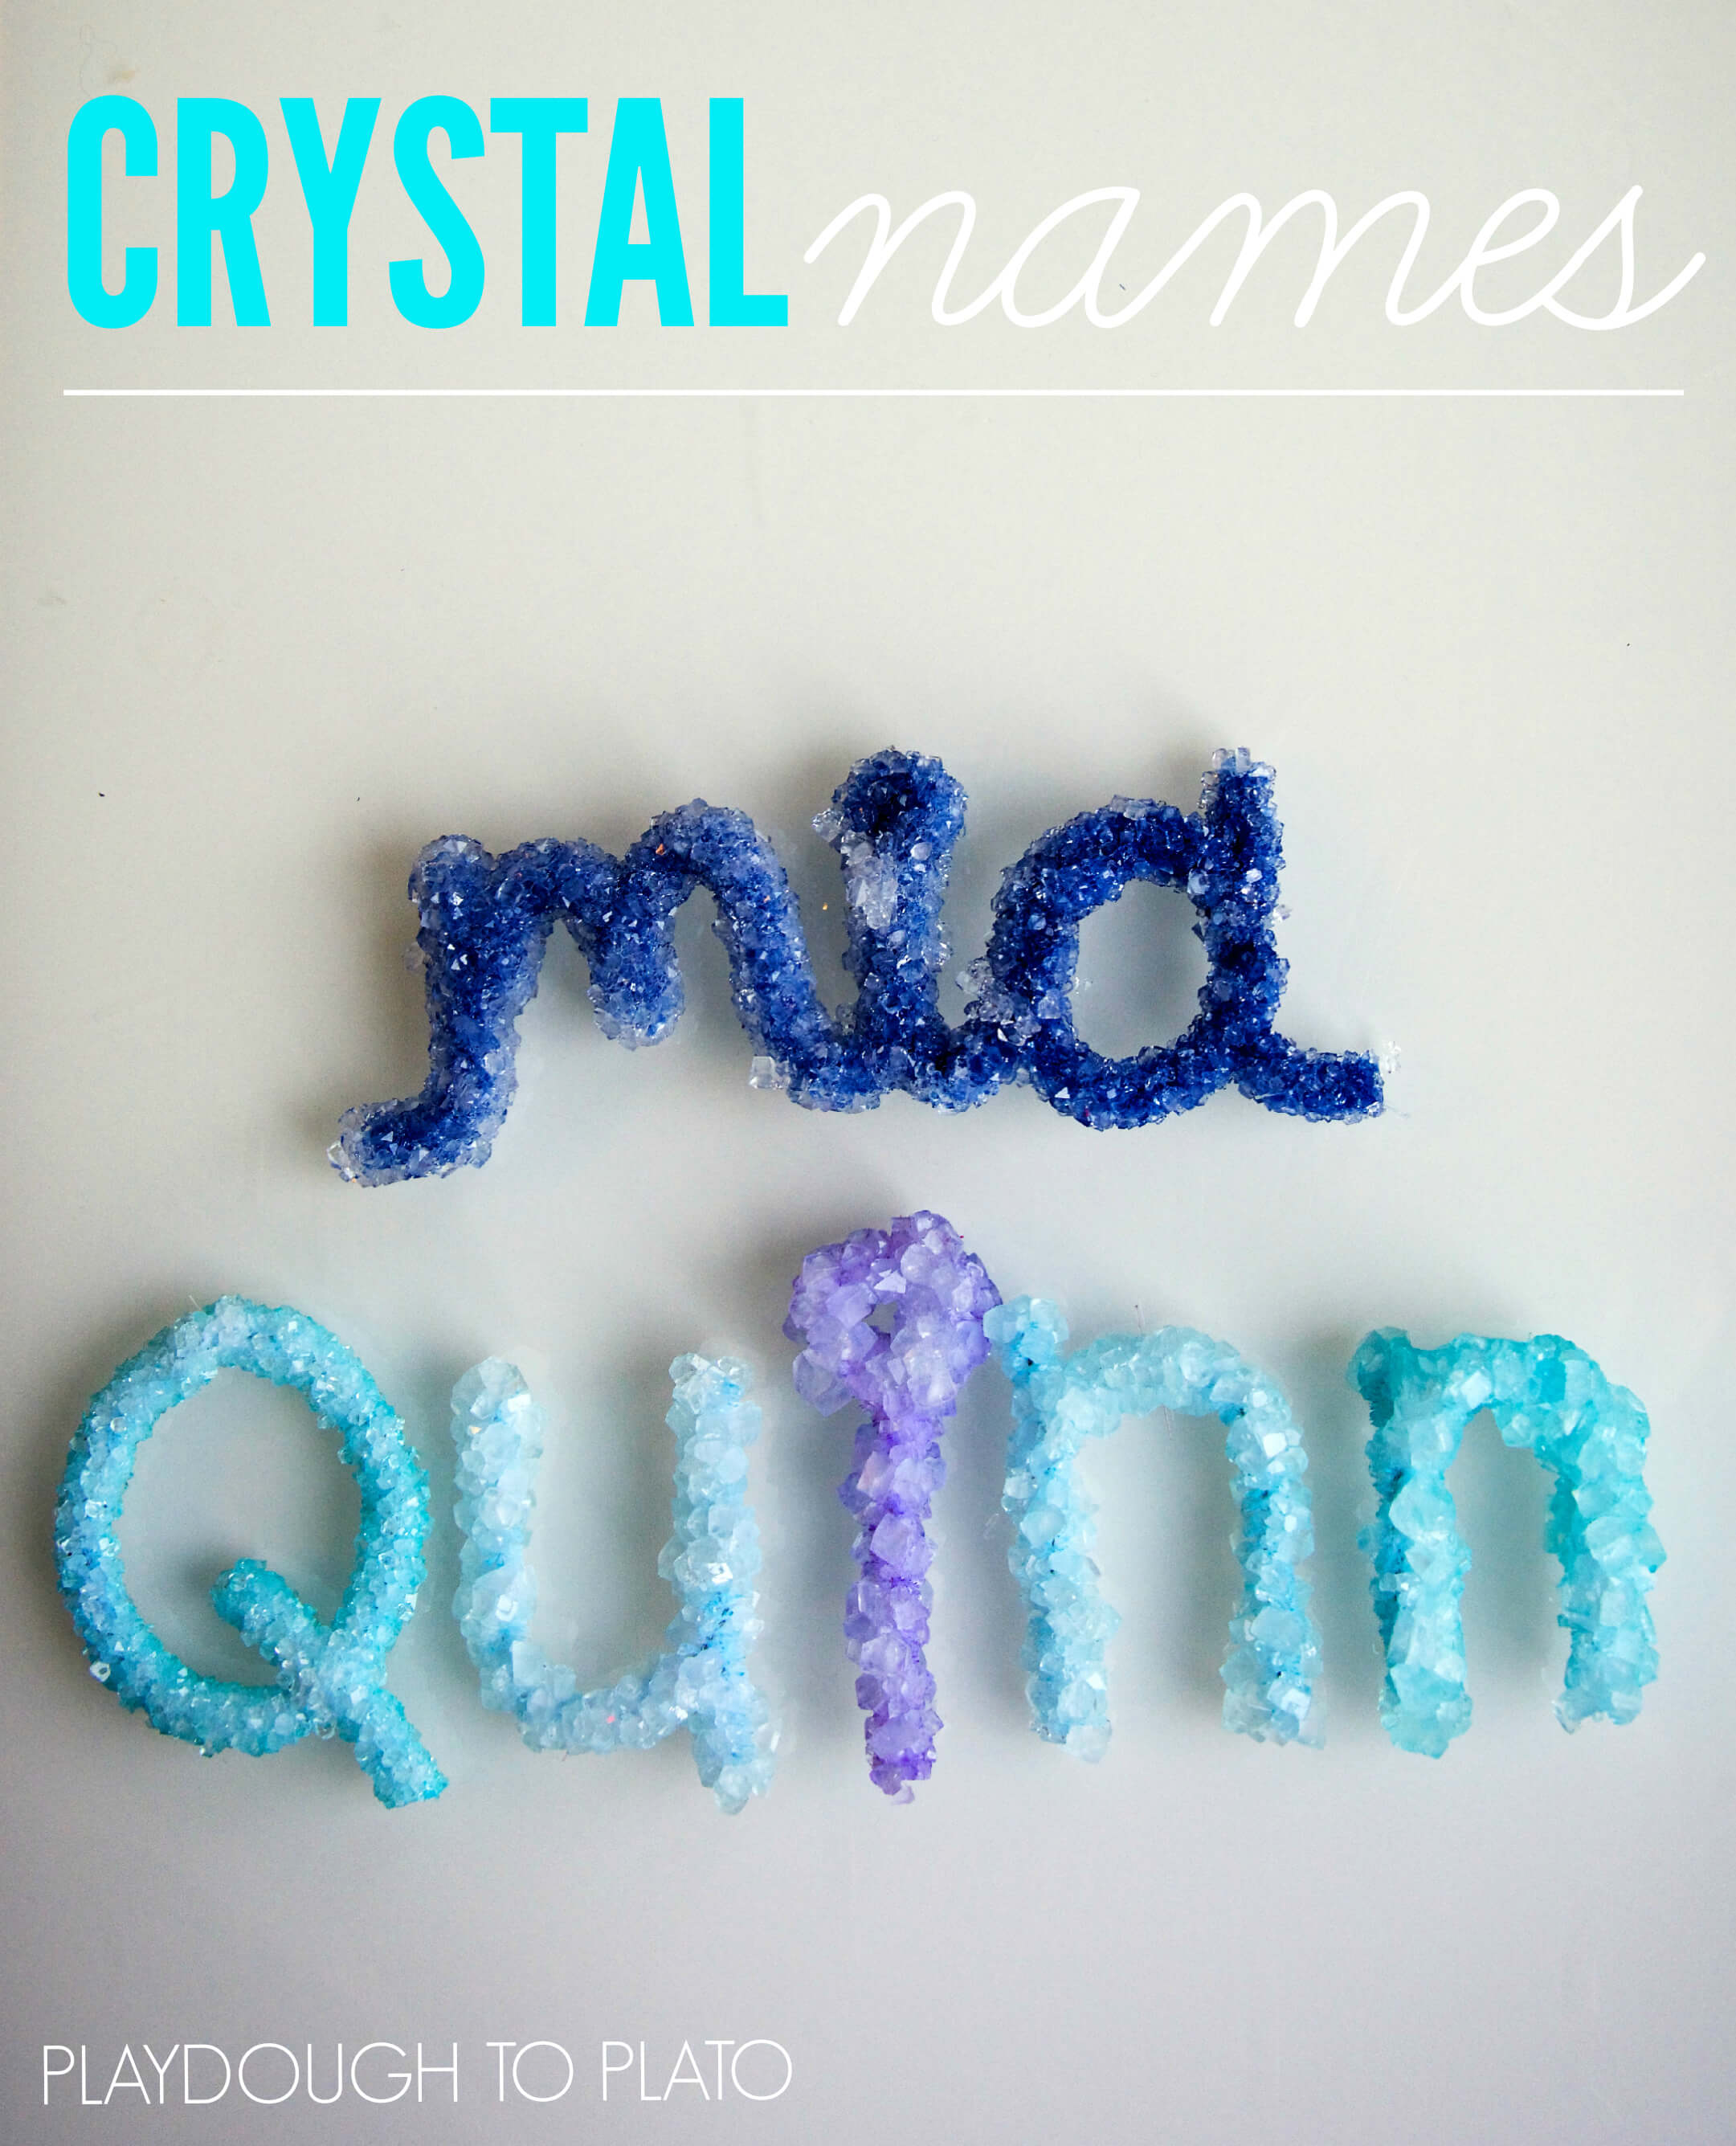
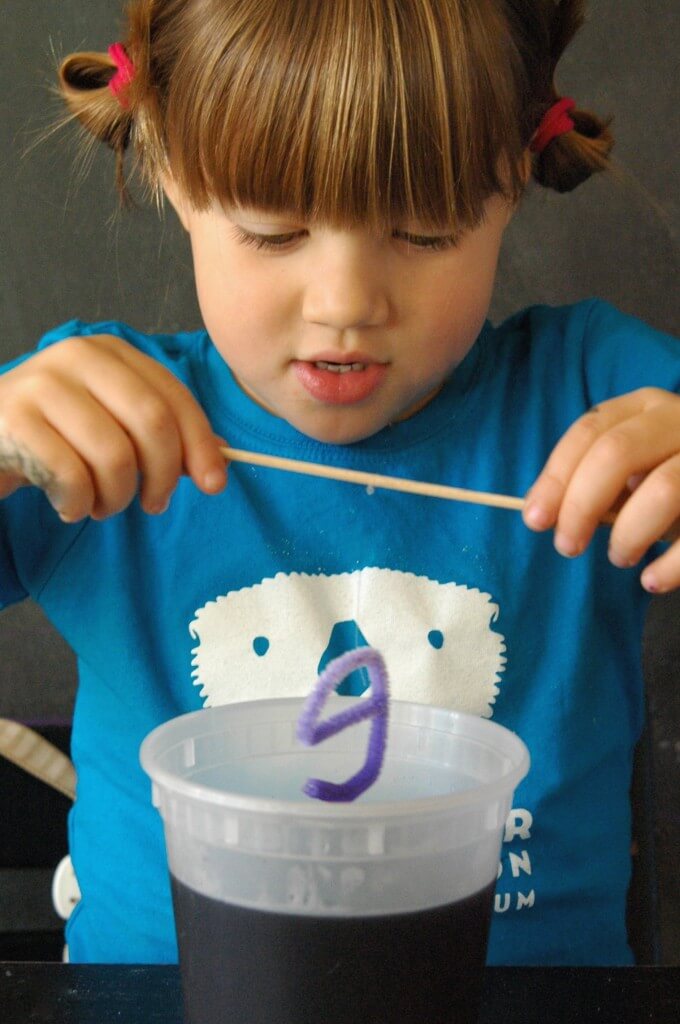
Next, she added several drops of food coloring to every container and carefully lowered each letter into the color of choice.
Waiting for the Crystals
Next came the hardest part of the kids’ science experiment – waiting!
I put the containers on a shelf and let them sit overnight where they wouldn’t be disturbed by curious hands.
After a couple hours, we saw some changes – mostly crystals forming on the sides of the container and also settling onto the bottom.
It was difficult to see what was happening to the pipe cleaners through the dark food coloring solution.
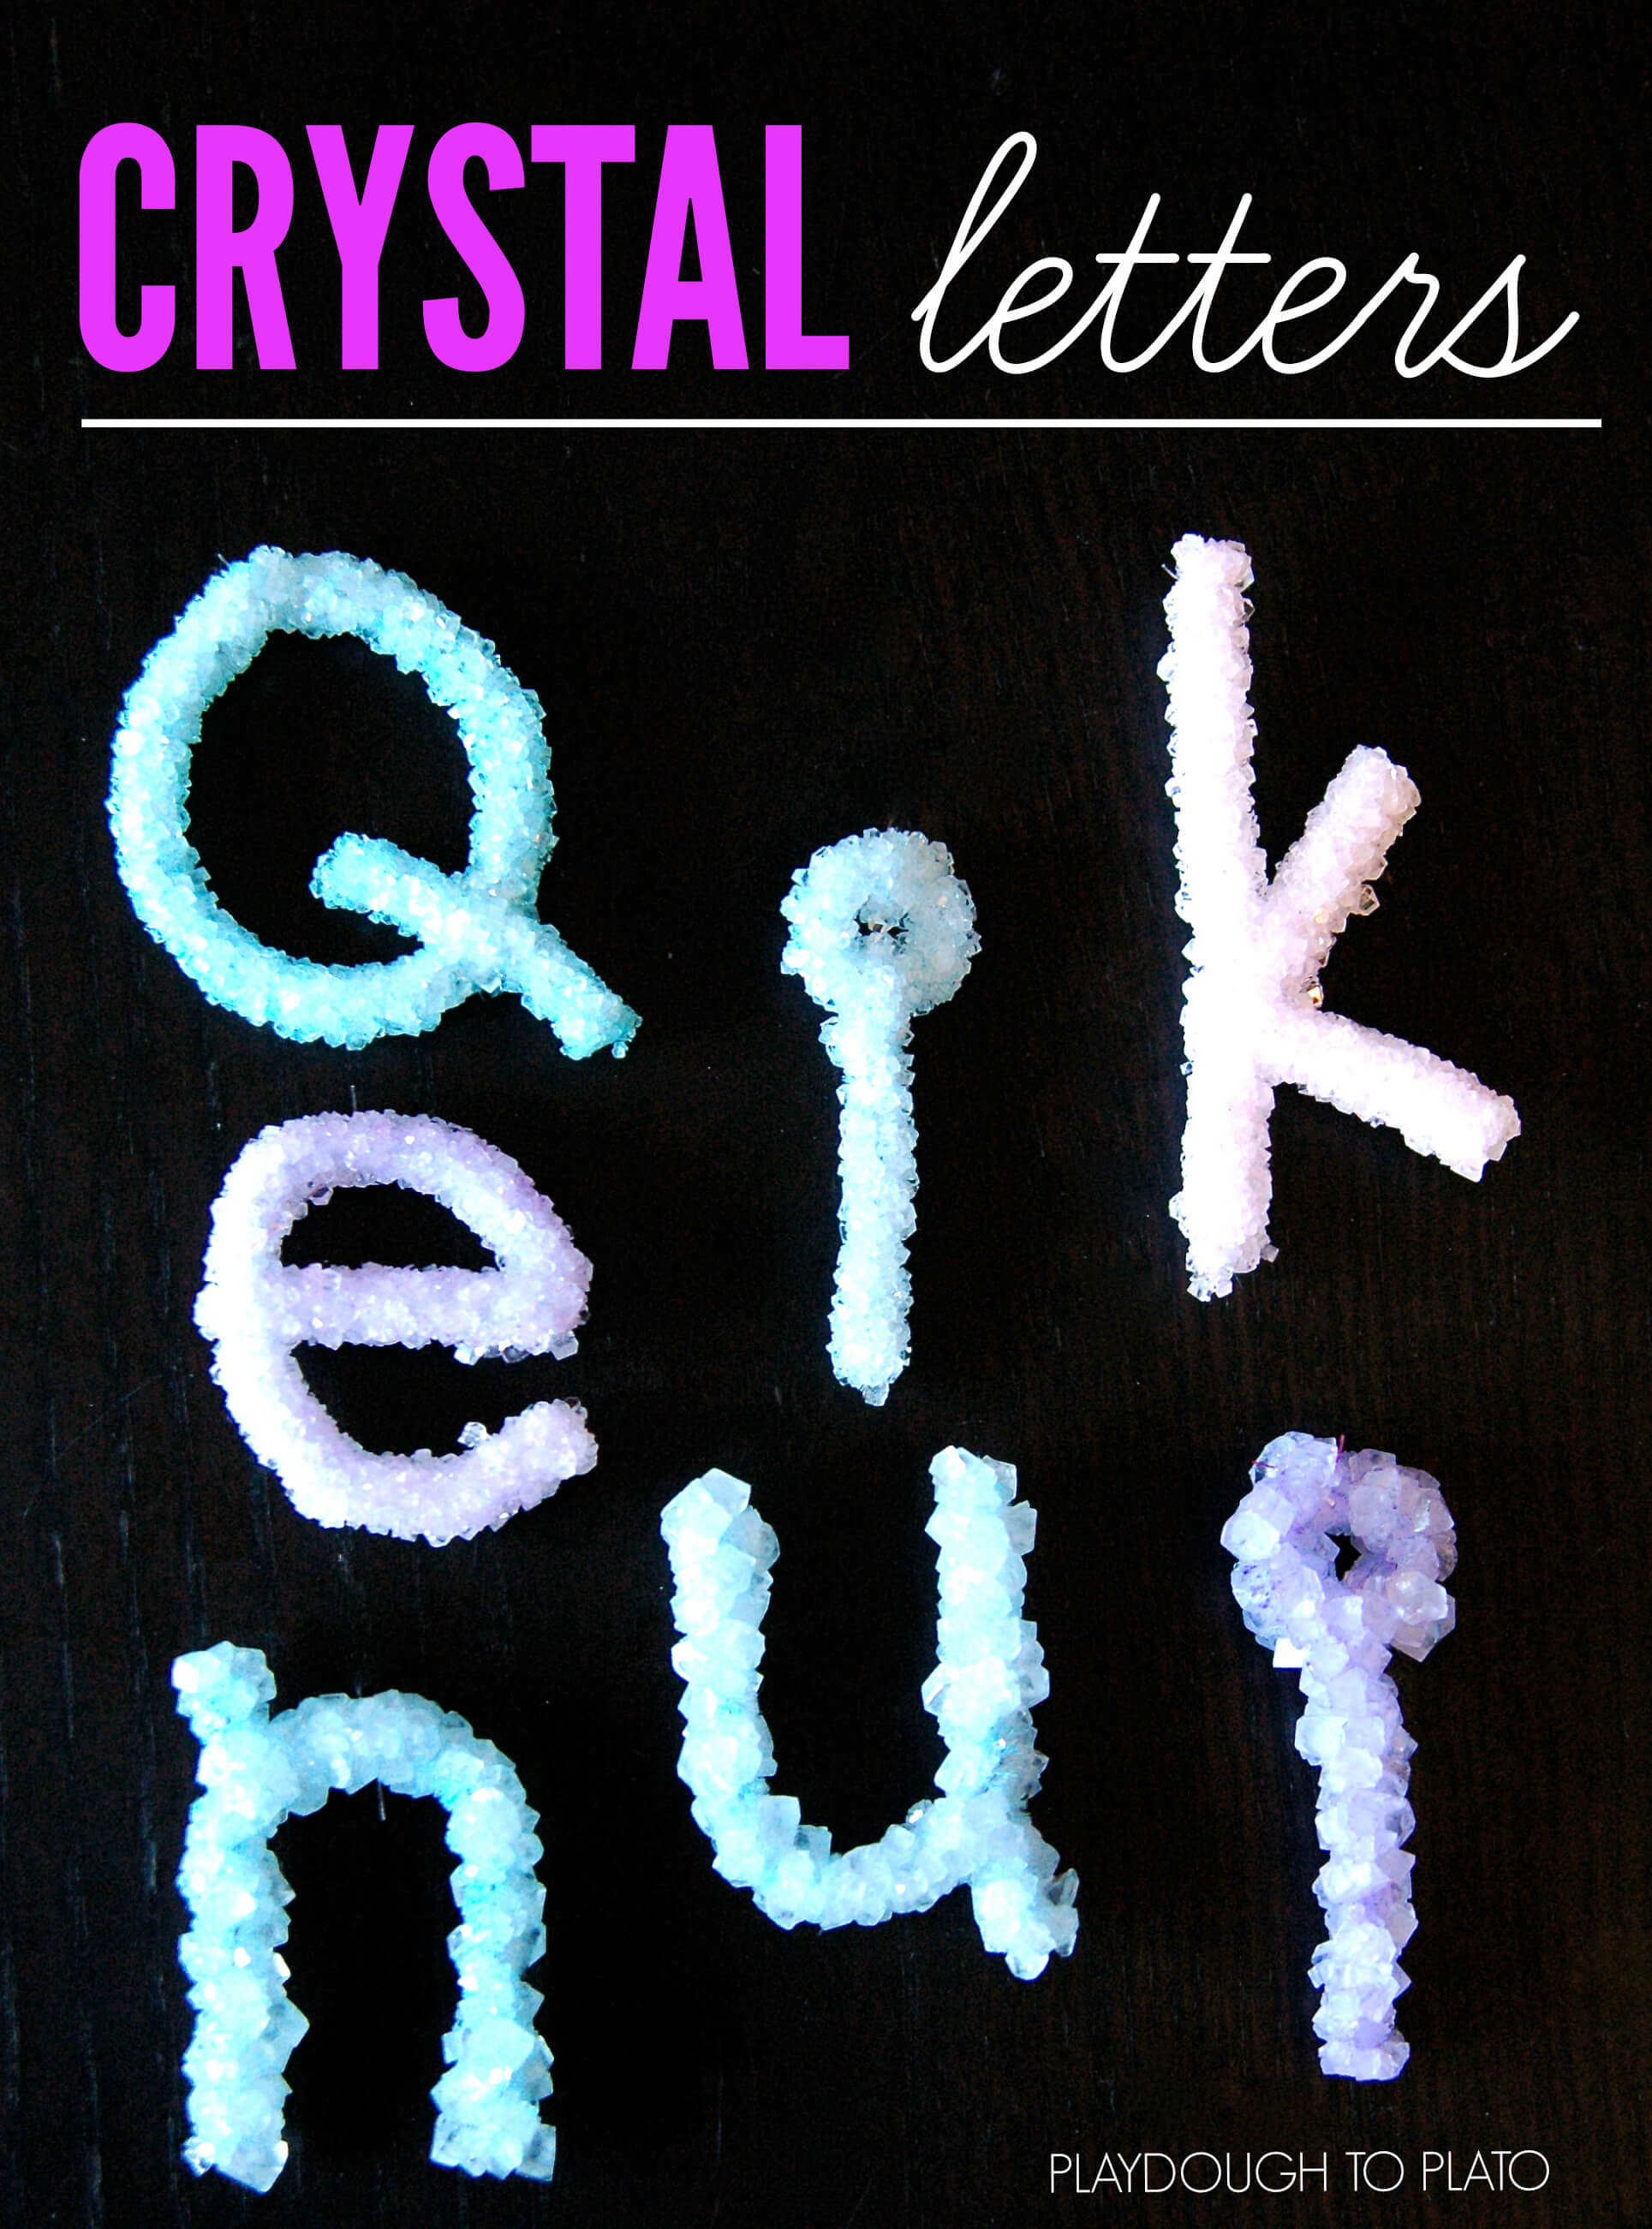
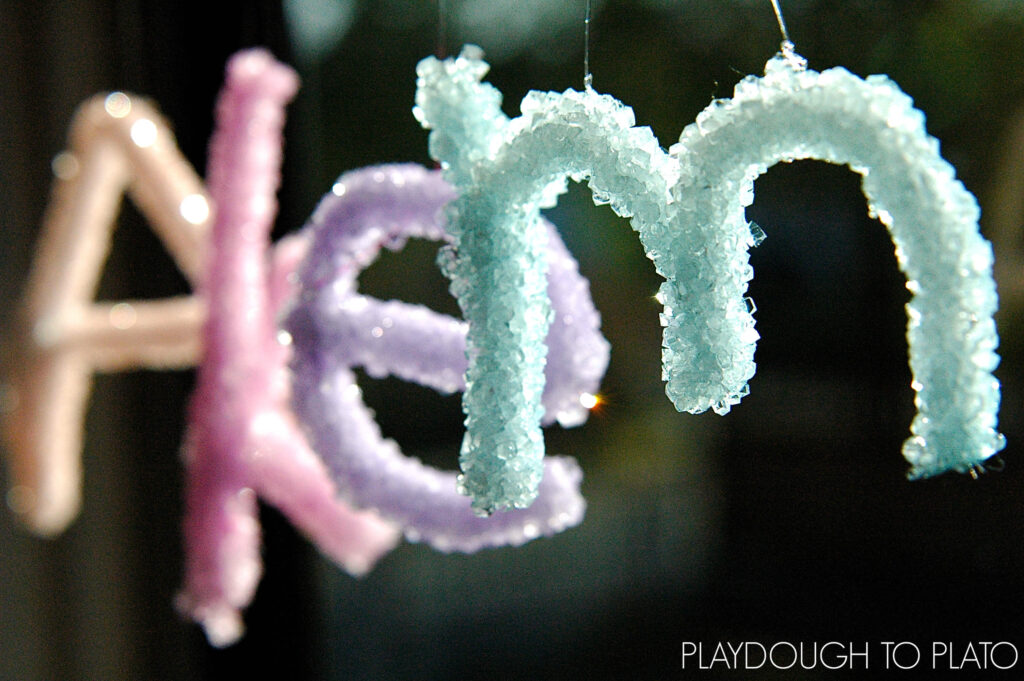
A and her little brother Q couldn’t wait to see how each of their names turned out and spent nearly an hour touching, arranging, and holding their letters up to the windows to see the crystals sparkle.
Once they were finished exploring their glistening letters, I carefully taped each child’s name up in a sunny window so they could be admired in all their sparkling glory. This kids’ science experiment was fun because it was so personal!
The Science Behind It
When borax is dissolved in water a suspension is created. A suspension is a mixture that has solid particles (the borax) that are large enough for sedimentation (settling out).
As the borax begins to settle, it starts to crystalize on all the surfaces it comes in contact with – including the pipe cleaner letters.
As the borax continues to settle out, it builds crystals on top of other borax crystals creating a thick layer.
More Kids’ Science Experiments
Inspire kids to LOVE science with 30 more jaw-dropping experiments they’ll beg to repeat!
Grab the mega pack of easy-to-follow science experiments kids will beg to repeat (plus a no prep science journal to keep track of their results!) in our shop!

This is so clever! I really want to try this with my kiddos! Thanks 🙂
i love this website it is going to become my science expirement thank you very much cant wait to show my parents teacher and classmates
i got all the suplies question though do i leave it for a couple of hours or do i leave it for a week or overight please reply today my science pro is next thursdy
You leave it over night in a spot where it won’t get bonked. Have fun!
thank you very much ill get started right away
Now this is quite something!! I’m going to have to try it with my boys. They will love it, Did you help bend the letters or just allow the children to create their names?
I let my 5 year old bend her own letters and she was able to do it pretty easily. I pretty much bent them for my 2.5 year old and let him copy me with some spare pipe cleaners. I hope you enjoy this activity, we are obsessed with borax crystals in any form at our house!
im done doing everything exept for waiting man i cant wait
I helped my 2.5 year old form the letters but my 5 year old could do it herself. I did make sure she had twisted the like cleaners well on letter like “A” and “K” that had joining parts.
do i put the borax in first or water
It doesn’t matter which goes in first as long as the borax dissolves.
Going to do this with my kids
Awesome, Tonya! I hope they love it too.
I highly think that the ingredient list is highly absurd. i recommend going on a diet.
Hi! I look forward to doing this with the kids at work. Just a quick question, if the kids make one letter at a time, since they will not be able to do cursive letters just yet, can you put more than one letter in the jar together? Thanks.
Hi Gracie,
You can put as many letters in as will fit as long as they do not touch each other. Anything that touches will be joined together with crystals. I tried both ways and found doing each letter separately to be easier. Also be careful the letters don’t touch the bottom of the container or they will get stuck. You can get them off but some crystals break off too. Have fun!
Hello! I love this idea!!
I’m planning on doing this with a large group of kids (25+) and I was wondering if I could hang the letters in a box instead of a jar (so I could recycle my boxes and save money on the jars ^^). Is there a special reason of doing it in a jar? Thank you so much for the great idea!
Oops! I didn’t realize I had to keep it in the same container that has the liquid. I thought I had to keep it in an empty one 🙂
how long will these last/ I was thinking about making some for my daughters dorm room.
As long as they don’t get wet I think they will last for years. We still have ours hanging up and it’s been almost a year. If you dye your solution to make the letters colored the colors will fade, especially if exposed to sunlight. I would recommend using colored pipe cleaners to make the colors last. I hope you enjoy this activity, it’s pretty addicting!
This is a amazing idea … thank you for posting. I’ve never seen anything like this. I am getting started now and these will be my Christmas gifts for my family and friends …. and I have a very large family and extended family.
What a wonderful Christmas gift, Lil!! We’re thrilled that you love the crystal name science activity too. 🙂
I saw a pintrest post for the alum egg crystal geodes. Do you still have that available?
Thanks